{Spencer Makes} Salted Chunky Chocolate Cookie

salted chunky chocolate cookie

Nothing beats the smell of freshly baked cookies. NOTHING. When the mr kindly requested for me to make these salted chunky chocolate cookies, I couldn’t say no. haha

The first time I made these were for the Biggest Morning Tea last year and everyone loved it! So I decided to try making it with Spencer (my Thermomix) today, and it was so easy and quick!

13895134_895993767213158_2941545152233463400_n1

These are like chocolate chip cookies, but BETTER! Imagine biting into big chunks of semi melted chocolate chunks and each bite had a hit of salt! There’s just something about sweets with a touch of savoury that I love.

13892224_895993793879822_1240977147308032361_n1

So if you are like me and love a little savoury in your sweets, definitely give this cookie a god! It’s crunchy on the outside and chewy in the middle. SO ADDICTIVE! Can’t stop at one!

Salted Chunky Chocolate Cookie (adapted from Smitten Kitchen)

Makes 20-24 cookies

Ingredients :

113g unsalted butter, cold and cut into cubes

180g packed light brown sugar

25g raw sugar

1 egg

1 tsp vanilla bean paste

3/4 tsp  baking soda

1/2 tsp baking powder

1/4 tsp sea salt

22og plain flour

220g dark chocolate, cut into chunks

Fluer de Sel, to finish (or flaky sea salt)

13873155_895993740546494_2996270339589433075_n1

Steps :

1) Preheat the oven to 180 degrees C. Line two baking trays with baking paper and set aside.

2) Place butter, light brown sugar, raw sugar, egg and vanilla bean paste into the bowl and mix 2 mins/sp 3.

3) Add plain flour, baking soda, baking powder and sea salt and mix for 40 secs/sp 4.

13907062_895993713879830_3778816521033936200_n1

4) Add dark chocolate chunks and stir for 30 secs/ sp 2.

13891887_895993727213162_4116234321963311953_n1

5) Form dough by scooping 1 heap tablespoon and rolling the dough into a ball. Place them on the baking tray with 3cm space between each of them. Sprinkle some fluer de sel or flaky sea salt on top of the dough.

13880273_895993753879826_7034193518650481516_n1

6) Place them in the oven for 10 mins, until golden on the outside but still very gooey and soft inside. Out of the oven, let the cookies rest on baking sheet for 5 minutes before transferring a cooling rack.

13901591_895993810546487_3505350499996016882_n1

Enjoy and try to stop at one, I dare ya! hehe

Remember to always cook and bake with love! xx

Raspberry & Lemon Shortcakes

DSCF1091-1-1

Baking has always been something I love doing. Especially to bake for people I love and just being able to see the smiles on their faces after they take a bite, warms my heart. So I try to bake something whenever I have the time and especially when there are special occasions or during the festive seasons! The house always smells the best during festive seasons, right? hehe

dscf1018-1

I am always excited to try new products in the market, and when I was asked to try the new Anchor Cream range, I immediately said yes! The new Anchor Cream range is made with 100% Australian dairy (only the best across 34 dairy farms across Victoria) and have a few innovative features that would be helpful when cooking.

dscf1020-1

It comes with a screw top lid which would help with easy storage and less messy drips & leaks! Also, the side of the bottle has measurement markers  that would help you with more precise pouring and easy measurements! Less wastage as you don’t have to pour into a measuring cup and also less to wash! WIN!

There’s 3 types of creams in this range which would suit every occasion of cooking or baking – thickened cream, thickened light cream and pure cream! They come in unique size bottles, with exact one cup (250ml) or 2 cups (500ml) which would help when following a recipe, hassle free!

dscf1030-1

Walking the aisles of the supermarket, I was thinking about what I could make with these beautiful creams and found these huge, fresh and beautiful raspberries! So I decided to make some raspberry and lemon shortcakes!

dscf1074-1

This recipe uses the pure cream in the shortcake and also the whipped thickened cream sandwiched in the middle. So it was a perfect recipe in my books! Hope you will enjoy it too!

Raspberry & Lemon Shortcake (Adapted from Raspberri Cupcakes)

2 cups plain flour

1 tbs baking powder

2 tbs packed brown sugar

1/4 tsp salt

115g cold butter, cubed

3/4 cup pure cream

1 lemon

2 punnets of fresh raspberries

1/2 tbs packed brown sugar

1 tbs honey

1/2 cup thickened cream

1 tsp vanilla bean paste

Steps :

1) Preheat the oven to 210 degrees celcius. In a large bowl, add the flour, brown sugar, baking powder, salt and cold butter. Using the tip of your fingers, rub the butter into the flour mixture until a sandy mixture is achieved. Don’t worry if there are still a few lumps of butter.

dscf1041-1

2) Slowly add the pure cream into the mixture and using a spatula, mix the cream until the dry mixture is just moistened.

dscf1045-1

dscf1047-1

3) Zest the lemon. Turn out the dough onto a floured surface and add the lemon zest. Lightly knead the dough till it comes together.

4) Pat the dough till about 1 1/2cm thick and using a 6cm scone cutter, cut the dough into the 7/8 portions. Place them on a lined baking tray and bake for 10-12 minutes, or until the tops are browned.

dscf1052-1

dscf1058-1

5) Transfer them to a wired rack to cool.

I made the shortcakes two different ways. One with just the fresh raspberry as it is, and one with a tangy raspberry coolie almost. I liked both, but the coolie gave it a very refreshing touch and the tanginess made you go back for more! So try both, or either (whichever you prefer!) and would love to hear what you think about them!

dscf1068-1

6) To make the raspberry coolie : In a small pot, place 1 punnet of raspberries, brown sugar, juice of 1/2 lemon and honey. On a low heat, stir the mixture till the raspberries are about to break down. Remove from heat and sit it in a bowl of ice water (to cool it completely before platting). This could be done a day before, keeping it in a jar in the fridge.

dscf1065-1

7) In a medium bowl, place the thickened cream and vanilla bean paste and whisk till stiff.

dscf1075-1

8) To serve : Cut the shortcake into half and place the whipped vanilla cream onto the top and place the fresh raspberries or raspberry coolie, serving with the other half placed on top. Best served immediately!

Enjoy! (:

Have a great week ahead everyone! It’s the season to be jolly, so go grab yourself some of the Anchor Cream and make this for the festive season! hehe

dscf1078-1

Remember to always bake and cook with love! xx

PS: Do note that the Anchor Cream range is only exclusively available at Woolworths Nationwide!

PPS : Thank you KeepLeft PR for the opportunity to try out the Anchor Cream range. All thoughts and opinions are based on my own experience. Thank you again for this wonderfully opportunity!

Banana Cake with Oats & Chia Seeds

Banana Cake with Oats & Chia Seeds

If you’ve been reading my blog for a while now, you would know how much of a banana cake/bread fan I am. I love everything about it. I love to bake it, I love to eat it and I definitely love the smell of it. Just something about the soft, moist cake that is yummy to eat whether its hot out of the oven, or after it’s been sitting on the table for a while.

Plus, who could resist having one after it’s aroma filling the whole house? Just makes me smile thinking about it! So to this date, my favourite banana cake/bread recipe is the one with the nutella swirls. Because honestly, banana and nutella, match made in heaven! But having a toddler, I am always in search of recipes that include healthier ingredients, which would give us a more nutritious result!

So when I saw this recipe on The Domestic Goddess Wannabe, I knew I had to give it a shot and see what he thinks about it. And the result? Lochlan LOVED it! He kept coming back for me and when I gave him a piece to hold, he held on to it tightly, taking the smallest bites, so he could enjoy it for a longer time. YAY!

And I mean, I super love his chubby chub hands! hehe

This cake totally reminded me of the old school banana cakes I had when I was a kid. It was soft, moist and the flavour of the banana was the right level of intensity – STRONG. hehe Just the way I love it!

Banana Cake with Oats & Chia Seeds (Closely adapted from The Domestic Goddess Wannabe)

2 large overripe bananas, mashed

1 egg

120g unsalted butter, melted (You could use olive oil)

3/4 cup soy milk

1 tsp vanilla bean paste

1 1/2 cup plain flour

80g caster sugar

1 tsp baking powder

1 tsp baking soda

1/2 tsp salt

1/2 cup rolled oats

1/8 cup chia seeds

Steps :

1) Preheat oven to 180 degrees Celcius. Spray a mini loaves tin with olive oil spray to make sure it’s well coated.

2) In a bowl, add the mashed bananas, soy milk, the egg, vanilla bean paste and melted butter. Mix till well combined.

3) In another bowl, add the flour, baking powder, baking soda, salt, oats and chia seeds. Using a whisk, mix till the ingredients are well combined.

4) Add the wet ingredients into the dry ingredients and stir till just incorporated. Careful not to over mix, as you don’t want a tough cake!

5) Fill the mini loaves till 3/4 full and bake in the oven for 15-20 mins (checking at 15 minutes with a toothpick, if it comes out dry means it’s done!). Cool it in the tin for 5 mins before turning them out onto a cooling rack.

Enjoy as is or with a hot cup of tea/coffee (or milk for the little kiddos)!

Remember to always bake or cook with love! Have a great week ahead, xx

Toddler Eats : Sugarless Carrot Banana Mini Loaves

unnamed-2-1-1

I’ve always wanted to bake something that Lochlan can enjoy for morning tea and I came across this recipe that was perfect. No sugar, and just the natural sweetness from the wholesome ingredients of the loaves!

Enjoying the loaf

I have to admit, I was a little nervous before giving the loaf to the little munchkin, cause I wasn’t sure if he would like it. But thankfully he quite enjoyed it and ate half go the loaf! (:

Cross section

I was really happy with the texture of the loaves too! It was fluffy and light but still moist! Just the way a good loaf should be. Perfect with a cup of hot tea, or a cup of warm milk (for the bub!) Of course if you had extra time and some cream cheese sitting in your fridge, you could always whip some cream cheese frosting for yourself and indulge! hehe

So here’s the recipe for these deliciousness! Hope you and your kiddos would enjoy it as much as we did!

Sugarless Carrot Banana Mini Loaves (Closely adapted to Easy Toddler Meals)

Ingredients :

1 large carrot, finely grated

2 large bananas (or 3 medium bananas), mashed

1 egg

3 tbs coconut oil

1 tsp vanilla bean paste

1/4 cup greek yogurt

1 1/2 cups all-purpose flour

1 tsp baking powder

1/2 tsp baking soda

Steps :

1) Preheat your oven to 170 degrees celcius. Spray some coconut oil/ olive oil into the mini loaf tin, to make sure it’s well coated. Set aside.

2) In a large bowl, mix the grated carrot, mashed banana, greek yogurt, coconut oil, egg and vanilla bean paste till well combined.

3) In another bowl, mix the dry ingredients.

4) Pour the dry ingredients into the wet mixture and stir till well combined. Scoop the mixture into the prepared mini loaf tin and bake for 13-15 minutes or until a toothpick comes out clean when inserted into the middle of the loaf.

Loaves all baked and ready!

5) Allow it to cool for 10 mins in the tin, then remove.

Lochlan analysing the loaf

Enjoy it with your kiddos!

Remember to always cook and bake with love! xx

The Coconutty Baked Brownie Bites

unnamed-8-1-1

Brownie. Who doesn’t love them? If you don’t, I’m not sure we can be friends. haha Kidding! But brownie is always something I cannot resist. When I see it, I have to have it – warmed, with a scoop of vanilla ice cream. PERFECTO!

There are many different type of brownies, but the ones I love most is crispy on the outside, and fudgey in the middle, and I think I found the perfect recipe!

All baked and cut

Just seeing how the top bit cracks, puts a smile on my face! And being a tad bit OCD and one who is trying to (but failing) lose the baby weight, I decided to cut them into bite size, so that I don’t feel too guilty when having one, or two. hehe

I’m in a coconutty phase, so I decided to add some fine desiccated coconut through the batter before baking and the flavour wasn’t too overpowering. Chocolate was still the major flavour with a tinge of coconut! Mmmm. Plus this wasn’t too sweet. Just the right level of sweetness!

So if you do like your brownie, I urge you to try this recipe, if you haven’t already heard of The Baked Brownie! My dad was here when I made these and he actually said, “How come the brownie from outside doesn’t taste like that?” haha That was one big compliment for me! hehe

The Coconutty Baked Brownie with Vanilla Ice Cream

Coconutty Baked Brownie Bites (Adapted from Pretty Simple Sweet)

 155g plain flour

1 tsp salt

2 tbs desiccated coconut

2 tbs cocoa powder

310g dark chocolate, cut into smaller pieces

230g unsalted butter

1 tsp instant espresso powder

100g caster sugar

100g packed light brown sugar

1 tsp vanilla bean paste

5 eggs, room temperature

Steps :

1) Preheat oven to 180 degrees celcius. Line the baking tin (I used a 9×13 inch rectangular baking tray) with baking paper, leaving some extra hanging off the sides for easy removal of the brownie.

2) In a medium bowl, mix the plain flour, salt, cocoa powder and desiccated coconut together. Set it aside.

3) Put the chocolate, butter, and instant espresso powder in a large bowl and set it over a small pot of simmering water, stirring occasionally, until the chocolate and butter are completely melted and smooth. Turn off the heat, but keep the bowl over the water and add the sugars. Whisk until completely combined, then remove the bowl from the pan. Allow the mixture to cool till room temperature.

4) Add 3 eggs to the chocolate mixture and whisk until combined. Add the remaining 2 eggs and whisk just until combined. Add the vanilla bean paste and stir until combined. Don’t overmix at this stage or your brownies will be cakey.

5) Add the flour mixture to the chocolate mixture and fold until just a bit of the flour mixture is visible.

6) Pour the batter into the prepared pan and smooth the top. Bake in the center of the oven for 30 minutes, rotating the pan halfway through the baking time, until a toothpick inserted into the center of the brownies comes out with a few moist crumbs sticking to it. Let the brownies cool completely, then lift them out of the pan using the parchment paper.

Baked and ready to be cut

Cut into bite sized squares

7) Cut them into bite sized squares and serve them warm with a scoop of ice cream!

Hope you all had a great weekend! Make these and have them today so that you can chase away any Monday blues and have a fantastic week ahead!

Remember to always cook and bake with love! Till the next post, xx.

PS: There will be a give-away in the next post, so stay tuned! (:

Japanese Sponge Strawberry Swissroll

Japanese sponge strawberry swissroll

Good morning dear readers! Firstly I would like to apologise for the long hiatus. It’s been an exciting and eventful coupe of months as we warmly welcome the newest addition to our Ho family (: That’s right! Lochlan Ho was born on the 8th of August and he has been an absolutely blessing and gem to every one around him!

10678647_10152244040387757_6479934814849348223_n-1

Having this precious boy in our lives is the best thing that has happened to us (: We can’t love him enough!

But I’m slowly coming back with posts from months back and I hope you can be patient with me as I try and get my routine back in place. Thank you all so much for your constant support, even though I haven’t been posting! It’s very encouraging and makes me wanna get back to it as soon as possible!

Japanese sponge strawberry swissroll

 So to celebrate my return, I decided to share one of my favourite recipes that I’ve baked a few times before bubba arrived! One that was shared by my cousin-in-law and enjoyed by everyone!

I have an obsession with swissrolls and just love making them! Of course, needless to say, I love to eat them too! hehe To date, I’ve made a matcha swissroll with azuki cream, chocolate with cream and fresh raspberries and this has to be my favourite, japanese sponge with fresh strawberries! A light and fluffy sponge that is not too sweet, paired perfectly with fresh strawberries and freshly whipped vanilla bean cream! NOMS! So if you’re a fan of swissrolls, do give this recipe a shot! I’m very sure you will enjoy it as much as I did!

Japanese Sponge Strawberry Swissroll 

3 egg yolks

35g castor sugar

50ml water, room temperature

40ml olive oil

80g cake flour

3 egg whites

30g castor sugar

1 tsp corn flour

200ml whipping cream

1 tsp vanilla bean paste

2 tbs icing sugar

8-10 fresh strawberries, cut into small cubes

fresh strawberries

Steps : 

1) Preheat oven to 160 degrees Celcius. Line the bottom of a 27×27 baking tray with greaseproof paper. Do not line the sides.

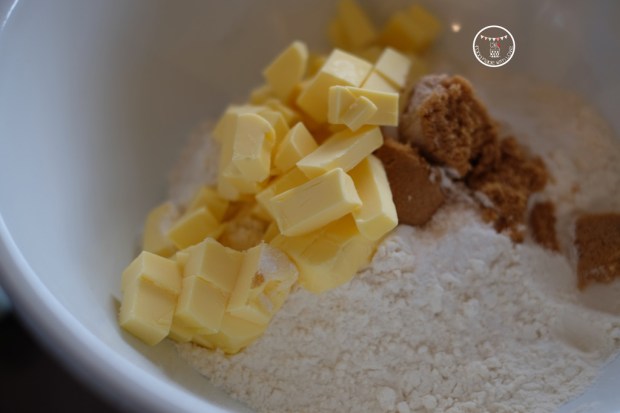
2) In a standing mixing bowl, cream the yolks and 35g of sugar until pale. Combine the water and olive oil into a cup and pour into the yolk mixture. Sift the cake flour into the mixture and continue mixing till combined. Set aside.

3) In another clean mixing bowl, whisk egg whites till foamy and add 30g sugar. Add corn flour and continue whisking till firm peaks form.

Stiff peaks

4) Add the whisked egg whites into the yolk batter in 3 portions. Spread the batter into the baking tray. Bake the cake for 14 minutes, turning the cake at the half way mark to ensure even baking.

Combining the egg whites with the egg yolks

 5) Take the cake out of the oven and drop it a few times to reduce the shrinkage. Remove the cake for the baking tray and place it on a flat surface. Cover it with another baking tray to make sure it doesn’t dry out. Allow it to cool completely before filling it.

Japanese sponge cake - baked

6) Whip the cream till stiff peaks form and add the vanilla bean paste. Gently stir the vanilla bean paste till well combined.

7) Release the edges of the baking paper of the cake. Cover the cake with another sheet of baking paper, and flip it over. Slowy and gently remove the baking paper from the bottom of the cake. Place the paper on the bottom again and flip it back, in the upright position. Using a serrated knife, cute of the short edge furthest away from you with a diagonal cut.

8) Place the whipped vanilla bean cream onto the cake and using a spatula spread it out evenly, having a slightly thicker amount on the side closer to you. Add the strawberries evenly onto the cream. Fold the edge of the cake, pushing the paper forward, rolling the cake. Once rolled, wrap the cake with the clean sheet of baking paper, making sure it’s tightly wrapped. Cover with a plastic wrap and allow it to cool in the fridge.

9) To serve, unwrap the cake and place it on a long plate. Sift some icing sugar on top of the cake and slice it to the thickness of your liking. ENJOY!

 japanese sponge strawberry swissroll

Japanese Layered Sponge with Fresh Fruits

If you want to make a layered sponge cake instead of a swissroll, after releasing the cake from the tray, cut it into three even pieces, and layer the first two layers with freshly whipped vanilla bean cream and fresh fruits of your choice! To be honest, I did this only because my sponge kinda broke when I tried to roll it. haha So don’t stress if that happens!

Layered japanese sponge cake

I used fresh strawberries and blueberries! The only thing about the strawberries is that you gotta cut it into similar sizes so the cake will be flat enough for the next layer!

Strawberry layer

How pretty is the colour of the strawberries in contrast with the sponge? I love it! hehe So do give this recipe a try! It’s seriously one of my favourite recipes and a crowd pleaser!

PS : Thanks Liyun for sharing the recipe with me and giving me tips! (:

Remember to always cook and bake with love! Till the next post, xx

Cocoa, Coffee & Walnut Swirl Cake

photo 1-2-1-1

I’m in a butter cake phase. I just can’t get enough of it. I think it might be a pregnancy craving. hehe But then, it isn’t a bad craving to have, is it? What could be better than soft and buttery cake? Absolutely nothing! Especially with a hot cuppa – perfect afternoon tea!

Nespresso SG Fortissio Lungo

I was lucky enough to be sent a tube of the new Nespresso flavour – Fortissio Lungo. It’s the first in the Lungo range with a strong intensity (8) and has a richer taste with fuller body. With notes of cereal, the beans are from Central-South America combined with the precious full Arabica Monsoon Malabar from India. I really wanted to make something with this new flavour, and all I can think of is in a form of a butter cake!

Cocoa, coffee & walnut swirl cake

And I love swirls in my cake! hehe It’s fun making them and also so pretty before and after being baked! So I decided a swirled butter came with cocoa, coffee and walnut! Mmmm (:

Cocoa, Coffee & Walnut Swirl Cake

250g self-raising flour, sifted

250g butter, room temperature

100g caster sugar

1 tsp vanilla bean paste

3-4 tsp espresso, cooled to room temperature (I used the Fortissio Lungo)

5 whole eggs, room temperature

1 tbs cocoa powder

140g walnut, roughly chopped and toasted

Ingredients

Steps :

1) Preheat oven to 170 degrees celcius. Butter and line the base of a square baking tin and set aside.

2) In a standing mixing bowl, add the butter and sugar, cream till light and fluffy. Add the vanilla bean paste then add the eggs, one at a time, and beat till well combined.

3) Add the espresso and slowly add the flour and chopped walnuts. Mix till all the flour is well combined, but careful not to over mix it.

4) Take half the mixture and place in a bowl. Sift in the cocoa powder in and mix till well combined.

5) Alternately place the coffee mixture and the cocoa mixture into the baking tin.

Cocoa, coffee and walnut mixture

6) Using a knife, run through the mixture from left to right, then do the same after turning it 90 degrees clockwise. You should get beautiful swirls!

Swirled cake

7) Bake the cake for 40-45 minutes, or until a skewer comes out clean after being inserted to the middle of the cake. Allow the cake to cool in the pan for 10 minutes before inverting onto a cooling rack. Make sure the cake is totally cooled before cutting, or it will crumble!

Cocoa, coffee and walnut swirled cake

This was a big hit in my family and the addition of the walnut made it yummier in my opinion! hehe (: Have a go and let me know what you think!

Remember to always cook and bake with love. Till the next post, xx

Zebra Cake

photo 2-1-1

Home. I am back in the comfort of my home in Singapore getting ready for the arrival of our little bub, Baby Ho! (: But regardless of which island I’m on, I still always have the itch to bake! Lucky for me, I’m still able to do what I love with the big bump in front of me hehe

SCS Baker's Starter Kit

Also I was fortunately enough to be sent a baker’s starter kit from SCS Butter which was filled with boing essentials that I could use! So off I went to get some SCS butter from the local supermarket and planned what I wanted to make.

Zebra cake

I’ve been wanting to bake a zebra cake for ages, but never got down to making it. Since it’s a butter cake, I thought this would be a perfect time to try it! hehe I was a little nervous as you won’t know how to will actually turn out till you cut it open, almost like a surprise cake! haha So you would be able to see the relieve on my face when I got the first slice out of the bundt! Even though there aren’t as many stripes as I hoped for, I was glad there were at least some! hehe

I absolutely love the texture of the cake baked in a bundt tin – it had a nice crunchy crumb on the outside, soft and fluffy on the inside, not to mention how buttery it was! And to resemble more of the black stripes, I found extra dark chocolate cocoa which turned out almost black!

Extra dark cocoa powder

I actually got quite a shock seeing how dark it was, but it worked out well! hehe

So here’s the recipe and how I made the zebra stripes!

Zebra Cake (adapted from Ambrosia)

340g unsalted butter (I used SCS butter)

453g cake flour

200g caster sugar

4 eggs

1 tsp vanilla bean paste

1/2 tsp salt

1 cup buttermilk

1/2 cup dark cocoa powder

6 tbs water

Steps :

1) Preheat oven to 170 degrees Celcius. Butter/Oil and flour a bundt baking tray well.

2) In a standing mixing bowl, cream the butter and sugar until it’s light and fluffy. Add the eggs one at a time, making sure that each addition is well combined into the mixture. Scrape the sides and the bottom of the mixing bowl when needed.

Adding buttermilk & flour

3) Add the salt and vanillin bean paste and beat for another 30 seconds or so. On low speed, alternate the cake flour and buttermilk until both are very well incorporated. Make sure you start and end with the cake flour. Beat until the mixture is smooth, but careful not to over mix the batter.

Mixing the batter to the cocoa

4) In a medium size bowl, mix the cocoa powder and water. Make sure there’s no lumps. Add 1 generous cup of the cake batter into the bowl and mix till well combined.

Getting ready to make the zebra cake

5) To make the zebra effect, add two heaps spoonful of vanilla batter in the bundt pan, then 1 heap spoonful of the chocolate batter. Continue to alternate the vanilla and chocolate batters until all the batters are used up and the bundt pan is filled. Tap the bundt pan to help in spreading the batters and be more equally distributed.

Steps to making the zebra patterns

Cake ready to be baked!

6) Bake the cake in the middle rack of your oven for 45-50 minutes. The crust will be golden brown and the cake should spring back when lightly touched. To check if the cake is done, stick a toothpick into the cake and it should come out clean. Allow the cake to cool for 10 mins in the bundt pan, then invert it out into a cooling rack. Allow it to cool completely.

Zebra cake

You can dust it with icing sugar, I wish I did, but I ran out of it! ENJOY!

Remember to always cook and bake with love! Thanks SCS for the starter kit once again! Till the next post, xx

Salted Caramel Creme Brûlée

photo 4-1-1

Whenever I’m deciding what to cook or bake, my inspiration always comes from my loved ones and what they like to have, or what their favourite cuisine or flavours are. Of late, I have to admit that I cook according to what Baby Ho (& I) crave for and thankfully the Mr and sister-in-law are really easy and wouldn’t mind having what I’m craving for! PHEW! So so blessed! But last week, I decided to make something inspired by what the Mr loves and with a twist, using his favourite dessert & flavour – creme brûlée & salted caramel!

salted caramel creme brûlée

I have to say I was really nervous making creme brûlée again, cause the last time I made was a long time ago and usually they kinda curdle a little, and never comes out as smooth as I wish they would. But I decided to give it another go, and waited with my fingers and toes crossed while they were baking in the oven! hehe

I couldn’t be happier with how it turned out! Smooth, luscious and with a good kick of the salt! Not overly sweet too! The Mr was all smiles and because I didn’t wanna have too much sugar, he had his and half of mine! hehe Of cos, the best bit was so hear the crack of the burnt sugar on the top!

So here’s the recipe and I hope you all enjoy it as much as we did!

Salted Caramel Creme Brûlée

600ml thickened cream

6 egg yolks

1 egg

1 vanilla pod

120g caster sugar, plus extra for the brûlée

1 tsp fleur de sel (or sea salt if that’s what you have)

Steps :

1) Preheat over to 115 degrees celcius.

2) In a small pot, pour the thickened cream in. Split the vanilla pod into half, lengthwise, and scrape the vanilla bean into the cream. Throw the pod into the pot as well and bring it to a slow boil. Allow the mixture to simmer for 10 minutes so that the vanilla pod and beans would infuse into the cream.

3) In another pot, heat the sugar on medium-high heat, swirling it to incorporate the rest of the sugar. Watch closely so that the caramel doesn’t burn. Once the caramel is a beautiful amber colour, take it off the heat and pour the cream into the pot. Do be very careful as the mixture will still bubbling! Whisk continuously to make sure the caramel and cream is well combined. Add the fleur de sel and give it a good stir to ensure the salt combines with the caramel cream mixture.

4) In a large glass bowl, crack the egg and add the egg yolks. Whisk well and slowly pour the salted caramel cream in a slow and steady stream. Make sure it’s not added too quickly, as it will scramble the eggs. Whisk continuously as you add the caramel cream  and strain into a measuring jug.

5) Pour the mixture into small mason jars (my mixture was enough to fill the 1/2 way mark of 6 jars) and place the jars in a roasting tray.

salted caramel creme brûlée

6) Fill the tray with hot water until it reaches 1/2 of the jars and slowly place it into the oven. Bake the creme brûlée for 45 minutes or until it’s just set but still wobbly in the middle. Take the jars out of the water bath and allow them to cool completely before placing them in the fridge for at least 3 hours or overnight.

7) To serve, sprinkle some caster sugar on top of the creme brûlée and using a blow torch, burn the sugar till it caramelises and is a dark brown colour.

salted caramel creme brûlée

ENJOY!

Have a great night everyone and remember to always cook and bake with love! xx

Baby Ho’s Gender Reveal

photo 2-2-1-1

It’s time! I’ve been waiting all week for this (: Since it was the holidays, I gave myself a little project to do which involves my two favourite things : baking and surprises!

I started going onto Pinterest looking for ideas on how to reveal my bub’s gender and there were so many I wanted to do! One of which was a piñata cake! But it wasn’t easy finding blue sweets, I had to buy packets and packets of lollies and sieve them out. haha Which wasn’t too ideal, cos I’m not huge on lollies, and they will go to waste!

Inside of the cake

So I decided to make an inside surprise cake instead! The first time I made an inside surprise cake was for my dearest mother on Mother’s Day 4 years ago and it was one of the biggest projects I’ve ever done but also the coolest! It was a hidden heart in the middle of a cake! Since it was so long ago, I thought it would be perfect for the revealing of Baby Ho’s gender! Also inspired by I Am Baker, I decided that the inside of the cake would spell the gender of our dearest bub!

Chocolate cake

I used a chocolate cake recipe for letters inside the cake, and just like making a cake pop, I made my favourite cream cheese frosting to combine them together!

Cake toppers

I also tried to look for cake toppers that would be perfect for the purpose of the cake and found heaps of printable ones! Cut them out and stuck them onto lollipop sticks! hehe I have to say, I went a little crazy with the cake toppers haha So addictive to make them!

photo-6

Then I placed the letters into a white cake batter and baked it in a loaf before frosting it with just a basic buttercream frosting! I do apologise for the messiness of the coloured frostings. I wasn’t too sure how I wanted to do it, but decided to go around piping different sized pink & blue frosting around the cake. I tried to bring out the artistic side of me. Free form. haha

Pink or blue?

To make the coloured frosting, I took two heap tablespoon of frosting and place them in separate bowls (I heap tablespoon in each bowl) and added food gel colouring to create the pink (for girl) and blue (for boy) frosting. I have to say, I love how so many people commented on Instagram that I might be having twins! hehe But nope, one heartbeat! One bub! hehe

So here comes the BIG REVEAL! Is Baby Ho a girl or a boy? *drumroll*

He's a BOY!

I am proud to announce that we are having a boy! (: Cutting through the cake to reveal the letters was really scary to be honest! I wasn’t sure if the letters would stay the way they were moulded or they would become one big mess! Thankfully, they could still be deciphered! PHEW! But yes! We are having a boy and we cannot be more excited! The mr already has plans to bring him to the gym and lift some weights! haha

We are having a boy!

Thank you everyone for the constant care, love and support through the past 23 weeks and I cannot be more blessed to be surrounded by you guys! Just slightly shorter than 3 months to go and we can’t wait to see our baby boy and hold him in our arms!

Thank you for being so patient with me this week! Remember to always bake and cook with love!

Till the next post, xx