Summer Salad In A Jar

img_1793-1-1

It’s Summer and we are in 2017! Happy New Year everyone! I hope 2016 has been good for you, but I hope even more that 2017 will be an amazing year with lots of opportunities for you to strive on, lots of love, happiness and that everyone will be in the best of health!

To start the year on the right note, I decided to change the way we eat, and steer it towards eating as healthy as possible! So when Croud Australia contacted me to send me a WW Freshbox that’s completely vegetarian by the Aussie Farmers Direct, I couldn’t say no!

fullsizerender-2-1

 It’s a box filled with fresh vegetables and beautiful produce! What’s great about each box is they come with recipes that you could follow too! How easy is that? I love the convenience!

When I saw what I had in my box ( 3 meals for 2 people, $64) a few ingredients jumped out at me and I really wanted to make a vibrant salad that we would be able to even have it on the go and with a salad “dressing” that would be exciting for the taste buds too.

img_1774-1

So I decided to make a kale & basil toasted walnut pesto and it absolutely binds all the ingredients together! The perfect dressing (and healthy too with a superfood in it!) for the salad and if you have people you’re making for that loves and needs meat (like the mr), you could easily grill some meat and pop it on as well! It’s a really versatile recipe, and you can add your favourite ingredients too!

FullSizeRender-3-1.jpg

Don’t you just love the colour? It tastes absolutely amazing too!

So here’s the recipe for the perfect Summer salad!

img_1791-1

Summer Salad in A Jar (An original Food Made With Love recipe)

For the kale & toasted walnut pesto:
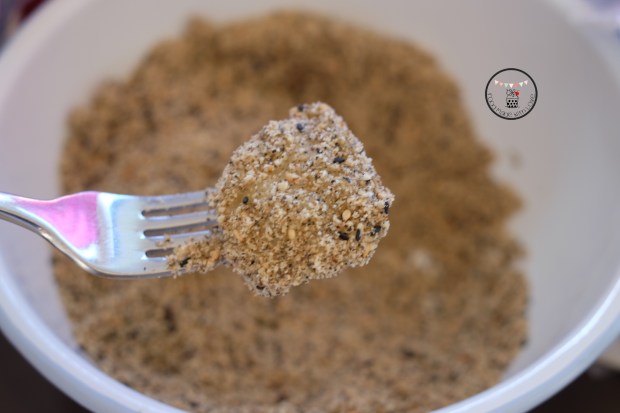
40g toasted walnut

80g kale leaves, stem removed

35g basil leaves

2 large garlic cloves

80g grated parmesan

1 tsp salt

150ml olive oil

Steps:

  1. Add the kale, basil, garlic cloves and salt in a food processor and pulse for 10 to 12 times, till you get a fine chop.
  2. With the motor running, slowly pour the olive oil into the bowl. Scrap the sides of the bowl.
  3. Add the walnuts, garlic cloves & parmesan, continue to pulse until the mixture is well combined. Set aside.

Note: I used this as a dressing for my salad, but you could use this in your pastas, or coat it with some grilled chicken!

For the salad:

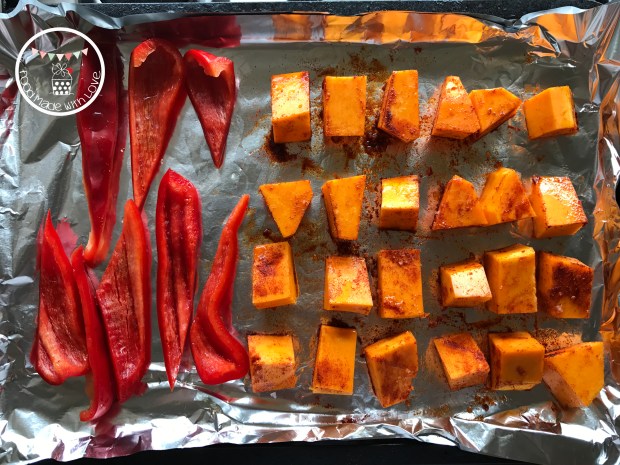
350g butternut pumpkin, cut into cubes

1 red capsicum, sliced length-wise

1 can of chickpeas, drained

1 large handful of rocket leaves

1 large handful of baby spinach leaves

30g Greek style feta, crumbled

3 tsp smoked paprika

1 tsp ground cumin

2 tsp ground coriander

1 tsp salt, and extra for seasoning

ground black pepper

2 tbs olive oil

Steps :

  1. Preheat the oven to 180 degrees Celcius. Line the baking tray with some aluminium foil, drizzle with 1 tbs of olive oil, and place the butternut pumpkin and red capsicum onto the tray. Season the butternut pumpkin with the smoked paprika and season with some salt. Bake for 20 mins or until the pumpkin is tender. Set aside to let it cool down.img_1784-1
  2. In a small nonstick pan, heat 1 tbs of oil over medium heat. Add ground coriander, cumin & salt, and cook for a minute. Remember to keep stirring, so that it doesn’t burn. Add the drained chickpeas and stir for 5 minutes or until lightly toasted and the chickpeas are well coated with the spices. Set aside.
  3. To plate : In a large jar, place the rocket and baby spinach leaves into the base. Add the butternut pumpkin and the red capsicum then sprinkle with the crumbled greek feta. Top with the spiced chickpeas and finally the kale & toasted walnut pesto.
  4. You could shake it gently to coat the contents with the pesto dressing, or if you have access to a plate, pour it out and mix it gently. Enjoy on its own or with some grilled meats!

           ENJOY!

Remember to always cook and bake with love!

xx

PS: Thank you Croud and Aussie Farmers Direct for this opportunity to try and love the Freshbox! Will be trying some of the recipes that are on the website too! Stay tuned, more recipes to come!

{Spencer Cooks} Muah Chee

img_6451-1-1

I was always someone who loved snacking. Afternoon tea times are a time of the day I look forward to as I get to sit down, have a hot cuppa and something savoury or sweet to just fill my tummy before dinner. There are lots of small snacks that is easily attainable back in Singapore. However, it is a little more difficult to find it here.

So when I chanced upon a Muah Chee recipe, I HAD TO make it! It was the perfect snack for a Sunday afternoon. Muah Chee is a snack that we usually can get from night markets or hawker stalls. Small pieces of glutinous rice balls rolled in a sugar, peanut and/ or black & white sesame mixture! Every bite satisfies both the sweet and savoury craving to be honest! Which is why I love them!

img_6452-1

I couldn’t quite believe how quick and easy it was to make this in the Thermomix. Everything was done and ready to be enjoyed in 20 mins! And I can’t really put the joys of being able to make something from scratch in the comfort of my own home in words! So I will let the pictures do the talking! hehe

img_6463-1

Little nuggets of deliciousness wrapped in a sugary peanut, white and black sesame mixture! SO SO GOOD!

Here’s the recipe for the muah chee. For those who have been craving like me, and to those who’s never tried it before. Please do give it a go! You won’t regret it!

img_6456-1

Muah Chee 

150g roasted peanut (without skin)

30g toasted white sesame

30g toasted black sesame

40g coconut sugar

120g glutinous rice flour

180g water

2 tbs olive oil

1000g water, for steaming

Steps :

In the TM bowl, add the peanuts, half the amount of white & black sesame, and sugar. Chop for 5secs/ Speed 8.

Pour the mixture into a bowl and mix the rest of the sesame seeds. Set aside.

img_6466-1

In the TM bowl, add the glutinous rice flour, water and oil and mix for 1 min/ Speed 6. You should get a smooth flour mixture.

img_6469-1img_6464-1

Pour into a shallow bowl and place the bowl into the Varoma deep tray. Place 1000g of water into the TM bowl and place the Varoma deep tray on top of the lid. Steam the mixture for 15mins/ Varoma/ Speed 3.

img_6460-1

Once steamed, use a teaspoon, scoop and cut into pieces and toss into the peanut & sesame seed mixture. Make sure the glutinous rice balls are coated well.

img_6459-1

Serve and enjoy immediately!

img_6461-1

Hope you will give this a go and let me know what you think! I am salivating just looking at the pictures! Think I will have to make it again this weekend! hehe Have an awesome weekend everyone!

Remember to always cook and bake with love!

Matcha Mania

Matcha Swiss Roll with Azuki Cream

Good evening dear readers. Sorry for the long pause again. It’s the holidays and I try and take this opportunity to spend a bit more time with the Mr and explore a little more of Melbourne. So watch this space to see what I’ve been up to in the post to come! (:

I’m not sure about you guys, but I do go through flavour phases and one of which is matcha! So much so that we even held a matcha party to celebrate the endless uses of this brilliant ingredient that is so full of antioxidant! What could be better yes? Here is a recap of the spread we had that day! Be warn, you might crave for some dessert after this!

Matchamisu

This was a beautiful bowl of matchamisu by Winston. Layers of matcha sponge with azuki beans, delicious!

Matcha panna cotta

This smooth and velvety panna cotta by Duy and Andrew with matcha shortbread! Hungry yet? hehe

Matcha Chiffon

The talented Thanh made matcha chiffon cake! (: I’ve yet to have the courage to make my first chiffon. Hopefully soon!

Matcha macarons

These my dear readers are the perfect matcha macarons by Eat Play Shop!! Look at how amazing they look? Spot on with the feet, texture and flavours! She’s definitely the macaron master! hehe STUNNING!

lemon lime macarons

I know these are not matcha, but I think it’s too pretty not to put it up! Lemon lime macarons! Mmmmm! A work of art I tell you!

Matcha cream puffs

As if 2 macarons weren’t enough work, she also made some matcha cream puffs which I was addicted to! Couldn’t stop at one!

Matcha kitkat

When I saw these, I had to remain calm and composed haha matcha kitkat by Agnes!! OMG. They were so so good!!! It’s so difficult to get hold of the commercial packed ones, I was lucky enough to try one cause Daisy gave me some and totally addicted to them! I sneaked some home too! hehe

Matcha madeleines

Talking about Daisy, the sweet queen made two matcha cakes! These are matcha madeleines and she also made matcha brownies that were so gooey in the middle and an intense matcha flavour! SO SO YUM!

Matcha brownies

Matcha opera cake

This was a hot favourite of the day, made by the ever so talented Ms Ihua, and you can see why. How pretty is this gateau??? Every layer just went perfectly with each other and the base was my favourite! Matcha-pistachio feuilletine white chocolate base, how can anyone not like that? Gorgeous!

Fruit platter by Zeboy

This is what I call edible art! The artistic Zeboy’s interpretation of a fruit salad is just amazing! Sous vide and bruleed pineapple, watermelon, smoked cream with matcha and sour plum powder! He plated it on the spot and every one just went ooh-and-aah! These two lovebirds are seriously the dynamic duo! Super talented!

Matcha swirl pound cake

Matcha swirl pound cake

I too made two matcha cakes, this is the matcha swirl pound cake which was really buttery! I actually made this as a back-up in case my matcha swiss roll didn’t work out well. hehe But I decided to bring it to the party as well, or else I would be gobbling it all up on my own and that wouldn’t be very good for my waist line! haha Share the calories I say, sharing is caring right? hehe

Matcha swiss roll

And here’s presenting my first ever swiss roll! hehe Matcha swiss roll with azuki beans cream! I have to say, I was super worried with how this would turn out cause you won’t know till you unwrap it the day after and slice it to see the inside! Although the cream wasn’t evenly spread, but I let out a sigh of relieve after I sliced it and it stayed in shape!

swiss roll with azuki bean cream

I have to admit though, I totally wrecked my first try, so I had to make it again and thankfully they turned out alright! (: So don’t ever give up ; always try and try again! It is definitely worth it! hehe

Matcha Swiss Roll with Azuki Cream (adapted from Cooking With Dog)

Ingredients :

4 Egg Whites
40g Sugar
4 Egg Yolks
40g Sugar
40g Cake Flour
1 tbsp Matcha powder
120ml Whipping Cream
120g Azuki Bean Paste with whole beans
Powdered Sugar, for garnish

Steps :

1) Preheat the oven to 170 degrees celcius. Cover a baking tray with baking paper and set aside.

Matcha powder and cake flour

Sifting the flour and matcha powder 3 times

2) Mix the cake flour and matcha powder together and sift it three times. Do not skip this step as this will ensure no air pockets, clumps and keep the cake light.

stiff peaks

3) In a clean and dry bowl, beat the egg whites until bubbles form. Slowly add half of the sugar and beat it. Add the rest of the sugar and beat until stiff peaks form.

Glossy and thick mixture

4) In a separate bowl, beat the egg yolks with the sugar until thick and creamy. Then add the sifted flour into the bowl. Using a balloon whisk, mix until the flour is completely moistened. Add 1/3 of the meringue into the bowl and beat the mixture with the whisk and drop it into the bowl. When combined, add the rest of the meringue in two steps. Mix the mixture carefully, not to break the foam. The batter will get glossy and smooth. Be patient!

Batter in the baking tray

5) Pour the batter into the prepared baking tray and using a spatula, spread the batter evenly throughout the tray and to all four corners. Bake the cake in the oven for 18 -20 mins, turning the cake after the 10 mins mark so that it is baked evenly.

6) Take the cake out of the oven and drop it a few times to reduce the shrinkage. Remove the cake for the baking tray and place it on a flat surface. Cover it with another baking tray to make sure it doesn’t dry out. Allow it to cool completely before filling it with the azuki bean cream.

7) To make the azuki bean cream : Whip the cream till stiff peaks and add the azuki cream paste. Mix it evenly to make azuki bean cream.

8) Release the edges of the baking paper of the cake. Cover the cake with another sheet of baking paper, and flip it over. Slowy and gently remove the baking paper from the bottom of the cake. Place the paper on the bottom again and flip it back, in the upright position. Using a serrated knife, cute of the short edge furthest away from you with a diagonal cut.

Azuki bean cream spread evenly onto cake

All ready to be rolled

9) Place the azuki cream onto the cake and using a spatula spread it out evenly, having a slightly thicker amount on the side closer to you. Fold the edge of the cake, pushing the paper forward, rolling the cake. Once rolled, wrap the cake with the clean sheet of baking paper, making sure it’s tightly wrapped. Cover with a plastic wrap and allow it to cool in the fridge.

Ready to be cut

10) To serve, unwrap the cake and place it on a long plate. Sift some icing sugar on top of the cake and slice it to the thickness of your liking. ENJOY!

sliced and ready to be eaten!

I know it seems a little complicated to roll it, but do click on the link above (next to the title) to watch the video and it would be much clearer after!

Remember to always cook and bake with love!  xx

Being Bold – A Recipe & Hudsons Giveaway ! {Winners Announced}

Be Bold

Good afternoon my dear readers! Happy weekend! (: Hope it’s going well and you have lots of fun and yummy things planned ahead of you! Since it’s the start of Spring, I thought it would be a good time to make some new goals!

“Freedom lies in being bold” – Robert Frost

Being bold is about making each day count (be it today, weekly or even for the year), so why not step out of your comfort zone and express your boldness to the world right? hehe The first BOLD thing I’ve decided to do is trying my hardest to make a change in my life – Being healthier and fitter ! My goal couldn’t come in a better time, as Hudsons Coffee also decided to BE BOLD with their launch of a new Barista’s  Choice Blend – A rich and intense flavour with caramel undertones. YUM!

Hudsons Coffee Barista's Choice Blend

I was lucky to receive a a pre-ground take home bag of the new blend and I couldn’t wait to try it! Ever since my brunch at Three Bags Full, I have started a liking to french press coffee! This one wasn’t overly strong on the palette and not too sharp or acidic either! Smooth and a subtle taste of caramel, which the mr loved!

Barista's choice

While enjoying my glass of coffee, I had a eureka moment! I really wanted to use it to bake! One particular ingredient came to mind – Banana! So I decided to combine the banana cake with some espresso, and to add some texture to the cake by adding a pecan streusel on top! I have made lots of banana cakes in the past, but never one with a coffee kick! This is me BEING BOLD (number 2) cause I don’t usually bake coffee cakes! So was really excited about this.

Banana Espresso Pecan Streusel Cake

While making the streusel, I couldn’t stop sneaking teaspoons of it, cause it was so addictive! The combination of pecan and oats were just delish! hehe It could easily be turned into a mixture for granola too!

close up

Although I am trying to get healthier and fitter, I still deserve the occasional treats yes? hehe So I added some dark chocolate chips in the cake to make it more indulgent! Anyway, dark chocolate is suppose to be good for you. I’m pretty sure there’s some scientific findings to back me up on this. haha

Slice of banana espresso pecan streusel cake

This cake was moist, full of flavour, and I just love having the bursts of chocolate and the crunch of the streusel top! Definitely one cake I would bake over and over again! You don’t need a very big piece to enjoy it, as it is quite rich. A small piece with a cup of tea or coffee is perfect!

Banana Espresso Pecan Streusel Cake (A Food Made With Love Original Recipe)

For the streusel :

1/2 cup + 2 tbs plain flour

1/2 cup rolled oats

1/2 cup brown sugar

1 tsp salt

85g unsalted butter

3/4 pecans, roughly chopped

Steps :

1) Mix the flour, rolled oats, brown sugar and salt in a medium bowl.

Adding the dry ingredients to make the streusel

2) Add the butter and rub with your finger tips intul the mixture holds together (my favourite thing to do actually, find it very therapeutic! haha).

3) Add the chopped pecans, mix and set aside in the fridge.

Pecan streusel topping

For the cake :

200g unsalted butter

170g castor sugar

4 eggs

1 tsp vanilla bean paste

4 tbs milk

5-6 tbs espresso (I used the Barista’s Choice Blend from Hudsons Coffee)

2 cups + 3 tbs plain flour

1 tsp bicarbonate soda

1 tsp baking powder

3-4 bananas, mashed

3/4 – 1 cup dark chocolate chips

Steps :

1) Preheat oven to 160 degrees C. Prepare a 26cm by 26cm square tin by lining the bottom and greasing the sides. Set aside.

2) In a mixing bowl, cream the butter and sugar until light and fluffy.

3) Add the eggs, one at a time, and mix until well combined. Add the vanilla bean paste and the mashed bananas. Mix till it is evenly mixed.

4) Mix the espresso and milk in a measuring cup and add it alternately with the plain flour (dry-wet-dry-wet-dry sequence). Careful not to over mix.

5) Pour the mixture into the prepared tin and tap it a few times on the bench to make the top even. Sprinkle the streusel and bake for 1 hour or until the top is golden and the toothpick comes out clean. Cover the cake with foil after 30 mins if it browns too quickly.

Ready to go into the oven

6) All it to cool in the tin for 10 minutes and remove it from the tin to rest it on the cooling rack.

all baked and cooled, ready to be sliced and enjoyed

Enjoy! (: It was my very first cake I was confident enough to bring to work and share with my colleagues, and they loved it! (: I brought it in during recess and it was gone by lunch! The feedback was that the cake was really moist and they really liked the surprise of the chocolate chips! Yippee!

So here comes the exciting bit! Tell me how you are going to BE BOLD and take that first step of making a positive change in your life! I’ve taken two, the first one will be on-going and the second one is completed, so I would love to hear your side of the story!

Hudsons Gift Package

Hudsons Coffee and Keep Left PR has been so generous to provide me with two packs of goodies to give away. Similar to what I received, each pack includes : 2 packets (50g each) of pre-ground Barista’s choice beans, 1 (12 oz) Hudsons Keep Cup and a  $10 voucher to enjoy a hot cuppa when you’re around a Hudsons store! So how do you win this awesome pack?

To enter this giveaway :

  • All you have to do is leave a comment letting me know : What kind of BOLD change(s) you want to make in your life. Remember it can be a daily, weekly or even a year long goal! Come on and let’s #BEBOLD together!
  • This giveaway is only open to Australian residents! (Sorry international readers!)
  • Follow me on Facebook, Instagram & Twitter, and let me know when you’ve done it!
  • Follow Hudsons Coffee on Facebook,  Instagram & Twitter as well!
  • Winners will be drawn on the 22nd of September 2013, Sunday at 8pm!
  • You may re-enter daily, one entry a day (Woohoo!)
  • Winners will be picked via random.org and notified on this blog post and via email.

Good luck and have a great weekend ahead! (:

Remember to always cook and bake with love!

Disclaimer : This post is sponsored by Hudsons Coffee & Keep Left PR. I tasted the Barista’s Blend coffee with compliments of both sponsors, however, the review, opinions are honest and based on my personal taste and preference. The recipe is a Food Made With Love original.

~~~~~~~~~~~~~~~~~~~~~~~~~~~~~~~~~~~~~~~~~~~~~~~~~~~~~~~~~~~~~~~~~~~~~~~~~~~~~~~~~

And the winners are…..

Iron Chef Shellie & Bonnie-Kate !! Congratulations!!!! I will be contacting you through email soon! x

Winner number 21

winner number 21 -  Comment

Winner number 18

Winner number 18 - Comment

Congrats again you two and hope you both enjoy your packages! Thank you everyone for your comments again and till the next post, x

Prawn Aglio Olio & A Wine Giveaway {Winners Announced}

Prawn aglio olio with Taylors Estate Pinot Gris

Good evening my dear readers! (: I hope that all of you had a wonderful weekend especially if you had a long one because of the Anzac Day holiday. I’ve got some exciting news to share with all of you! (: A week back, I received an email from  Taylors Wines who wanted me to do a wine giveaway on my blog. Of course, I said yes! hehe I was also so lucky to received not one, but two bottles of Pinot Gris to taste! How generous are they? Couldn’t be happier!

Pinot Gris came in the mail

Before I go into more details of the wine and the giveaway, I would like to tell me my thoughts about the Pinot Gris! Pinot Gris has always been one of my favourite type of wine. hehe I had a glass before bed one night, and really love how clean and crisp it tasted with tones of pear and apple. I knew instantly what would pair with it perfectly – seafood. My dearest husband read my mind, and made an amazing prawn aglio olio with pan seared scallops for dinner the following night!

Prawn aglio olio with seared scallops paired with a glass of pinot gris

He even used some of the wine in the sauce and it was so good! I wanted more (: The prawn and scallops were so sweet & succulent, it just complimented the wine perfectly.

Prawn aglio olio with seared scallops

Prawn Aglio Olio with Pan Seared Scallops (The mr’s original recipe, serves 2)

5 cloves of garlic, finely chopped

3 small chillies, de-seeded and finely chopped (you can increase or reduce the amount of chilli depending on how spicy you like your dish to be!)

2 tbs fresh basil, finely chopped

1/2 cup white wine (I used Taylors Estate Pinot Gris)

2 tbs olive oil (plus an extra tbs for the scallops)

Salt & pepper, to season

12 prawns, peeled and cut into chunks

6 scallops, left whole

Pasta of your choice

Freshly grated parmesan cheese, to garnish

Steps :

1) Cook the pasta according to the instructions on the package. Strain and run under cold water so that the pasta will not stick together. Set aside while cooking the sauce.

2) In a heavy based pot, heat the olive oil on medium fire and fry the garlic and chilli till fragrant.

3) Add the prawns, and fry till it’s coloured and no longer translucent. Add the chopped basil and white wine. Allow this to simmer for about 5 minutes.

4) Pour the pasta into the sauce and mix it well. Set aside, and keep it warm.

5) Pat dry the scallops and season with sea salt. Heat a non-stick pan on low-medium fire and add 1 tbs of olive oil. Place the scallops into the pan and flip every 30 seconds. Repeat each side for about 3 times, or until the scallops have a nice golden brown sear.

6) Place the pasta on a plate and top with 3 scallops per person. Garnish with some freshly grated parmesan cheese. Serve with a glass of Pinot Gris. ENJOY!

Prawn aglio olio with seared scallops

And now, the part that you’ve been waiting for so patiently…. the giveaway! (:

Taylors Wines is a family-owned wine company, in South Australia’s stunning Clare Valley, that was born from a passion of producing exceptional,  hand crafted wines. They are “Bringing great wines to life” and would love to give two lucky readers two bottles of their beautiful Taylors Wine –  Taylors Estate Pinot Gris 2011 and Taylors Estate Shiraz 2010.

Taylors Estate wines

How do you win these amazing wines?

To enter this giveaway:

  • All you have to do is to leave a comment at the end of the post to let me know : What is your favourite wine and what do you like to pair it with? 
  • Open to Australian residents only! (So sorry!)
  • Please make sure you’re of a legal drinking age and be able to provide a proof of age (it is needed to be sent to the company before they can send you the wine)
  • The winners will be drawn on the 5th of May 2013, Sunday at 10pm (Melbourne time).
  • You may reenter daily, one entry a day (YAY!)
  • Winner will be picked via random.org and announced on this blog and notified via email

Good luck and have a great week ahead! (:

Remember to always cook and bake with love!

This is a sponsored post by Taylors Wines. I tasted the Pinot Gris with compliments of Taylors Wines, however, the review, opinions are honest and based on my personal taste and preference. The recipe is a Food Made With Love original.

~~~~~~~~~~~~~~~~~~~~~~~~~~~~~~~~~~~~~~~~~~~~~~~~~~~~~~~~~~~~~~~~~~~~~~~~~~~~~~~~

And the winners are….. Diana and Coco!! (: Congratulations!

Winner - Number 4

Diana

Winner - Number 13Coco

Congratulations you two! (: Will be dropping you an email or a reply soon! Hope you enjoy the wines! hehe Have a great week ahead! xx

~~~~~~~~~~~~~~~~~~~~~~~~~~~~~~~~~~~~~~~~~~~~~~~~~~~~~~~~~~

Update : Unfortunately, I can’t get hold of Diana and Ross (who was picked after not hearing from Diana) so I had to pick another winner! Congrats Zoe!! (: Hope you will enjoy this wine with Jeff!

New winner

comment number 20

Seafood Mentaiko Pasta

Seafood Mentai Pasta

Happy Monday everyone! I hope you had a good start to the short week and no one had the Monday blues! (: Even if you did, hopefully this post would brighten up your day a little bit! hehe Recently, I chanced upon a small packet of flying fish roe (toboki) and just had to buy it! There was one dish I’ve been wanting to get, but couldn’t get hold of any fish roe to make it! So you can imagine when I saw it, I knew what I was going to make for dinner that day – seafood mentaiko pasta! Mmmmm (:

Flying fish roe

Mentaiko is just a cream-based fish roe sauce that is so delicious and not overly heavy. I know many a times, when you have cream-based pasta, it tends to be a little too thick and you end up not being able to finish the plate. But trust me, this is one creamy pasta which you would want to slurp every single drop and be tempted to lick the plate! hehe I first had this pasta many years back in Singapore at a Japanese cafe. It was the first time I had pasta at a Japanese cafe and I totally loved it! Just couldn’t have enough! Till this day, I could still remember the taste of it, and that to me means it was one super-awesome-yummilicious dish!

Seafood in mentaiko cream sauce

So I headed to my favourite Japanese blog, Just One Cookbook, that always had amazing recipes ( do head to her blog and look at her beautiful bento boxes for her children, so so detailed and I can just imagine how excited they are when they see it! ).  I changed it up a little bit but the sauce was delicious! In fact, the sauce wasn’t thick or heavy at all, which was great! hehe To add a little more richness to the dish I added a soft boiled egg so the runny yolk would flavour the sauce too. The mr and sister-in-law loved it! So I urge you to give this a try, especially if you like cream-based pastas! hehe

seafood mentaiko pasta

Seafood Mentaiko Pasta (adapted from Just One Cookbook, serves 6)

1kg seafood marinara

1 packet (about 50-100g) of tobiko (flying fish roe)

3 tbs japanese mayonnaise (kewpie)

3/4 cup of thickened cream

30g unsalted butter

2 small onions, finely chopped

4 cloves of garlic, finely chopped

1 cup fish stock

salt & pepper, to taste

shredded nori (seaweed), to garnish

6 soft boiled eggs, to serve

250g pasta (I used linguini but you can use any you fancy)

Steps :

1) In a large bowl, mix the tobiko, mayonnaise and cream gently until well combined. Set aside.

Tobiko, cream and mayonnaise

2) Boil a pot of water and cook the pasta according to the instructions on the packet. Drain and run it under cold water to make sure they don’t stick together. Set is aside.

3) In a heavy based pan or pot, add the butter and allow it to melt completely before adding the chopped onions and garlic. Fry till fragrant, with caution not to burn it or it will taste bitter.

Frying the onion and garlic

4) Add the seafood marinara and mix it well to make sure it is coated with the buttery onion and garlic mixture. Add the fish stock and allow it simmer for 15 minutes or until the seafood is completely cooked through.

Adding in the seafood

5) Use a strainer to take the seafood out and place them in the creamy tobiko mixture, reserving the liquid in the pot. Give it a good stir and make sure the seafood is well coated with the creamy sauce. Bring the liquid in the pot to a boil and reduce it till about around 1/4 cup and add that to the seafood mixture. Then add the pasta and slowly stir to combine everything together. Season with salt and pepper, careful not to over salt it as the tobiko can be quite salty (depending on how much you put)!

6) To serve, place some pasta and seafood on a plate, and add some mentaiko sauce. Top the pasta with a soft boil egg and sprinkle with some shredded nori. Cut through the egg and allow the egg yolk to flavour and thicken the sauce. ENJOY!

PS : Just found out mentaiko is different from tobiko! But you can use either and it will still be delish I’m sure! Sorry about that! (:

Have a great short week ahead dearest readers and remember to always cook and bake with love! (:

Spicy Chicken Bulgogi

It’s winter and I don’t know about you, but I always crave for something spicy or soupy during this time of the year. I have to admit. Winter is my least favourite season of the year. Gloomy, wet and freezing! All I want to do is hide under my blankets and hibernate! Definitely can’t wait till it is over. But for now, winter warmers are a must!

If you’ve been reading my blog (and thank you for you constant support!), you know that I’ve been obsessing about the korean cuisine. When I do go to a korean restaurant, I would find myself looking at either the hotpot or hotplate page of the menu and I would end up ordering bulgogi. A hot favourite is beef bulgogi of course. But I also enjoy the spicy version of bulgogi. Don’t you? I’ve had really good spicy chicken hot plate at 7&7 in Carnegie and tonight, I was just craving for some! So I decided to make it for dinner!

Matched with a variety of mixed vegetables – it’s my version of a perfect and balanced meal. You have your carbs, protein and fiber all in one dish. Plus the heat from the dish just brings comfort to our tummies. Definitely a win-win! Have to thank Bee from Rasa Malaysia for her recipe for bulgogi. It’s delicious! (: Thank you for helping me satisfy a craving!

 Spicy Chicken Bulgogi (Adapted from Rasa Malaysia)

Ingredients : 

2 skinless chicken thighs, cut into strips

1/2 leek, thinly sliced

1/2 carrot, thinkly sliced

1/4 chinese cabbage, cut into strips

100g enoki mushrooms

4-5 spring onion, cut into large pieces

2 tbs olive oil

2 tbs water

ground white pepper to season

For the marinade : 

3 tbs Korean red chilli pepper paste (gochujang)*

1 tbs Korean red chilli pepper powder (gochugaru)*

2 tbs light soy sauce

2 tbs mirin

1 tbs sugar

1 tbs sesame oil

1 tbs mince garlic

1 tbs grated ginger

pinch of ground black pepper

Steps : 

1) Mix all the ingredients in the marinade and add the chicken strips. Mix well and allow the chicken to marinade for at least 30 mins to an hour.

2) Heat a deep frying pan on medium-high heat and add 1 tbs of olive oil. Add the leek and carrot and fry till soft. Add the cabbage and enoki mushrooms and fry until the vegetable is cooked. Season with ground white pepper. Place in the serving bowl and set aside.

3) Add the other tablespoon of olive oil into the pan and fry the chicken till cooked. Add water and all0w the chicken to simmer for 5-10 mins. Add the spring onion and fry for another 3 mins.

4) Serve the chicken on top of the vegetables. Have it with korean rice and ENJOY! (:

Definitely spicy enough to warm up our tummies tonight. The Mr was very happy (: This recipe is a keeper and perfect winter warmer. Do give it a try and let me know what you think!

So dear readers, what do you order when you’re at a korean restaurant? Would love to know!

* Note : You can get the red chilli pepper paste and powder from most asian supermarkets. I got mine from KFL at Springvale. If you have a korean supermarket near you, ever better! (: