New Autumn Menu : No. 8 By John Lawson

photo 1-1-1

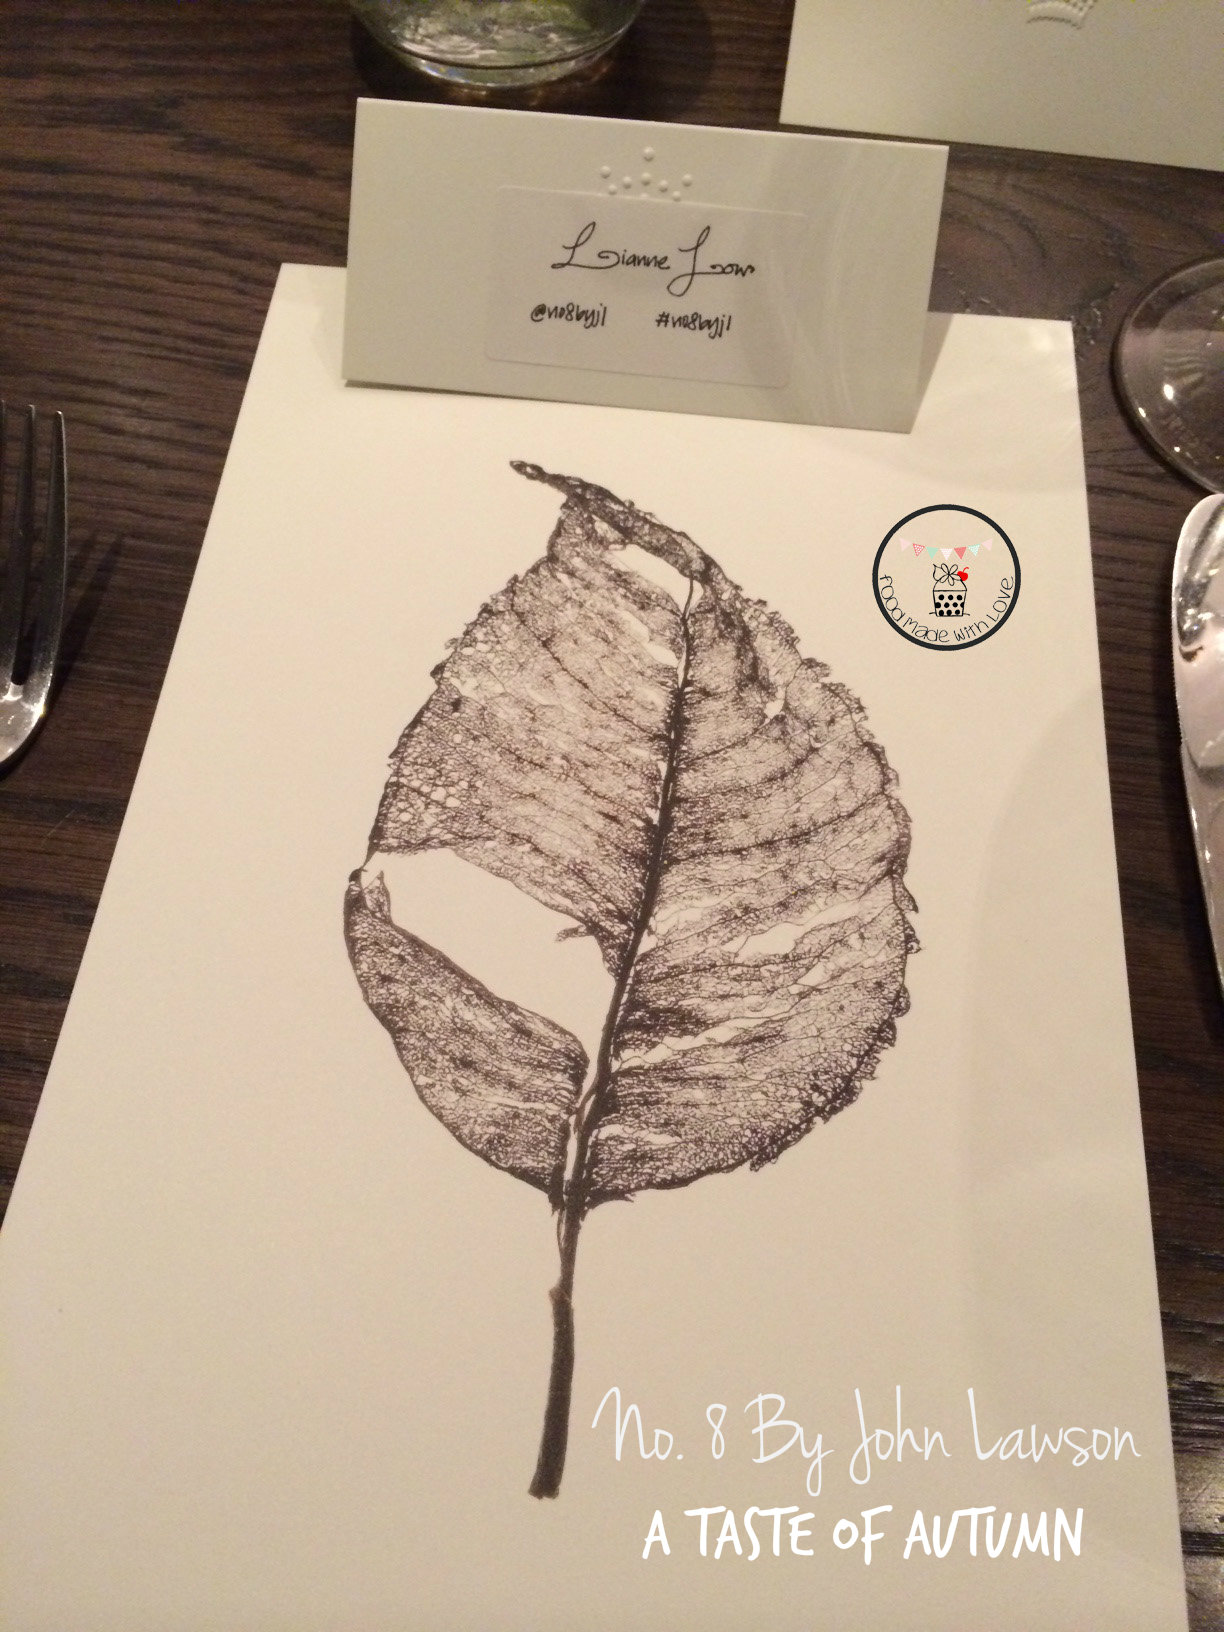
I was so lucky and excited to be invited to taste the new autumn menu at No. 8 by John Lawson a few weeks back. Don’t know if you can remember my first tasting done there and I absolutely loved it! So when another opportunity came to dine back at No. 8, I couldn’t say no hehe If you don’t remember John Lawson, his dishes are driven & inspired by the fresh produce he has around him. In fact, his cooking revolves around sustainably produced ingredients that he can find around locally from Victorian farmers. 

Before I share with you the new menu, I just want to thank John Lawson, the chefs and the staff for accommodating to this expectant woman. hehe Cannot be more thankful that I am still able to dine comfortably and have delicious food! (:

Whole wheat and beer sourdough

So like always, the night starts with beautiful slices of bread made by Eds Breads! If you follow me on instagram, you would know that I often buy my breads from him and have them for my breakfast! Unfortunately, I was late due to work, so I didn’t get to try the newly created – whole wheat and beer sourdough. But lucky for me, we were all given a loaf to bring home! YAY! hehe Love the crunchy outer crust and a soft centre. There isn’t one loaf of his I could fault!

Wheat berry and baby carrot salad

The first course was the salad course : wheat berry and baby carrot salad ! I absolutely love the wheat berries. They have a nutty flavour to them and really good bite too! This was also served with jerusalem artichokes turnips and sunflower shoots! A really colourful and refreshing start to the night! This was paired with a gin & tonic, which I didn’t have, of course. But I can imagine what a good match it would be! hehe

Mildura yabbies, hervey bay scallops and pine mushrooms

The next dish was a show-stopper in my opinion! When it arrived in front of me, I could feel my jaw drop! How pretty is that? Perfectly cooked Mildura yabbies, that were so fresh and sweet with Hervey Bay scallops and pine mushrooms! What a great entree! Every seafood I love on a plate! Actually on a gorgeous scallop shell! Absolutely loved this dish.

Slippery Jack mushroom risotto

And the dishes just gets better and better! When I looked through the menu before dinner started, this was the dish I was really looking forward to! Risotto, when cooked perfectly, is my weakness. I could have a huge plate of it and still want more. hehe This, my dear readers, was absolutely delish! Every mouthful I had was bursting with mushroomy flavours, and the rice was creamy and cheesy! SO GOOD! Ticked all the right boxes! Hands down my favourite dish of the night! NOMS!

Milawa duck breast

The main for the new autumn menu was Milawa duck breast! As it was cooked medium rare to medium, I couldn’t have it. But from the sounds made by everyone sitting around me, I knew it was as good as the first time I had it! This time it was served with pear, brussel sprouts and foie gras sauce. How good does that sound? hehe Have to head back another time to try it! hehe

Flat iron steak

Lucky me though, a special dish was cooked for me – flat iron steak! I’ve not had this cut of steak before, but it was so tender and though it looked like it hasn’t been cooked through, it was! Every piece just melts in my mouth and goes so well with the slices of beet root! AMAZEBALLS! I was trying to savour it slowly, but I found myself finishing it before I knew it! haha

baked potato with cheddar and crispy pig

We were also served a side of baked potato with cheddar and crispy pig! Holy moly! This was everything I was craving for in my pregnancy! Lucky thing we shared among the 4 of us, or else I would have smothered my face in it! Don’t worry there was also a side of cosberg, kale and mustard leaf, but I was so engrossed in eating the potato and steak, I forgot to snap it! hehe

72% Cocoa and coffee fondant

Now, time for the sweets! Though I was already quite stuffed, but there is always room for dessert right? hehe There were two on offer again tonight, and this was the one I didn’t have cause they were worried the chocolate wasn’t pasteurised. 72% Cocoa & coffee fondant! Let me tell you though, the smell of the chocolate filled the table as they were being served! So delicately plated too!

Gooey middle

Of course, when you are served a fondant, the money shot would be when you cut it open! Sorry the photo is a tad dark, but can you see the shiny bit of chocolate oozing out? Definitely a perfectly cooked fondant!

IMG_0452-1

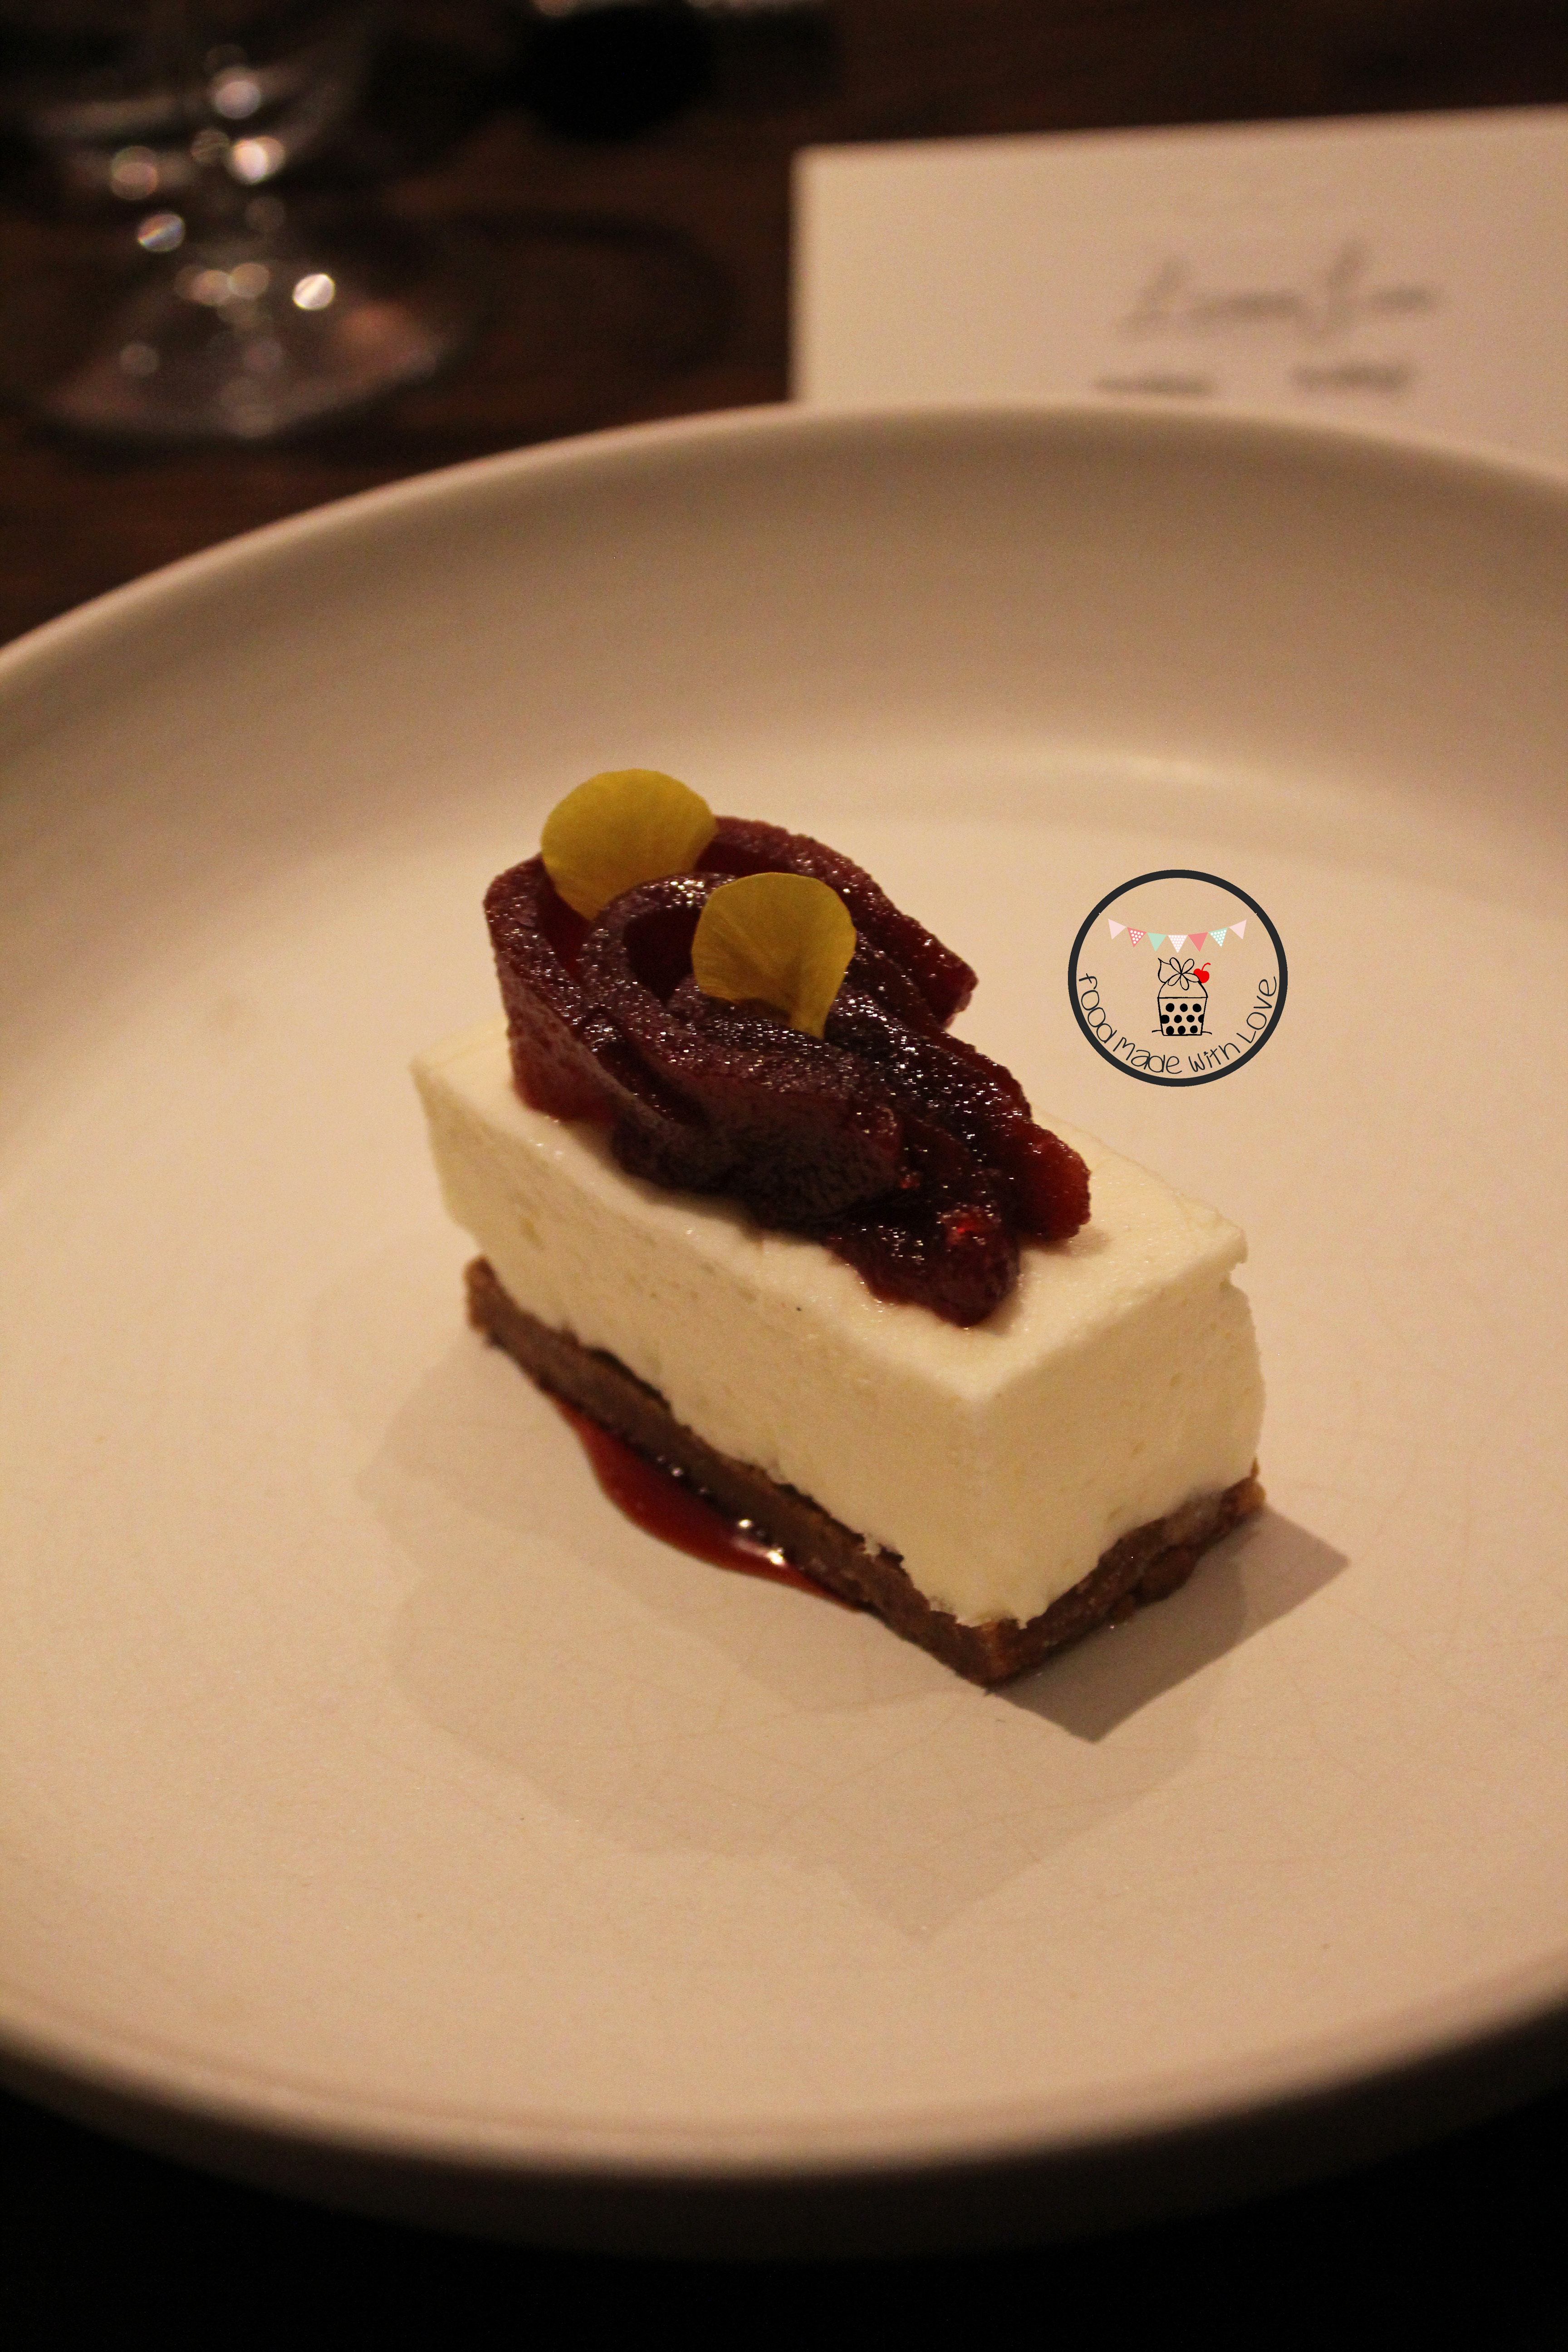
I had the slow poached quince, spiced crumb and yoghurt! The last time I was at No. 8 I had a yoghurt dessert too! Such a good way to end the night though. Light, refreshing with the sweetness of the poached quince! I definitely wanted more! Mmmm (:

Occelli testun in foglie di castagno

Something new was a fromage course : Occeelli Testun in Foglie di Castagno! haha The name was a tongue twister and I have to admit I googled just to see what it was! hehe It’s a cow and sheep milk cheese that is wrapped in chestnut leaves for 18 months! My constant craving has always been cheese this whole pregnancy, but sadly I couldn’t have this cause it was soft cheese! The smell was divine though! It was matched with a Grey Box honey from Castlemaine. Sweet and salty – match made in heaven I’m sure!

Chocolate and passionfruit truffle

Last but definitely not the least, we were given beautiful chocolate and passionfruit truffles to end the night (: Dark chocolate that is subtly bitter contrasting with a sweet passionfruit filling!

Once again, the food was outstanding and I highly recommend you to head down to No. 8 at Crown Melbourne to give the new menu a go! You definitely won’t regret it! (:

Disclaimer : I was invited to the launch  by Hatch Communications and No. 8 By John Lawson. All thoughts and opinions are based on my experience at the time of the visit. Thank you so much for this wonderful experience and opportunity yet again!

No. 8 by John Lawson (number 8) on Urbanspoon

Salted Caramel Creme Brûlée

photo 4-1-1

Whenever I’m deciding what to cook or bake, my inspiration always comes from my loved ones and what they like to have, or what their favourite cuisine or flavours are. Of late, I have to admit that I cook according to what Baby Ho (& I) crave for and thankfully the Mr and sister-in-law are really easy and wouldn’t mind having what I’m craving for! PHEW! So so blessed! But last week, I decided to make something inspired by what the Mr loves and with a twist, using his favourite dessert & flavour – creme brûlée & salted caramel!

salted caramel creme brûlée

I have to say I was really nervous making creme brûlée again, cause the last time I made was a long time ago and usually they kinda curdle a little, and never comes out as smooth as I wish they would. But I decided to give it another go, and waited with my fingers and toes crossed while they were baking in the oven! hehe

I couldn’t be happier with how it turned out! Smooth, luscious and with a good kick of the salt! Not overly sweet too! The Mr was all smiles and because I didn’t wanna have too much sugar, he had his and half of mine! hehe Of cos, the best bit was so hear the crack of the burnt sugar on the top!

So here’s the recipe and I hope you all enjoy it as much as we did!

Salted Caramel Creme Brûlée

600ml thickened cream

6 egg yolks

1 egg

1 vanilla pod

120g caster sugar, plus extra for the brûlée

1 tsp fleur de sel (or sea salt if that’s what you have)

Steps :

1) Preheat over to 115 degrees celcius.

2) In a small pot, pour the thickened cream in. Split the vanilla pod into half, lengthwise, and scrape the vanilla bean into the cream. Throw the pod into the pot as well and bring it to a slow boil. Allow the mixture to simmer for 10 minutes so that the vanilla pod and beans would infuse into the cream.

3) In another pot, heat the sugar on medium-high heat, swirling it to incorporate the rest of the sugar. Watch closely so that the caramel doesn’t burn. Once the caramel is a beautiful amber colour, take it off the heat and pour the cream into the pot. Do be very careful as the mixture will still bubbling! Whisk continuously to make sure the caramel and cream is well combined. Add the fleur de sel and give it a good stir to ensure the salt combines with the caramel cream mixture.

4) In a large glass bowl, crack the egg and add the egg yolks. Whisk well and slowly pour the salted caramel cream in a slow and steady stream. Make sure it’s not added too quickly, as it will scramble the eggs. Whisk continuously as you add the caramel cream  and strain into a measuring jug.

5) Pour the mixture into small mason jars (my mixture was enough to fill the 1/2 way mark of 6 jars) and place the jars in a roasting tray.

salted caramel creme brûlée

6) Fill the tray with hot water until it reaches 1/2 of the jars and slowly place it into the oven. Bake the creme brûlée for 45 minutes or until it’s just set but still wobbly in the middle. Take the jars out of the water bath and allow them to cool completely before placing them in the fridge for at least 3 hours or overnight.

7) To serve, sprinkle some caster sugar on top of the creme brûlée and using a blow torch, burn the sugar till it caramelises and is a dark brown colour.

salted caramel creme brûlée

ENJOY!

Have a great night everyone and remember to always cook and bake with love! xx

My Mr The Chef : Chicken Money Bag

IMG_4260-1-1

I am truly a lucky woman. I married a man who can seriously cook some delicious food! Although he’s really busy, he still takes time to cook something once in a while, which I am super thankful for! If you’ve followed me for a while now, you would have seen some of his creations : Hainanese chicken riceroasted beef ribshomemade bacon and polenta chips!

Ready to be served

I’m  not sure if you remember seeing this dish on Masterchef last year, but this was a dish by the ever so talented – Maggie Beer! The Mr wanted to make it the moment he saw it and boy am I glad he did. It was absolutely delicious! Tedious to prep, but all the hard work definitely paid off! Just imagine golden crispy chicken skin (like yum!) and the meat is just succulent and full of flavour on the inside! Together with the tomato chutney, it’s just the perfect pair!

Skinning the chicken

The trickiest part of the dish is probably skinning the whole chicken and keeping the skin whole, making sure there are no holes! The Mr did such a good job! He got it out in one go! Don’t think I would be able to do it. haha

So here’s the recipe from Maggie Beer! Give it a try, the hard work is definitely worth every delicious bite!

Chicken Money Bag with Preserved Lemon and Tomato Chutney (Recipe closely adapted from Maggie Beer, Serves 3)

For the chicken :

50g unsalted butter, plus extra for greasing

2 tbs olive oil

3 shallots, finely chopped

225g white button mushrooms, sliced

1 tbs lemon thyme leaves, chopped

1/3 cup white wine (I didn’t have Verjuice)

1.8kg whole chicken

100g chicken fat, finely chopped

1 1/2 tbs preserved lemon rind, chopped

1 1/4 tbs tarragon, chopped

15g sea salt flakes

1 egg

For the Preserved Lemon & Tomato Chutney : 

1 1/2 tbs Olive oil

1 onion, diced

2 cloves of garlic, chopped

2 sprigs of rosemary, finely chopped

1/4 cup white wine (Use Verjuice if you have it!)

800g tomato, roughly chopped

100g preserved lemon, rinsed and chopped

110ml Red wine vinegar

90g caster sugar

Steps :

1) Preheat oven to 200 degrees celcius.

2) Place a heavy based pan over medium-high heat, add butter and heat until it has turned nutty brown. Add olive oil, shallots and mushrooms and cook for 5 minutes. Add thyme, toss to combine, and season with salt.

3) Deglaze the pan with white wine and cook until it is sticky and reduced. Place mushroom mixture in a large bowl, and set aside to cool.

4) Skin chicken and place in a bowl. Remove chicken marylands, roughly chop leg and thigh meat, then pulse in a food processor to a coarse paste. Add chicken fat and pulse to combine. Remove breasts and cut into two centimeters dice.

Prepping the chicken and mushroom mixture

5) Finely chop mushroom mixture, then add the preserved lemon rind and tarragon to cooled mushroom mixture and mix until well combined. Add chicken leg mixture, diced chicken breast, sea salt flakes and egg to the bowl and slap the mixture against the side of the bowl until combined.

Prepping the ingredients

Chicken mixture

6) Cut chicken skin into three even triangular shaped pieces.

7) Over a 6cm springform baking tin, place a sheet of cling wrap, then spread skin over. 

Making the money bags

8) Add chicken mixture, bring each end of the skin together to create a pouch, then place in the fridge for ten minutes to allow the skin to set.

Adding the chicken mixture

Bringing the skin together to create a pouch

9) Invert baking tins onto a baking tray and carefully lift tins to remove. The skin should remain neatly tucked underneath, holding the parcel together as it cooks.

All ready to be baked!

10) Place baking tray into oven, and cook for 25-30 minutes or until the skin is golden brown. If you have a meat thermometer, check to see that the internal temperature has reached 62 degrees celcius.

Baked till golden brown

11) Remove from the oven and allow it to rest for 15 minutes.

12) For the chutney : Heat olive oil in a saucepan over medium heat. Add onion and cook for five minutes until softened and translucent. Add garlic and rosemary, and cook for two minutes.

13) Deglaze the pan with white wine then add the rest of the ingredients. Bring to the boil, then reduce to a rapid simmer and cook until the mixture is reduced to about two cups and a chutney-like consistency. Remove from heat, and place into a bowl to cool. Season to taste with salt.

14) To serve : Slice the chicken money bags and serve on the tomato chutney. Enjoy! (:

chicken money bag sliced

Enjoy the coming weekend everyone! (: Hope this has inspired you to cook something special for your loved ones this weekend! Remember to always cook and bake with love!

Till the next post, xx

Turning 28 At Nieuw Amsterdam

IMG_9898-1

Turning a year older is no doubt a special occasion. But this year, it was really special to me. Next year, I will be celebrating as a mum! (: Can’t be any more excited about that! As we get older, birthdays just become a time where we head out to have good food. No longer did we have the huge celebrations, just quiet ones now, which I actually enjoy more! Just a small intimate affair with my loved ones. hehe

Nieuw Amsterdam

Address : 106-112 Hardware Street

Melbourne Vic 3000

Website

Nieuw Amsterdam has been on my to-go list for a while now, so I knew exactly where I wanted to go to celebrate turning a year older! Absolutely loved the atmosphere when we stepped into this American Bistro, and the wait staff were really friendly as well!

Our drinks

Being pregnant, I couldn’t have any alcohol, so I ordered lemon lime bitters instead. The sister-in-law couldn’t resist the cider and the Mr had a dark beer (sorry I didn’t get the exact name! haha). The food at Nieuw Amsterdam are mainly sharing plates and that’s exactly what we did! Although we did order quite a bit. haha We were definitely hungry (:

New York Sour Dough

The night of food started with a loaf of New York sourdough with some beautiful creamy butter! It had a really crispy outer crust and the bread was still soft in the middle. We definitely wanted more of it, but was reserving our stomach space for the food we ordered! hehe

Pig trotter and ham hock nuggets

These little gold nuggets were absolutely delicious! With a great crunch with every bite, the mixture of pig trotters and ham hock just melts in your mouth and you wouldn’t be able to resist going for more! Sitting on the nugget is a thin slice of a pickled radish, which cuts through the richness of the dish. AMAZING!

BBQ Scallops with mango gazpacho, avocado and chilli

Our second appetiser is perfectly cooked BBQ scallops sitting in mango gazpacho, with avocado and chilli! Scallops are one of my favourite ingredients of all time. I could have it in any way – sashimi, pan fried, grilled. Give it to me! haha Though it seems like there is a lot of flavours going on, but everything worked together!

Chicken waffles

I was craving for waffles for the longest time, so when I saw this on the menu, I couldn’t resist! A thin waffle topped with chicken terrine, pate and a super crispy chicken skin! YUM! Don’t worry, I didn’t have my pate hehe but it was still delish! The small but mighty chilli jam just brings the whole dish together and the flavour of sweet and spicy just bursts in your mouth! I was one happy girl! hehe

Southern style pork belly chops

This, my dear readers, was the best dish of the night. Tender and melt-in-your-mouth pork belly which was just full of flavour, topped with pork crackling and sauerkraut! Couldn’t get enough of it and just wanted to devour the whole bowl!

Southern style pork belly chops

Absolutely divine! A definitely most order dish when you do head there! (:

Jerk chicken

The Mr chose the jerk chicken dish with crispy rice and black bean puree! The jerk chicken was tender and had a good chilli kick to it and went really well with the crispy rice! The only down part of this was the pineapple salad, which really was just pieces of pineapple, and was a tad bit sweet for my liking.

Smoked beef brisket

I chose the last main : Smoked beef brisket with carrot remoulade! I requested for the beef to be cooked through, and it wasn’t tough! Wheee! (: So thankful that the chefs were happy to accommodate to my dietary requirements!

Dutch potato fries with spiced garlic mayo

As a side, we got the dutch potato fries with a side of spiced garlic mayo! Can’t turn down crispy thick cut fries. Simple but delish!

The Nieuw chocolate bar

As we were all quite full by the time we finished our appetisers and mains, we decided to share just one dessert. The one that caught my attention is the Nieuw Chocolate Bar! When it came, I couldn’t be happier with my choice! A rich and decadent chocolate bar topped with banana cake, brûlée bananas and tonka bean ice cream! It was so yum I wanted to have another, though there wasn’t much space left in my tummy. haha

 It was definitely a great night and I can’t thank the Mr and sister-in-law enough to celebrate this special day with me! Nothing beats celebrating with loved ones and having great food is just the icing on the cake! Will definitely be back to try the other dishes on the menu! hehe

Nieuw Amsterdam on Urbanspoon


Have a great weekend everyone!

Remember to always cook and bake with love! 

New Found Gem : Mr. Brightside

Mr. Brightside

Brunch. Something I truly truly adore and look forward to on weekends! It was the long weekend last week, and the Mr and I were looking for a place nearby to have brunch. We usually head to our usuals favourites in Bentleigh (Merchants Guild & Little Tommy Tucker), but we really wanted to find something different, and still close by!

Thank goodness for Eat Fresh Eat Local (twitter: @FreshBestLocal) l who introduced me to The Homemaker Report, I found a place that was just 10 minutes away from our place – Mr Brightside !

Mr Brightside

A cosy cafe tucked in the corner, it was just filled with locals who knew one another. We were greeted with warm smiles by the staff and as it was pretty packed, we sat outside. But no fear, there were heaters right above us to keep us warm and toasty!

Our usual drinks

We also ordered our usual drinks to keep our tummies warm! The mr had a latte, I had Calmer Sutra soy chai latte and Melissa had her favourite hot chocolate! I pretty much knew what I wanted to have when I saw the menu online before heading there, but I knew they had specials for the day too, and asked the Mr to help me check the board. One of the staff (wish I got his name!) joked with the Mr and said now we aren’t able to hear him say it in his special voice! haha Too funny! He came out shortly after to explain what the specials were. SO FRIENDLY! Seriously love the service at Mr. Brightside! Made brunch a lot more enjoyable!

Challah French Toast

I still decided on the challah french toes with maple syrup and mascarpone! There’s an option of adding bacon, and how could I not?? Maple syrup and bacon is the best combination! This was my kind of heaven. The challah toast was crispy on the outside and still soft in the middle. Together with the mascarpone, absolutely delish!!! If you want a good french toast, this is it!

Potato hash brown

Whenever there is a potato hash on the menu, the mr would definitely order it, and this was no different! He loves his hash, and this hash he absolutely loved! In fact, he said he might have found the best hash he’s had! Super golden and crispy, with a moist and tender centre! Can’t get better can it? It is served with beef brisket and he added a side of mushrooms!

Perfectly poached eggs

When the Mr cut into the poached egg, liquid gold was spilling out! I have to admit, poached egg is one thing I do miss to have for breakfast!

Big Breakfast

Melissa ordered the Big Breakfast and boy, they weren’t joking about it being big! 2 sausages, bacon, roasted tomatoes, scrambled eggs, potato hash and toasts! She could hardly finish it and was filled all the way till dinner!

Mr. Brightside

We were all so happy to find Mr. Brightside, with delicious food and super friendly staff, there’s no doubt that we will be back again and very very soon! I bet you want to head down for that plate of french toast now! hehe

Happy weekend everyone! x

Mr Brightside on Urbanspoon

Baby Ho’s Gender Reveal

photo 2-2-1-1

It’s time! I’ve been waiting all week for this (: Since it was the holidays, I gave myself a little project to do which involves my two favourite things : baking and surprises!

I started going onto Pinterest looking for ideas on how to reveal my bub’s gender and there were so many I wanted to do! One of which was a piñata cake! But it wasn’t easy finding blue sweets, I had to buy packets and packets of lollies and sieve them out. haha Which wasn’t too ideal, cos I’m not huge on lollies, and they will go to waste!

Inside of the cake

So I decided to make an inside surprise cake instead! The first time I made an inside surprise cake was for my dearest mother on Mother’s Day 4 years ago and it was one of the biggest projects I’ve ever done but also the coolest! It was a hidden heart in the middle of a cake! Since it was so long ago, I thought it would be perfect for the revealing of Baby Ho’s gender! Also inspired by I Am Baker, I decided that the inside of the cake would spell the gender of our dearest bub!

Chocolate cake

I used a chocolate cake recipe for letters inside the cake, and just like making a cake pop, I made my favourite cream cheese frosting to combine them together!

Cake toppers

I also tried to look for cake toppers that would be perfect for the purpose of the cake and found heaps of printable ones! Cut them out and stuck them onto lollipop sticks! hehe I have to say, I went a little crazy with the cake toppers haha So addictive to make them!

photo-6

Then I placed the letters into a white cake batter and baked it in a loaf before frosting it with just a basic buttercream frosting! I do apologise for the messiness of the coloured frostings. I wasn’t too sure how I wanted to do it, but decided to go around piping different sized pink & blue frosting around the cake. I tried to bring out the artistic side of me. Free form. haha

Pink or blue?

To make the coloured frosting, I took two heap tablespoon of frosting and place them in separate bowls (I heap tablespoon in each bowl) and added food gel colouring to create the pink (for girl) and blue (for boy) frosting. I have to say, I love how so many people commented on Instagram that I might be having twins! hehe But nope, one heartbeat! One bub! hehe

So here comes the BIG REVEAL! Is Baby Ho a girl or a boy? *drumroll*

He's a BOY!

I am proud to announce that we are having a boy! (: Cutting through the cake to reveal the letters was really scary to be honest! I wasn’t sure if the letters would stay the way they were moulded or they would become one big mess! Thankfully, they could still be deciphered! PHEW! But yes! We are having a boy and we cannot be more excited! The mr already has plans to bring him to the gym and lift some weights! haha

We are having a boy!

Thank you everyone for the constant care, love and support through the past 23 weeks and I cannot be more blessed to be surrounded by you guys! Just slightly shorter than 3 months to go and we can’t wait to see our baby boy and hold him in our arms!

Thank you for being so patient with me this week! Remember to always bake and cook with love!

Till the next post, xx

HUON Smoked Salmon Bouquet Quiche

IMG_9891-2-2

I’m late, I’m late, I’m late! That was the only thing on my mind when I was trying to come up with something to make for the HUON Blogging Challenge as the post is due tomorrow! I have to admit, I was a bit hesitant to take up the challenge as we had to use smoke salmon and the only way I could have it is cooking it!

HUON smoked salmon banquet rolls

While looking at the HUON Reserve Selection range and deciding on what I should get, I was drawn to the banquet rolls immediately! If only I could have them as is, cos I would love to have man a roulette out of it! Oh wells! haha Have to concentrate on what I can have!

ingredients used

So I did what I usually do to get inspirations for the dish I want to make – walk down the aisles of the supermarket! It’s seriously the best place to come up with ideas for what to cook! Absolutely love doing it. hehe So I decided to make a quiche, for the first time! I know, what’s so exciting about a quiche? Well, I decided to make it look very different from a usual quiche, turning the salmon rolls into bouquet of flowers!

Smoked salmon bouquet quiche

I was super nervous making it because I’ve never made a quiche before, and I didn’t know if the shapes were going to last through the baking process! Thank goodness, the flowers were still “blooming” when I took it out of the oven. HOORAY! It worked! hehe The mr and sister-in-law really enjoyed it too! That’s always a plus! (: So here’s the recipe! Hope you will enjoy it as much as we did!

Smoked Salmon Bouquet Quiche (Serves 4-6 people)

For the sour cream short crust pastry : (Recipe from Maggie Beer)

125ml sour cream

250g plain flour, extra for dusting

200g butter

For the filling : 

200g HUON Reserve Selection banquet rolls

1 leek (white part, halved lengthwise and thinly sliced)

8 mushroom cups, sliced

10g chives, finely chopped

6-8 sundried tomatoes, finely chopped

1 tbs olive oil

10g unsalted butter

salt and black pepper, to season

200ml thickened cream

150g shredded cheddar

4 eggs

Steps :

Kneading the dough into a ball

1) For the short crust pastry : Preheat the oven to 200 degrees celcius. Dice the butter then pulse it in a food processor with the plain flour till it resembles bread crumbs. Add the sour cream and pulse it further till it resembles a dough.

Rolling out and dough and blind baking

2) On a clean surface, dust a bit of plain flour and knead the dough into a ball. Wrap the dough in cling wrap and allow it to rest in the fridge for 20 minutes. Roll the pastry out to 3-5mm thickness and roll it over 24cm quiche baking tin that has been oiled. Blind bake the pastry for 10-15 minutes, or until it’s lightly golden. Allow it to cool while preparing the other ingredients.

Lining the tin with the pastry

2)  For the filling : Heat a large heavy-based pan on high and add the olive oil. Fry the leek till soft and fragrant, then add the mushrooms. Season with salt and pepper and allow the mushrooms to fry till slightly caramelised. Add the butter and fold in the mushroom mixture. Set it aside and allow it to cool before placing it in the pastry case. Sprinkle the chives and sundries tomatoes evenly around the pastry case.

Frying the leek and mushroom mixture

3) Cut each banquet rolled salmon into half and place them in a shape of a flower. ( I did 3 large flowers, and 3 small flowers. But you can do as many as you like! Bring out your artistic side! )

4) Combine the thickened cream and eggs in a bowl and mix them till well combined. Pour it slowly into the case and around the smoked salmon, careful not to get any on.

eggs and cream mixture

5) Top the quiche with shredded cheddar, once again avoiding the smoked salmon.

6) Reduce the oven to 190 degrees celcius and bake the quiche for 35-40 minutes, or until the egg mixture is set and the top is golden brown.

Smoked salmon bouquet quiche

7) Serve with a side of salad with your favourite dressing and with extra sour cream to go with the quiche! Indulgence! ENJOY!

Quiche with a side of salad

I have to say I really enjoyed making those flowers out of the smoke salmon rolls! To make it look more like flowers, I piped stalks and leaves using the sour cream and fill the leaves with chopped chives! hehe I’m no artist, but I think this is the best I could do!

Hope you enjoyed the recipe, and do give it a try! I didn’t get to eat the smoked salmon on it’s own (before cooking), but the mr and sister-in-law said it was delicious and not as salty as the others they’ve had! Which is always a plus! Have a great weekend everyone!

Remember to always cook and bake with love! Till the next post, xx

My Biggest Project : Rainbow Cake

Processed with VSCOcam with t1 preset

Layer cakes were never a specialty of mine, but when the opportunity came up to make something special for a first birthday, I just couldn’t resist! If you follow me on instagram (@lianneelow) I’m sure you’ve seen endless photos of Paige who turned one last year. I love her like she’s my own, so I wanted to do something special for her as well!

Stacking the layers

Rainbow was the theme of her party, so inevitably, the only cake I could think of was rainbow cake! Being ambitious, I also wanted to make all 7 layers out of natural colouring and flavouring. So after much research, I came up with the flavours and decided to give it a try. As much as I wanted natural colouring, the colours of the fruits just didn’t stand out as much as I wanted to after being baked, so for the actual cake, I decided to put a drop or two of colouring paste just to make it pop!

Cupcake pops

On a side note (just cause the word pop reminded me haha), I also made some cupcake pops for the party! Though it was time consuming to make them, I enjoyed every single moment – from molding them into their shapes, dipping them into melted chocolate (like yummeh!) and to sprinkling them with 100’s and 1000’s! Could totally imagine a kid doing it as a fun activity too! Hehe

plan drawn

So here’s a draw up of my plan: 7 flavours and all stacked and iced with my favourite cream cheese frosting! Mmmmm!

I wasn’t too worried about baking the 7 individual layers, I was more worried about constructing it and how high it would actually be! It was definitely the highest cake I’ve made in my life!  The only thing I was really worried about was transporting the cake to the party as I was going to be driving alone! I think my life was shortened about 10 years in that 10 minutes of driving! Haha

It was all worth it though, to see the faces lit up at the party and hearing all the compliments from the guests! Definitely made my day! The next thing that made my heart beat really quickly was the cutting of the cake and revealing to see if there were 7 distinct layers. And….

Revealing the layers inside

TADAH!!! (: I couldn’t be happier with how it turned out! I’m sure I let out a loud sigh of relief the moment I took the first slice of cake out and served it! A happy dance was definitely in order! Hehe  I have to admit, there were some layers that I was probably a bit too heavy with the colouring towards the end (was going colour happy haha), cause I really wanted the colours to stand out. But please know that you can always cut that down to your own preference, or you can just cut that out too!

Rainbow Cake 

Ingredients : (20 cm round baking tin, repeat 7 times)

120g plain flour

80g caster sugar

40g unsalted butter, room temperature

120ml milk

1 tsp baking powder

1 tsp vanilla paste

1 egg

Wilton icing food gels (I used a toothpick to add the colours)

For the different layers : (add food gel colouring till desired colour or leave it out if you wish)

Red – 3/4 cup fresh raspberry, mashed + red food gel

Pink – 3/4 cup fresh strawberries, mashed

Purple – 3/4 cup blackberries, mashed + purple food gel

Blue – 3/4 cup blueberries, mashed + blue food gel

Green – Zest of 2 limes, 3 tbs juice + green food gel

 Yellow – Zest of 2 lemons, 3 tbs juice + yellow food gel

Orange – Zest of 1 naval orange, 3 tbs juice + orange food gel

Steps : 

1) For each layer of cake : Grease and line the baking tin with baking paper. Preheat oven to 165 degrees celcius.

2) In a medium bowl, combine the plain flour and baking powder. In a mixing bowl, add the butter, sugar, egg and vanilla paste and mix till pale and fluffy. Alternate the flour mixture with milk (flour,milk,flour) until well combined.

3) Fold in the flavouring and colouring for each layer. Careful not to over mix.

the red layer - raspberry

4) Pour the batter into the prepared baking tin and tap it on the counter to allow all the air bubbles to come to the surface. Bake for 18 mins or until the skewer comes out clean. Allow the layers of cake to cool completely before assembling.

The yellow layer - lemon

Cream Cheese Icing (From the Hummingbird Bakery Cookbook)

900g icing sugar

375g cream cheese

150g unsalted butter, softened

Steps :

1) Beat the icing sugar and butter in a mixing bowl until well combined.

2) Add the cream cheese in one go and beat until completely incorporated. Turn the mixer up to medium high, and beat until it’s light and fluffy (about 5 minutes). Do not over beat as it will turn runny.

Cream cheese icing

3) To assemble : Place the red cake layer at the bottom, place 2 heap tbs of cream cheese icing on the cake and spread it out uniformly using a palette knife. Place the orange layer on top and repeat the process. Once you reach the top layer (pink), frost the top and side of the cake till it’s smooth and even.

Rainbow cake success!

Enjoy! (: I love how I could actually taste the fruits in every single layer, and they actually do work well together although it’s impossible to fit all 7 layers in one bite! haha

Paige eating the cake

It was such an honour that my cake is the first cake Paige has eaten (:  How pretty is her dress!

Happy 1st birthday Paige

It is many months after the actual birthday, but happy 1st birthday Paige! Can’t believe how quick it has been and she’s such a big girl now! (:

Paige and Us

I can’t wait till I am able to make my own bub’s cake and I will definitely be more than happy to make this cake again!

Have a good mid week everyone! (:

Remember to always bake and cook with love! Till the next post, xx

Celebrating a Marriage : Anada

Karen's big day!

A couple of weeks back, I was lucky enough to attend a friend’s special day and it was beautiful (: After the ceremony, we went for a small celebration and I was asked to find a place that would be fitting for the occasion. I think I found the perfect place!

IMG_9612-1-1

Anada has been on my to-go list for the longest time, and I was so glad we headed there to celebrate their beautiful day! It’s such a cosy place and the ambience was perfect! Not to mention how delicious the food was! I’ve not had spanish food ever since I came back from Barcelona, and that was almost a year back! How time flies!

We were seated at the long table by the window and I was seated at the sofa seats, facing the restaurant. I love being able to see the hustling & bustling of the kitchen, staff and the bar. Just makes the night even more interesting!

Drinks of the night

Of course, I couldn’t have any drinks that night. I stuck to my water. But our friends ordered a couple to try! You can’t really go wrong with ordering Sangria at a Spanish restaurant. The cava sangria had a good balance of cava and citrus, just what a sangria should be! The newly weds ordered the cocktail – papa doble. It was refreshing and had a really good citrus flavour! Definitely something I will try once I can have a drink (or two haha)

As for the food, we decided to order some tapas, a main and a couple of paellas to share among the 6 of us. We were actually quite filled up by the end of the night!

fried cauliflower

The first tapas we had was the fried cauliflower with zataar and house yoghurt. This was my favourite tapas of the night! The cauliflower was nicely caramelised on the outside, soft and tender on the inside. Together with the tangy house yoghurt, it was absolutely delicious!  Wanted to order one all for me (and bub)! hehe

fried aubergine

Next up, the fried aubergine with a dollop of labne, chilli and mint! This was really flavourful but would have been even better if the aubergine was slightly warmer. It went really well with the labne though!

Bone marrow on toast

The last tapas we ordered was the bone marrow on toast with wagyu cecina. I’m not a huge fan of bone marrow and I couldn’t have the cecina, so I gave this a miss. However, everyone else said that it was a very delicious small treat! They definitely enjoyed this a lot cause they were still talking about it at the end of dinner!

Crispy pork belly

This, ladies and gentlemen, is hands down the best dish of the night! Crispy pork belly with meat that melts in your mouth, sitting on a bed of smokey aubergine. I was definitely in pork heaven after my very first bite! The crackling was so crispy and perfectly seasoned, I wanted more!

Chicken and seafood paella

After all the tapas and pork belly, we were definitely looking forward to the paellas! Haven’t really had good paella in Melbourne so I was really hoping this place would be it! And it sure didn’t disappoint! The chicken and seafood paella was flavoursome and the rice was al dente, just the way it should be!

arroz negro paella

The squid ink paella was also really delicious, and there is just something sexy about the black rice against the seafood. haha but it might just be me thinking that! I have to admit though, I do prefer the chicken and seafood one. I think it might be because I have a constant craving for tomatoey food! hehe

Anada

We definitely enjoyed ourselves at Anada, and I can definitely say that I will be back again for the fried cauliflower and the crispy pork belly! Can’t wait!

Añada on Urbanspoon

Would just like to congratulate Karen and Patrick on their beautiful marriage. May you have endless years of love for each other, and may it continue to grow every single day! (: Hope your week is going well dear readers, remember to always cook and bake with love! Till the next post, xx

Osso Bucco in A Rich Tomato Red Wine Sauce & Creamy Parmesan Polenta

IMG_9684-1-1

Being pregnant, I cook according to what I crave these days, or some might like to say, according to what the baby wants! hehe To be honest, most of the things I cook are food I miss from home, but currently, my daily cravings are anything tomatoey and cheesy! Mmmmm (: How can that go wrong?

Taylors Estate Pinot Noir

It is the time of the month again when I’m so lucky to receive a couple of bottles of Taylors Wines! I know, I know. Please do not worry, I’m not drinking! I also make sure that I cook it long enough to get all the alcohol content out of the dish, leaving just the intense flavour of the wine. hehe So you can take a deep breath! hehe I decided to ask for Taylors Estate 2012 Adelaide Hills Pinot Noir. This medium bodied wine has flavours of ripe cherry and the freshness of berries. It’s soft on your palate and has tones of subtle spiciness. I knew immediately what it would be great for – Osso Bucco!

Tomato and red wine cooked osso bucco with creamy parmesan polenta

This was one perfect dish for satisfying my pregnancy cravings! Melt-in-the-mouth beef pieces cooked in a thick, luscious tomato and red wine sauce and served on a creamy parmesan polenta! I’m not a huge fan of marrow, but the mr is, so it was also a winner with him! hehe

So here’s the recipe, hope you will enjoy it as much as I did! (:

Osso Bucco in a Rich Tomato & Red Wine Sauce with Creamy Parmesan Polenta (serves 6-8)

For Osso Bucco :

8 pieces of osso bucco

salt & pepper, to season and to taste

hot paprika, to season

plain flour, to season

4 tbs olive oil

2 red onions, finely chopped

2 carrots, peeled and sliced into rounds

2 stalks of celery, finely sliced

3 cloves of garlic, finely chopped

2 large chilles, deseeded and thinly sliced

2 anchovy fillets

1 tin of chopped tomatoes (400g)

1 cup passata

1 cup Pinot Noir

1 cup beef stock

aromatics chopped up

For creamy parmesan polenta :

4 cups chicken stock

1 cup yellow cornmeal

1 cup finely grated Parmesan

2 tbs unsalted butter

1/4 cup thickened cream

Salt & ground black pepper, to season

For Anchovy Gremolata (optional)

4 tbs flat leaf parsley, finely chopped

9 anchovy fillets, finely chopped

Steps :

1) For the osso bucco : In a heavy based frying pan, add the olive oil and heat it on medium heat. Season the osso bucco pieces with salt, black pepper, hot paprika and flour on both sides. Fry and seal the osso bucco and place it on the plate, set it aside while preparing the sauce.

Season the osso bucco

Sealing the osso bucco

sealed osso buccos

2) Add the red onion, carrots, celery, chilli and garlic into the pan and fry till soft and fragrant.

Frying the ingredients till fragrant

3)  Add the red wine and allow that to reduce till 1/4 left.

adding the red wine

4) Once the red wine is reduced, add the tinned chopped tomatoes, passata, anchovies and beef stock. Allow the mixture to come to a boil then carefully add the osso bucco.

Slow cooking the osso bucco

5) Cover and allow it simmer on low heat for 2-31/2 hours. The meat should separate from the bone.  Give the pan a shake every 30 mins, to make sure it’s not stuck /burnt at the bottom.

6) For the polenta : In a medium sized pot, bring the chicken stock to a boil. Reduce to medium heat, and slowly add the cornmeal, whisking continuously with a whisk to prevent lumps. Switch to a wooden spoon and continue stirring until the mixture thickens (about 10 mins), season with salt and black pepper. Make sure you scrape the bottom to make sure nothing burns or stick. Take it off the heat and add the parmesan, butter and thickened cream.

7) For the anchovy gremolata : Mix the chopped parsley and anchovy until well combined.

8) To serve : Place the osso bucco on top of a bed of creamy parmesan polenta and top with more tomato and red wine sauce. Scatter the anchovy gremolata on the osso bucco and ENJOY! (:

Osso bucco served

Thank you Taylors Wines once again for the beautiful Pinot Noir, and although I can’t have a glass (or two), I’m so happy I’m still able to have them in my food! hehe Have a great mid week everyone! Remember to always cook and bake with love! Till the next post, xx