My Mr The Chef : Polenta Chips

Polenta chips

Good afternoon dear readers! I hope you all had a wonderful Easter break and had lots of and hot cross buns! Cause I sure did! hehe (: Not too long back, the sis-in-law and I requested the mr to cook steak for us and he came up with his version of steak & chips! I’ve always considered myself blessed as I married a man who sure knows how to cook and the way to my heart is definitely through my tummy hehe

The mr's version of steak & chips

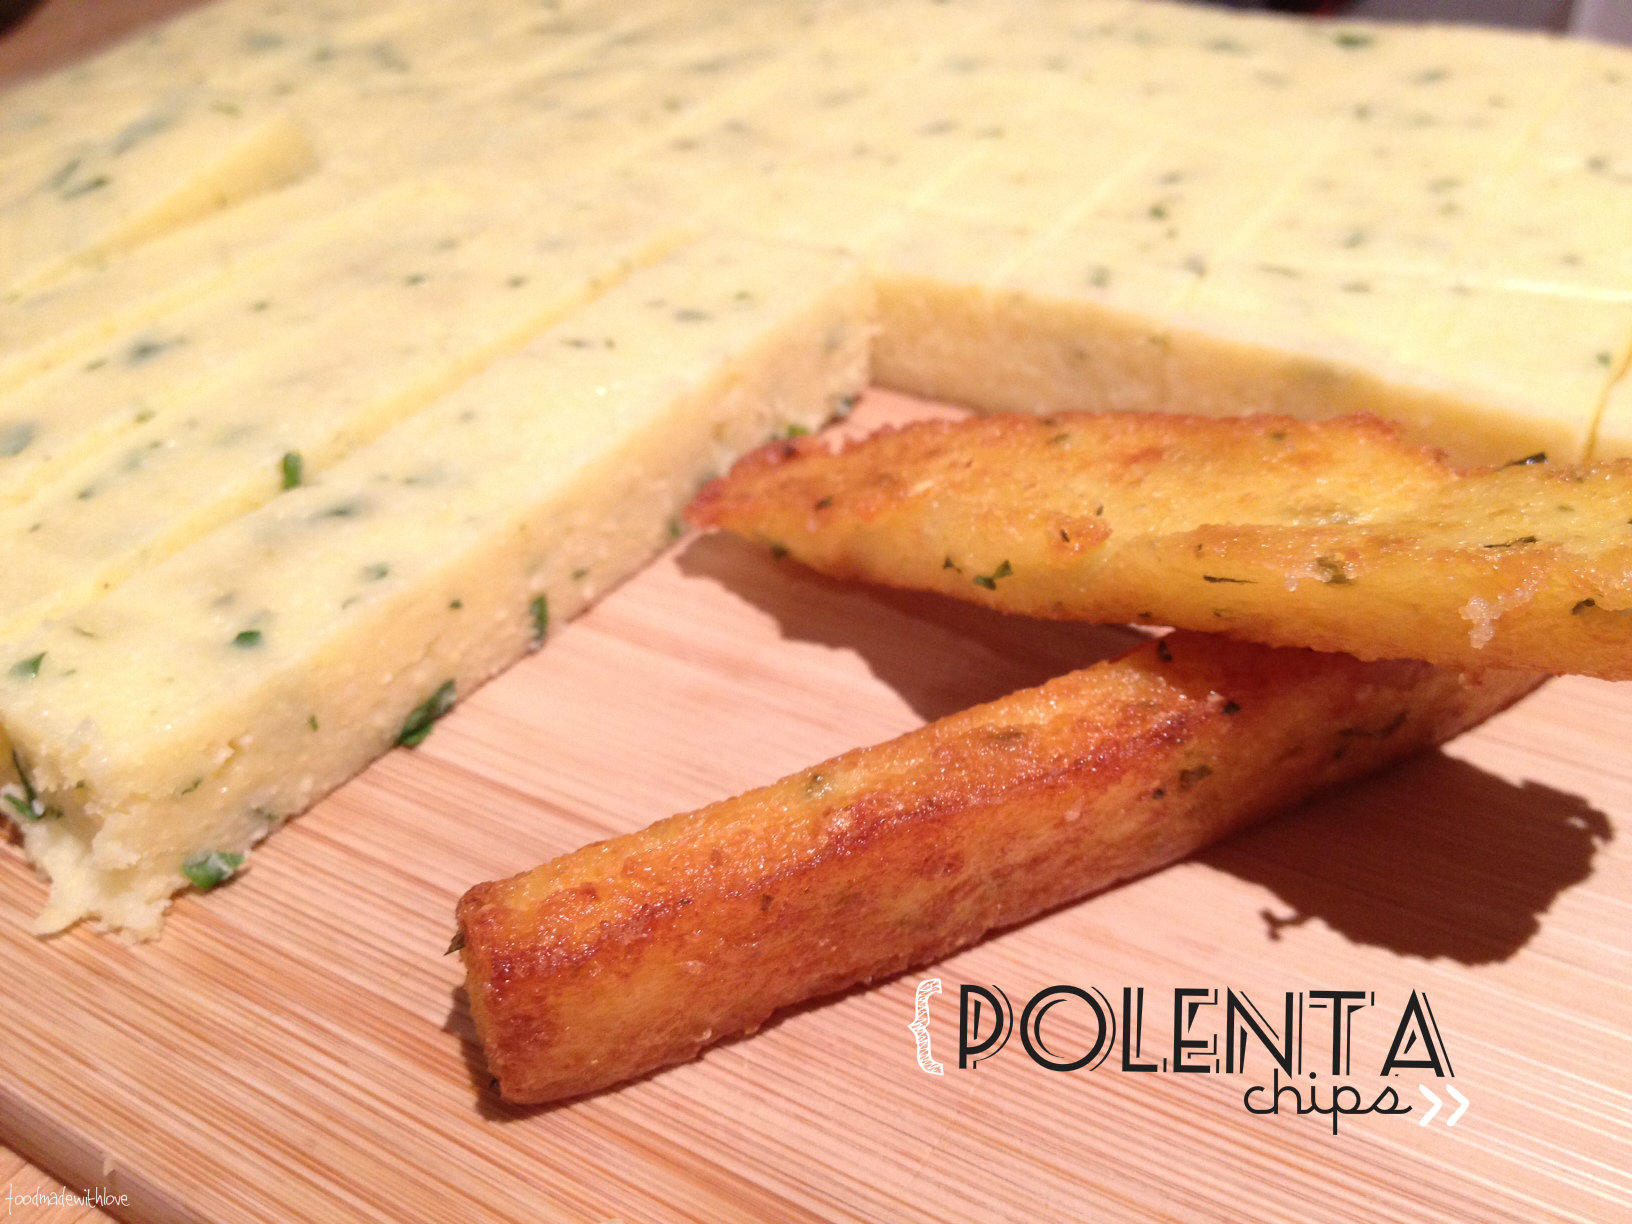
He was inspired by the MKR episode we watched as well as a recipe he came across in the Delicious (April 2013 issue) magazine to make polenta chips and they were SO ADDICTIVE! Crunchy on the outside, soft and fluffy on the inside. We couldn’t stop eating it the moment it was out of the frying pan! hehe

So do give these a go! (: It’s shallowed fried so it’s not too sinful! You will absolutely love them as much as we did. hehe

Polenta Chips (by the Mr adapted from Delicious Magazine April 2013)

200g polenta

50g unsalted butter

100g finely grated parmesan

4 tbs chopped flat-leaf parsley

salt & pepper, to taste and garnish

Steps :

1) Line a baking tray with grease-proof baking paper allowing 2cm to overhang. Boil 800ml of water in a small pot, then reduce the heat to low. Do note that the amount of water is different for different brands of polenta, so please do check how much water is needed for the amount of polenta.

2) Stir in the polenta in a slow, steady stream, then cook and stir continuously for 5 minutes or until it has thickened. Take it off the heat and stir in the butter, parmesan and parsley. Season with salt and pepper and spoon it into the tray and smooth the surface. Press it down and make sure the polenta is really compact. Allow it to chill for at least an hour.

3)  Tip the polenta onto a board and cut it half lengthways, then cut it into 1 1/2 cm thick chips.

The mr cutting the polenta up

4) Heat some vegetable oil in a large frying pan over medium heat. In batches, fry the polenta chips, turning, until golden and crisp.

Frying the polenta chips

5) Drain on the paper towel and keep warm in an oven or serve it immediately with a sprinkle of salt.

Polenta chips

ENJOY! (:

Perfectly cooked steak

On a separate note, how good does this look? The mr sure knows how to cook the perfect steak! AMAZING! hehe

Have a lovely day and a short week everyone! (: Remember to always cook and bake with love! 

Son-in-law Eggs

  I can still remember the first time I had son-in-law eggs, ‘khai luuk kheuy’ in Thai, at Gingerboy last year and it was a new and fun experience. I’ve never heard of son-in-law eggs prior to that beautiful meal at Gingerboy and after having them, I couldn’t get enough of it! It was one of the most popular dishes and came highly recommended. The wait staff explained to us, upon the arrival of the eggs, that we had to have the whole egg in one go to have the best experience. And of course, we did!

We tried to fit the egg into our mouth (it wasn’t a small egg in case you’re wondering) and when we bit into it, our eyes glowed and when we all finished it, we all did a harmony of  “WOWS” haha. It was truly amazing! The egg yolk was still really runny and the egg practically did a mini explosion in our mouths! I was in awe.

The next time I had them was my recent trip to Chin Chin. And this time, we learned our lesson, we decided to cut it into smaller pieces to truly enjoy the flavour. Since then, I just wanted to have more! So I decided to search for recipes online and found one by Ai-Ling @ Food Endevours of the Blue Apocalypse! It looks delicious and sound easy enough for me to follow. So off I went to KFL to get some of the ingredients and made it for lunch!

So glad I did, cause it was delicious! With the tangy, sweet chilli caramel, it was perfect! We loved the chilli caramel so much that we kept the leftovers so I could make the eggs again the next day! haha Obsession, I know.

Are you also a fan of son-in-law eggs? If you are, do give this recipe a try! I’m very sure you will love it! Do head over to the link to see the step-by-step pictures! It definitely helped me! (:

Son-in-law Eggs with Chilli Caramel (Adapted from Food Endeavours of the Blue Apocalypse)

2 eggs

Vegetable oil, for deep frying

1/4 cup sugar

1 tbs palm sugar

50ml fish sauce

2 tbs tamarind paste

3 chilli padi, sliced thinly

Spring onion, sliced thinly, for garnish

Fried shallots, for garnish

Steps :

1) For the eggs : Soft boil the eggs. I used an egg cooker for this. But if you’re using the stove, place the eggs in a small pot and fill with cold water, just enough to cover the eggs. Place over high heat, and when the water has come to a boil, remove the pot from the heat and allow the residual heat to cook the eggs gently for a further 3 minutes. Transfer the eggs to a pot of cold ice water, to stop the cooking process, for 10 minutes. Gently peel the eggs and pat dry using paper towel. Set aside.

2) For the chilli caramel : In a heavy-base pot, heat the sugar on low heat, swirling occasionally until the sugar liquifies and turns a slightly dark brown. Careful not to take this too far, as it will burn and taste bitter.

3) Take the pot off the heat, and slowly add the fish sauce. It will cause the smoke and bubble vigorously, so take caution.

4) Once the bubbling has settled down, return the pot back on the stove on low heat, and simmer for 2-3 minutes. Add the chillies and stir it well. Take the pot off the hear, and add the tamarind paste and palm sugar. Mix it until the palm sugar has dissolved completely. Set aside.

5) Heat oil in a small saucepan on medium-high heat, then add the soft boiled eggs and fry till golden brown. Drain on a paper towel.

6) Using a pair thongs, put the eggs in the pot of chilli caramel and coat it. Place the coated eggs in a bowl, and garnish with spring onions and fried shallots. Pour a bit more of the chilli caramel on top of the eggs, if desired.

ENJOY!

PS : Like Ai-Ling, I prefer a gooey yolk, which is why I chose to soft boil my eggs. If you don’t like that, you could hard boil your eggs, and just repeat the whole process of putting the eggs in ice water after it is cooked. Will still be delicious! (:

Homemade Garlic Bread

Do you love garlic bread? Do you often find yourself walking the aisle where the garlic bread is and cannot resist getting a loaf when you see it? Especially when it’s on sale? Or when you order pizza, you would not miss ordering garlic bread?

Then you are exactly like me! (: If you love it so much, why not make it? So let’s go!

Homemade Garlic Bread

3 handfuls parsley, chopped

50g butter, melted

pinch of salt

whole bulb of garlic

3 tbs parmesan

A loaf of baguette, sliced 1-inch thick

Steps :

1. Preheat the oven to 160 degrees Celcius. Bake the whole bulb of garlic for 20 mins.

2. Remove the garlic from the skin and mash it with a fork. Mix the garlic, parsely, melted butter, salt and parmesan in a bowl until well combined.

2. Spread it on the bread and bake for 10-15mins.

ENJOYYYY!

ps : I’m very sure you will.

pss : I’m very sure you will always make this and not buy store bought ones anymore! (:

Ad Hoc Potato Pavé

I saw something so divine and so pretty while looking for recipes for potatoes, and what to do with them. I tried to replicate what I saw, but I failed. Don’t get me wrong, it was super yummy, but it just didn’t come out the same way as Momofuku For 2‘s potato pavé. Hers was nice and crisp and stays in perfect shape! Mine, fell apart. haha and I know the reason why, from the start. Silly me forgot to read the recipe thoroughly, and didn’t chill the pave long enough for it to stay in shape. haha so when I cut it into the pieces, it all started to fall apart. This might also be due to me not using 3 large 1kg potatoes, cause what I have are small potatoes at home. But it was still yummy! Just not very pleasing to the eye on the plate. haha But I must say, it came out of the baking tray beautifully! An awesome bright orange caramelisation. I was beaming when I lifted the baking tray up!

Learn from my mistake, prepare this a day before the party, cause it could be kept in the fridge after it’s cooled down for up to 2 days! (: Trust me, this is something that will make everyone ask for more at a dinner party. And it is really not too difficult and doesn’t take that long to prepare either!

Continue reading