Summer Salad In A Jar

img_1793-1-1

It’s Summer and we are in 2017! Happy New Year everyone! I hope 2016 has been good for you, but I hope even more that 2017 will be an amazing year with lots of opportunities for you to strive on, lots of love, happiness and that everyone will be in the best of health!

To start the year on the right note, I decided to change the way we eat, and steer it towards eating as healthy as possible! So when Croud Australia contacted me to send me a WW Freshbox that’s completely vegetarian by the Aussie Farmers Direct, I couldn’t say no!

fullsizerender-2-1

 It’s a box filled with fresh vegetables and beautiful produce! What’s great about each box is they come with recipes that you could follow too! How easy is that? I love the convenience!

When I saw what I had in my box ( 3 meals for 2 people, $64) a few ingredients jumped out at me and I really wanted to make a vibrant salad that we would be able to even have it on the go and with a salad “dressing” that would be exciting for the taste buds too.

img_1774-1

So I decided to make a kale & basil toasted walnut pesto and it absolutely binds all the ingredients together! The perfect dressing (and healthy too with a superfood in it!) for the salad and if you have people you’re making for that loves and needs meat (like the mr), you could easily grill some meat and pop it on as well! It’s a really versatile recipe, and you can add your favourite ingredients too!

FullSizeRender-3-1.jpg

Don’t you just love the colour? It tastes absolutely amazing too!

So here’s the recipe for the perfect Summer salad!

img_1791-1

Summer Salad in A Jar (An original Food Made With Love recipe)

For the kale & toasted walnut pesto:

40g toasted walnut

80g kale leaves, stem removed

35g basil leaves

2 large garlic cloves

80g grated parmesan

1 tsp salt

150ml olive oil

Steps:

  1. Add the kale, basil, garlic cloves and salt in a food processor and pulse for 10 to 12 times, till you get a fine chop.
  2. With the motor running, slowly pour the olive oil into the bowl. Scrap the sides of the bowl.
  3. Add the walnuts, garlic cloves & parmesan, continue to pulse until the mixture is well combined. Set aside.

Note: I used this as a dressing for my salad, but you could use this in your pastas, or coat it with some grilled chicken!

For the salad:

350g butternut pumpkin, cut into cubes

1 red capsicum, sliced length-wise

1 can of chickpeas, drained

1 large handful of rocket leaves

1 large handful of baby spinach leaves

30g Greek style feta, crumbled

3 tsp smoked paprika

1 tsp ground cumin

2 tsp ground coriander

1 tsp salt, and extra for seasoning

ground black pepper

2 tbs olive oil

Steps :

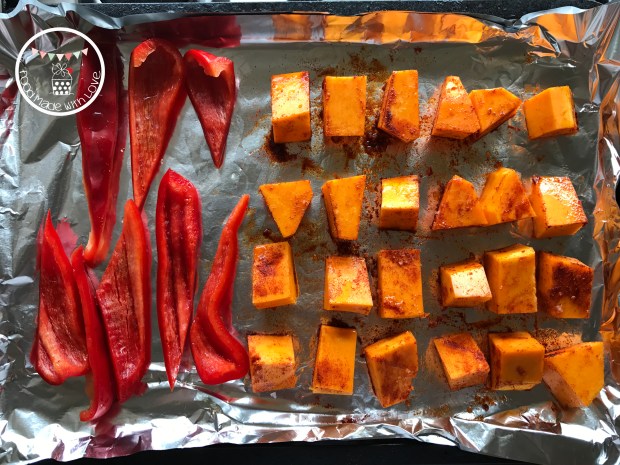
  1. Preheat the oven to 180 degrees Celcius. Line the baking tray with some aluminium foil, drizzle with 1 tbs of olive oil, and place the butternut pumpkin and red capsicum onto the tray. Season the butternut pumpkin with the smoked paprika and season with some salt. Bake for 20 mins or until the pumpkin is tender. Set aside to let it cool down.img_1784-1
  2. In a small nonstick pan, heat 1 tbs of oil over medium heat. Add ground coriander, cumin & salt, and cook for a minute. Remember to keep stirring, so that it doesn’t burn. Add the drained chickpeas and stir for 5 minutes or until lightly toasted and the chickpeas are well coated with the spices. Set aside.
  3. To plate : In a large jar, place the rocket and baby spinach leaves into the base. Add the butternut pumpkin and the red capsicum then sprinkle with the crumbled greek feta. Top with the spiced chickpeas and finally the kale & toasted walnut pesto.
  4. You could shake it gently to coat the contents with the pesto dressing, or if you have access to a plate, pour it out and mix it gently. Enjoy on its own or with some grilled meats!

           ENJOY!

Remember to always cook and bake with love!

xx

PS: Thank you Croud and Aussie Farmers Direct for this opportunity to try and love the Freshbox! Will be trying some of the recipes that are on the website too! Stay tuned, more recipes to come!

Raspberry & Lemon Shortcakes

DSCF1091-1-1

Baking has always been something I love doing. Especially to bake for people I love and just being able to see the smiles on their faces after they take a bite, warms my heart. So I try to bake something whenever I have the time and especially when there are special occasions or during the festive seasons! The house always smells the best during festive seasons, right? hehe

dscf1018-1

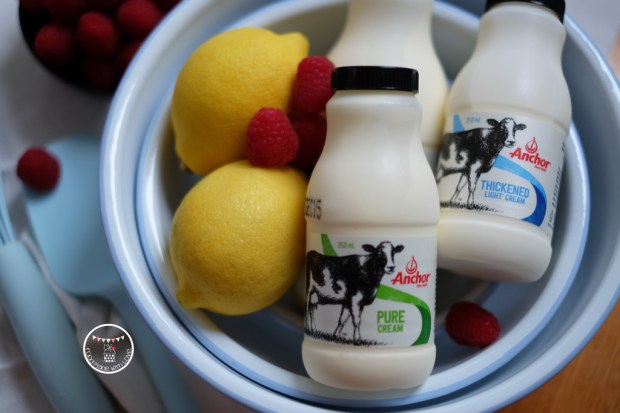
I am always excited to try new products in the market, and when I was asked to try the new Anchor Cream range, I immediately said yes! The new Anchor Cream range is made with 100% Australian dairy (only the best across 34 dairy farms across Victoria) and have a few innovative features that would be helpful when cooking.

dscf1020-1

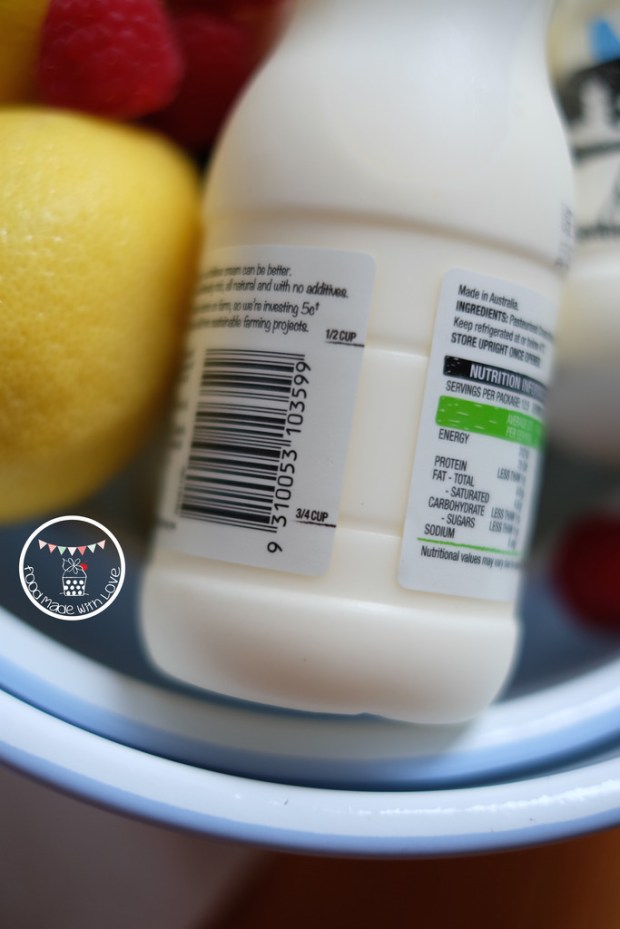
It comes with a screw top lid which would help with easy storage and less messy drips & leaks! Also, the side of the bottle has measurement markers  that would help you with more precise pouring and easy measurements! Less wastage as you don’t have to pour into a measuring cup and also less to wash! WIN!

There’s 3 types of creams in this range which would suit every occasion of cooking or baking – thickened cream, thickened light cream and pure cream! They come in unique size bottles, with exact one cup (250ml) or 2 cups (500ml) which would help when following a recipe, hassle free!

dscf1030-1

Walking the aisles of the supermarket, I was thinking about what I could make with these beautiful creams and found these huge, fresh and beautiful raspberries! So I decided to make some raspberry and lemon shortcakes!

dscf1074-1

This recipe uses the pure cream in the shortcake and also the whipped thickened cream sandwiched in the middle. So it was a perfect recipe in my books! Hope you will enjoy it too!

Raspberry & Lemon Shortcake (Adapted from Raspberri Cupcakes)

2 cups plain flour

1 tbs baking powder

2 tbs packed brown sugar

1/4 tsp salt

115g cold butter, cubed

3/4 cup pure cream

1 lemon

2 punnets of fresh raspberries

1/2 tbs packed brown sugar

1 tbs honey

1/2 cup thickened cream

1 tsp vanilla bean paste

Steps :

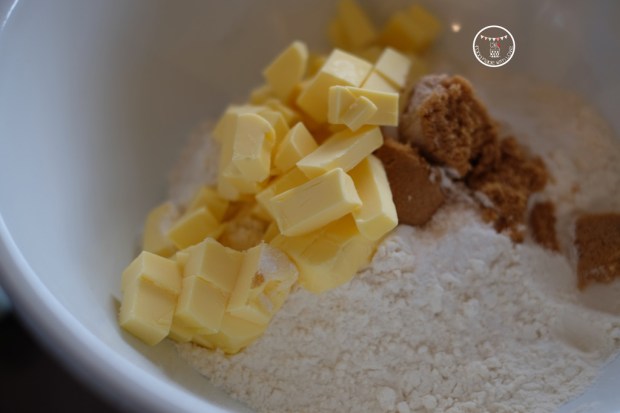
1) Preheat the oven to 210 degrees celcius. In a large bowl, add the flour, brown sugar, baking powder, salt and cold butter. Using the tip of your fingers, rub the butter into the flour mixture until a sandy mixture is achieved. Don’t worry if there are still a few lumps of butter.

dscf1041-1

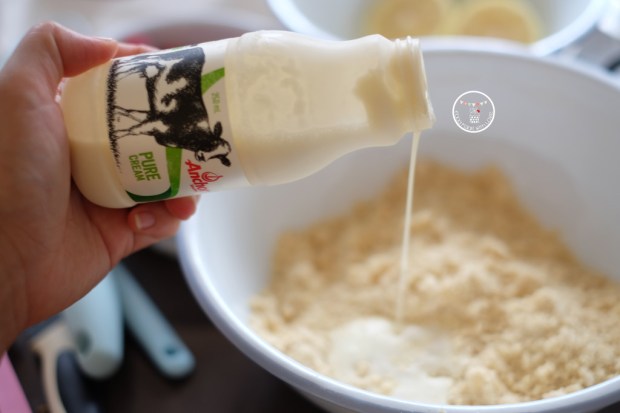
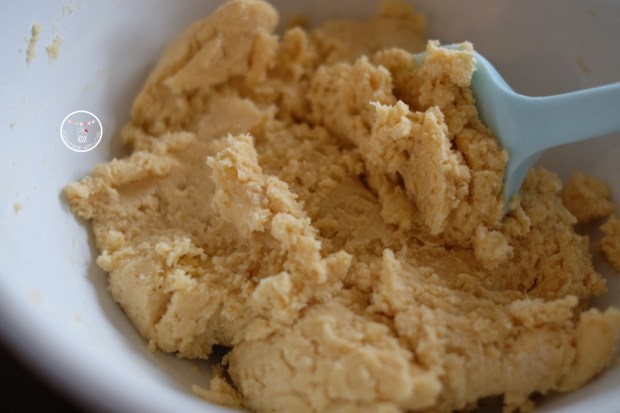
2) Slowly add the pure cream into the mixture and using a spatula, mix the cream until the dry mixture is just moistened.

dscf1045-1

dscf1047-1

3) Zest the lemon. Turn out the dough onto a floured surface and add the lemon zest. Lightly knead the dough till it comes together.

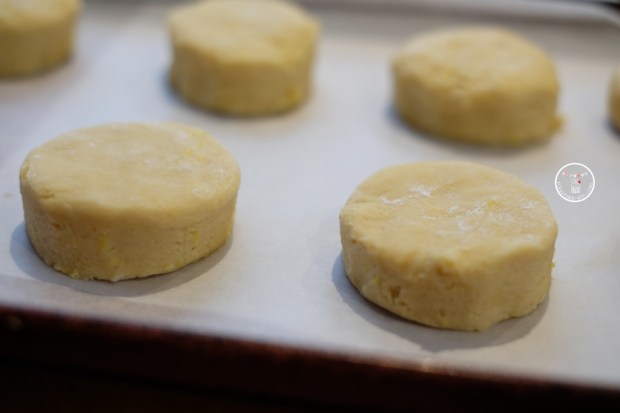
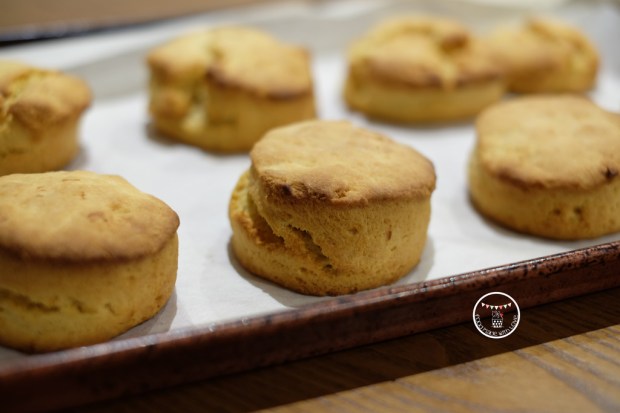
4) Pat the dough till about 1 1/2cm thick and using a 6cm scone cutter, cut the dough into the 7/8 portions. Place them on a lined baking tray and bake for 10-12 minutes, or until the tops are browned.

dscf1052-1

dscf1058-1

5) Transfer them to a wired rack to cool.

I made the shortcakes two different ways. One with just the fresh raspberry as it is, and one with a tangy raspberry coolie almost. I liked both, but the coolie gave it a very refreshing touch and the tanginess made you go back for more! So try both, or either (whichever you prefer!) and would love to hear what you think about them!

dscf1068-1

6) To make the raspberry coolie : In a small pot, place 1 punnet of raspberries, brown sugar, juice of 1/2 lemon and honey. On a low heat, stir the mixture till the raspberries are about to break down. Remove from heat and sit it in a bowl of ice water (to cool it completely before platting). This could be done a day before, keeping it in a jar in the fridge.

dscf1065-1

7) In a medium bowl, place the thickened cream and vanilla bean paste and whisk till stiff.

dscf1075-1

8) To serve : Cut the shortcake into half and place the whipped vanilla cream onto the top and place the fresh raspberries or raspberry coolie, serving with the other half placed on top. Best served immediately!

Enjoy! (:

Have a great week ahead everyone! It’s the season to be jolly, so go grab yourself some of the Anchor Cream and make this for the festive season! hehe

dscf1078-1

Remember to always bake and cook with love! xx

PS: Do note that the Anchor Cream range is only exclusively available at Woolworths Nationwide!

PPS : Thank you KeepLeft PR for the opportunity to try out the Anchor Cream range. All thoughts and opinions are based on my own experience. Thank you again for this wonderfully opportunity!

BBQ Made Easy with Heat Beads® Chimney Booster

Heat Beads(r)

I love BBQs. It’s just something that could bring everyone together, around the fire, and enjoy the love for food. To me, BBQs are perfect all year round. In the Summer, with a beer or cider in one hand, and a pair of tongs on the other. In Winter, it will act as a heater or a camp fire, keeping us warm and toasty! hehe

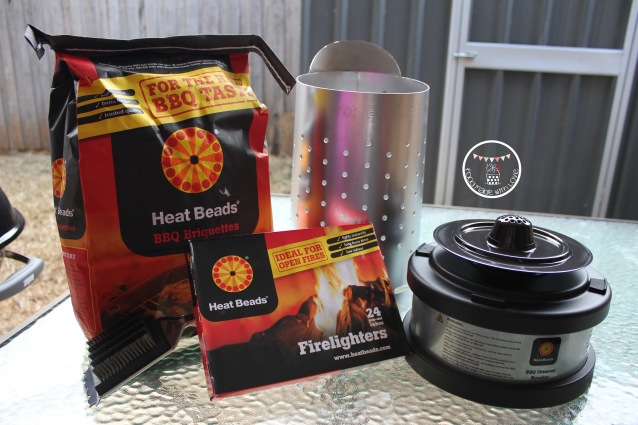
Setting up a BBQ can be tricky and time consuming, depending on the weather conditions. So when KeepLeft PR contacted me and asked if I would like to try the the Heat Beads® BBQ Chimney & Chimney Booster for a quick and easy BBQ experience, I couldn’t say no! I couldn’t be more thankful for the generosity of Heat Beads® as they didn’t only give me the Heat Beads® briquettes, firelighters, the Heat Beads® BBQ Chimney & Chimney Booster, they gave me my dream BBQ as well – The Weber! I was over the moon when the packages arrived!

The Weber BBQ

Heat Beads® BBQ Chimney & Chimney Booster

Instead of the usual hour or more taken to get the briquettes ready for some action, with the Heat Beads® BBQ Chimney & Chimney Booster, you can get your briquettes hot enough for the BBQ in 12 minutes (with a few minutes more if it’s cold and windy)! How amazing is that?? And it’s so easy to use as well! I was a little worried at first, as the Mr is in the USA doing a seminar tour. So I had no help, plus he’s always usually the one setting it up!

Setting up the BBQ Chimney & Chimney Booster

But trust me, it could all be done in a few quick steps!

Put the Heat Beads® briquettes in the Heat Beads® BBQ Chimney, place the Heat Beads® firelighters on the firelighter plate of the Heat Beads® Chimney Booster, light the firelighters using a match or gas lighter, place your Heat Beads® BBQ Chimney on top of the Chimney Booster and turn on the switch!

Lighting the firelighters on the firelighter plate

Now all you gotta do is wait for 12 minutes! I decided to put the Booster to the test, and BBQed on a super windy and cold night. It took 14 minutes for the briquettes to be hot enough to be placed in the BBQ. 14 minutes! AMAZING!

Using the BBQ Chimney & Chimney Booster

By the 12th minute, the briquettes were close to being ready. And how do you know when their ready? The briquettes become ash over, turning a light grey colour. That’s when it’s ready to be popped into your BBQ!

14 minutes, Briquettes were ashed over and ready to go!

With the setting up time reduced to a mere 12-14 minutes, I’ve got more time to cook my meats now! I decided to do a comparison of cooking methods: low & slow vs quick & fast. Heat Beads® is perfect for both! The low & slow would be perfect for days when you have a little more time to spare. The quick & fast would be perfect for busy bees who are working, or have little time to get food time on the table. Trust me, cause now with bubba, all I have is under an hour to get our meals prepared and cooked! So what did I decide to cook? Smoked BBQ baby back ribs (low & slow) and Jamaican Jerk Smoked chicken wings (quick & fast)! Salivating yet? hehe I definitely was, smelling the aromas coming out of the Weber!

Ribs & Wings

All done within 1 1/2 hours, inclusive of prep time! I thought it was pretty impressive, don’t you? You must be thinking, how can it be? Well, I used the 14 minutes taken for the briquettes to be ready to season my meats! A win-win situation if you asked me!

Smoked Bbq Baby Back Ribs

Smoked BBQ Baby Back Ribs (Recipe from Weber’s Time to Grill™ by Jamie Purviance)

Dry Rub :

1 tbs sea salt

2 tsp granulated garlic

2 tsp paprika

2 tsp dried thyme

1/2 tsp freshly ground black pepper

1 racks of baby back ribs, about 1kg

1/2 cup BBQ sauce

Handful of Hickory Wood Chips

Steps : 

1) Soak your wood chips in water for at least 30 mins and drain. Set aside.

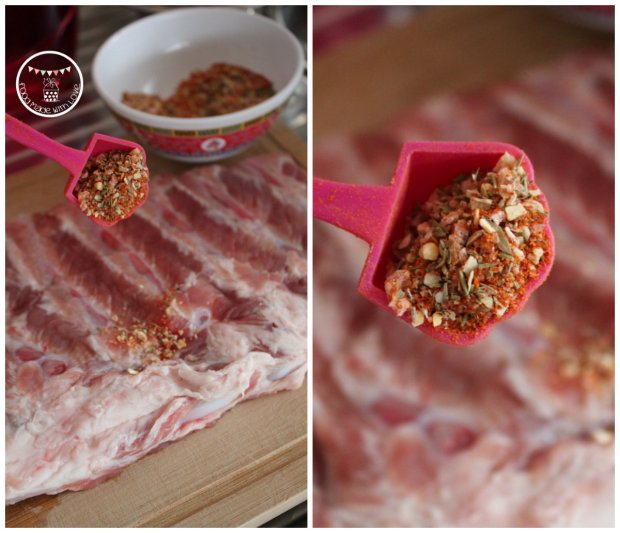
2) In a small bowl, mix the ingredients for the dry rub together. Remove the membrane of the ribs and cut them into half to create two smaller racks.

Dry rub - Ribs

3) Season each rack evenly with the dry rub and place the ribs on a piece of foil, wrapping them up well. Double wrap them, making sure there are no holes.

Seasoned and ready to go

4) Place the packet of ribs on the clean grill and cook for 1 hour, with the lid closed, and turning the packets occasionally, making sure not to pierce the foil. At this point, you could go do other things! Go hang the laundry and just put your feet up and have a cuppa (:

Ribs on the bbq

5) Remove the packets from the grill and let rest for about 10 mins. Carefully open the packets, remove the ribs and discard the rendered fat and oil.

6) Place the wood chips onto the charcoal and a a tray of water under the grill. Close the lid and when the wood chips start to smoke, return the ribs onto the grill (above the water) bone side down. Grill and smoke, the the lid closed, for about 10-12 minutes, basting with the bbq sauce, until they are sizzling and lightly charred. Remove from grill and let it rest for 5 minutes before serving with the remaining bbq sauce.

Jamaican Jerk Smoked Chicken Wings

2 tsp Jamaican Jerk Rub (For a quick marinade, I used the one from The Spice Mill)

2 tsp sea salt flakes

10-12 chicken wings

Steps : 

1) Marinade the chicken wings with the Jamaican Jerk spice rub and sea salt and allow it to marinade while the ribs are cooking on the grill.

Seasoning the chicken wings

2) When the ribs are 10 minutes from getting done, I put the chicken wings on the grill and turned it occasionally to make sure it doesn’t burn.

3) When the ribs are smoking, leave the chicken wings on the grill to be smoked as well (for the same 10-12 minutes). It brings the chicken wings to a whole new level of deliciousness! Golden brown and lightly charred. PERFECT!

Grilling the chicken wings

Jamaican Jerk Smoked chicken wings

Have them with some baked sweet potatoes (you can throw them on the grill when you start cooking your ribs) and a side of salad! Dinner is served! (:

Smoked BBQ Baby back ribs

My parents and I were really impressed by how delicious the ribs and wings were! I had so much fun trying out the Heat Beads® BBQ Chimney & Chimney booster and couldn’t be happier with how the meats turned out. I’m sure by now you’re wondering where to get the Heat Beads® BBQ Chimney & Chimney Booster from? Or you want to read more about the Heat Beads® products? Do pop over to Heat Beads® to find out more!

Have a great weekend ahead and always remember to cook and bake with love!

Disclaimer : Lianne@Food Made With Love received the Weber BBQ & Heat Beads® products as a gift from Heat Beads® & KeepLeft PR. Thank you so much for this fantastic opportunity! 

Osso Bucco in A Rich Tomato Red Wine Sauce & Creamy Parmesan Polenta

IMG_9684-1-1

Being pregnant, I cook according to what I crave these days, or some might like to say, according to what the baby wants! hehe To be honest, most of the things I cook are food I miss from home, but currently, my daily cravings are anything tomatoey and cheesy! Mmmmm (: How can that go wrong?

Taylors Estate Pinot Noir

It is the time of the month again when I’m so lucky to receive a couple of bottles of Taylors Wines! I know, I know. Please do not worry, I’m not drinking! I also make sure that I cook it long enough to get all the alcohol content out of the dish, leaving just the intense flavour of the wine. hehe So you can take a deep breath! hehe I decided to ask for Taylors Estate 2012 Adelaide Hills Pinot Noir. This medium bodied wine has flavours of ripe cherry and the freshness of berries. It’s soft on your palate and has tones of subtle spiciness. I knew immediately what it would be great for – Osso Bucco!

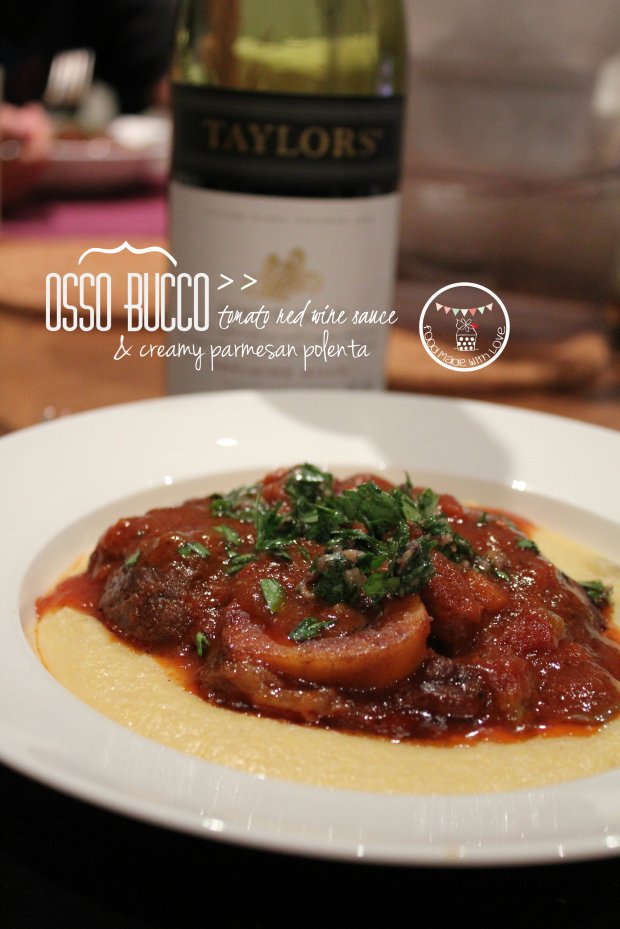
Tomato and red wine cooked osso bucco with creamy parmesan polenta

This was one perfect dish for satisfying my pregnancy cravings! Melt-in-the-mouth beef pieces cooked in a thick, luscious tomato and red wine sauce and served on a creamy parmesan polenta! I’m not a huge fan of marrow, but the mr is, so it was also a winner with him! hehe

So here’s the recipe, hope you will enjoy it as much as I did! (:

Osso Bucco in a Rich Tomato & Red Wine Sauce with Creamy Parmesan Polenta (serves 6-8)

For Osso Bucco :

8 pieces of osso bucco

salt & pepper, to season and to taste

hot paprika, to season

plain flour, to season

4 tbs olive oil

2 red onions, finely chopped

2 carrots, peeled and sliced into rounds

2 stalks of celery, finely sliced

3 cloves of garlic, finely chopped

2 large chilles, deseeded and thinly sliced

2 anchovy fillets

1 tin of chopped tomatoes (400g)

1 cup passata

1 cup Pinot Noir

1 cup beef stock

aromatics chopped up

For creamy parmesan polenta :

4 cups chicken stock

1 cup yellow cornmeal

1 cup finely grated Parmesan

2 tbs unsalted butter

1/4 cup thickened cream

Salt & ground black pepper, to season

For Anchovy Gremolata (optional)

4 tbs flat leaf parsley, finely chopped

9 anchovy fillets, finely chopped

Steps :

1) For the osso bucco : In a heavy based frying pan, add the olive oil and heat it on medium heat. Season the osso bucco pieces with salt, black pepper, hot paprika and flour on both sides. Fry and seal the osso bucco and place it on the plate, set it aside while preparing the sauce.

Season the osso bucco

Sealing the osso bucco

sealed osso buccos

2) Add the red onion, carrots, celery, chilli and garlic into the pan and fry till soft and fragrant.

Frying the ingredients till fragrant

3)  Add the red wine and allow that to reduce till 1/4 left.

adding the red wine

4) Once the red wine is reduced, add the tinned chopped tomatoes, passata, anchovies and beef stock. Allow the mixture to come to a boil then carefully add the osso bucco.

Slow cooking the osso bucco

5) Cover and allow it simmer on low heat for 2-31/2 hours. The meat should separate from the bone.  Give the pan a shake every 30 mins, to make sure it’s not stuck /burnt at the bottom.

6) For the polenta : In a medium sized pot, bring the chicken stock to a boil. Reduce to medium heat, and slowly add the cornmeal, whisking continuously with a whisk to prevent lumps. Switch to a wooden spoon and continue stirring until the mixture thickens (about 10 mins), season with salt and black pepper. Make sure you scrape the bottom to make sure nothing burns or stick. Take it off the heat and add the parmesan, butter and thickened cream.

7) For the anchovy gremolata : Mix the chopped parsley and anchovy until well combined.

8) To serve : Place the osso bucco on top of a bed of creamy parmesan polenta and top with more tomato and red wine sauce. Scatter the anchovy gremolata on the osso bucco and ENJOY! (:

Osso bucco served

Thank you Taylors Wines once again for the beautiful Pinot Noir, and although I can’t have a glass (or two), I’m so happy I’m still able to have them in my food! hehe Have a great mid week everyone! Remember to always cook and bake with love! Till the next post, xx

Tagine Magic : Moroccan Meatballs & Baba Ganoush

IMG_8881-1-1

I haven’t had much Moroccan food, but I can distinctly remember the first time I had it while we were still living in Brunswick many years back. On Sydney Road sits a small little Spanish/Moroccan restaurant, LaPaella, that sells really delicious Moroccan food and it was from this experience where I drew my inspiration from! I was really lucky to receive an Emile Henry tagine from Kitchenware Superstore, so it was perfect for me to make something Moroccan for dinner!

emile_henry_red_tagine

(photo credits : The Kitchenware Superstore)

The 32cm tagine came in a beautiful dark red and the best thing was it was made using the new flame top tecnologyan innovation in ceramics, with the development of a new glazed clay, exceptionally resistant to heat. So it didn’t even need a flame diffuser if you’re using the stovetop! How good and convenient is that?

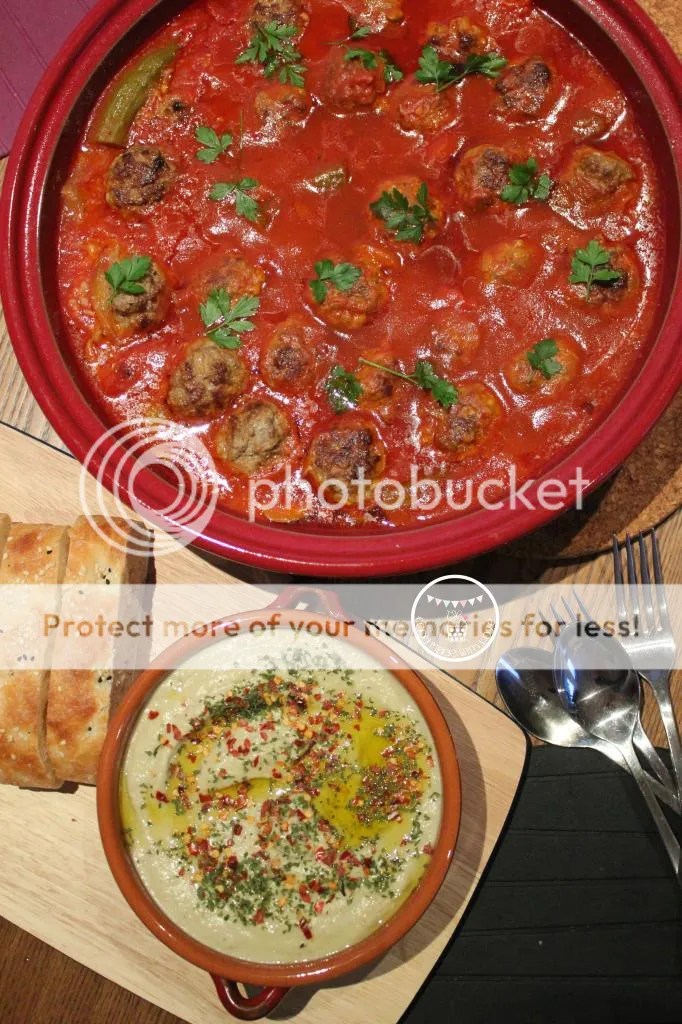
Moroccan meatballs with baba ganoush

It also keeps the food warm for a longer time! So you’ll still get hot food after all the photo taking! haha (: Definitely perfect for me! hehe

Moroccan meatballs with baba ganoush and turkish bread

I am all for having a balanced meal, so besides the Moroccan meatball, I charred some vegetables, added some okra and also made baba ganoush to go with as a side! This combination, I have to admit, is addictive! hehe You can’t stop having it. I assure you!

So here is the recipe and if you don’t have a tagine, I encourage u to get one, if not, you could always make it in a shallow frying pan. But a tagine is recommended! hehe

Moroccan Meatballs with Baba Ganoush (Recipes adapted from Baltic Maid & David Lebovitz)

For the meatballs :

300g mince pork

300g mince beef

1 small onion, finely chopped

2 cloves garlic, finely chopped

1 tsp salt

1 tsp ground ginger

1 tsp paprika

1 tsp ground coriander

1 tsp cumin

1/2 tsp cinnamon

2 tbs of olive oil, for frying

For the spicy tomato sauce : 

1 can of chopped tinned tomatoes

1/2 cup passata

2 cloves of garlic, finely chopped

1 tsp chilli flakes

1/2 cup of beef stock

1 packet of okra (about 200g)

1 red capsicum

1 yellow capsicum

1 green capsicum

1 tsp salt

For the baba ganoush :

2 medium size eggplant

2 heap tbs tahini

Juice of 1 lemon

2 cloves garlic, peeled and smashed

1/4 tsp chilli power

1 tbs olive oil, and extra to serve

1 tsp salt, or more to season

chopped parsley & chilli flakes, to garnish

Steps :

1) Under a hot grill, grill the capsicums and egg plant till they are tender and charred. Place them in a metal bowl and cover with cling wrap for about 10 mins. The charred skin would peel off easily. Slice the capsicum lengthwise and place in a bowl. Put the grilled eggplants (let whole) aside.

2) Place the tagine on the stove over medium heat. Add the tinned chopped tomatoes, passata, garlic, beef stock and allow it to come to a simmer for 10 mins. Add the okra and cover, allowing the okra to soften (about 10 mins). Add the chilli flakes.

making the spicy tomato sauce

3) Add the sliced roasted capsicum into the sauce and allow it to simmer for another 10 mins. Stirring to make sure the bottom is not sticking. Then switch it off, leaving the cover on.

Add the roasted capsicum into the sauce

4) For the meatballs : Add all the ingredients into a large meta bowl and mix till well combined.

Ingredients for the meatballs

5) Form the meatballs according to the size you fancy and place them on a plate. Heat a heavy based frying pan on medium heat then add the olive oil. Brown the meatballs on both sides then add them into the spicy tomato sauce (in the tagine). Cover and allow it to simmer on low heat for 20 minutes.

Frying the meatballs

6) While the meatballs are simmering away, slice the roasted eggplant into half, lengthwise, and scrape all the flesh into a food processor. Add the garlic, tahini, chilli powder and blend till quite smooth. Add the lemon juice, salt and olive oil. Blend till well combined. Place in a bowl, drizzle with more olive oil and garnish with chilli flakes and chopped parsley.

Moroccan meatballs

7) Garnish the meatballs with fresh parsley and serve with baba ganoush and warm turkish bread!

Moroccan meatballs with baba ganoush and turkish bread

Enjoy! (:

Hope you all had a great weekend and here’s to an awesome week ahead! Remember to always cook and bake with love! Till the next post, xx!

Disclaimer : I was given the tagine by Kitchenware Superstore to test and write a review, but all opinions and experience are based on my time of use! Thanks so much for this amazing tagine! 

Salmon En Papillote

Salmon En Papillote

Cooking. Definitely something I find joy in. Something I love. No matter how tired or long the day is, I always look forward to being in the kitchen. Be it something I’ve cooked many times before, or trying out a new recipe, it always makes a sweet end to my day. Not to mention the smile on the Mr’s face after eating it. Just can’t get any better than this!

Taylors Clare Valley Gewurtztraminer 2011

It’s the time of the month again when Taylors Wines has so generously given me two bottles of wine to taste and come up with a recipe that includes it as well as be perfect to pair with! This month, I decided to choose one that I never had much experience with – The Taylors Estate 2011 Clare Valley Gewürztraminer! This wine is light and crisp, with citrusy notes so I only had one protein in mind for it. FISH!

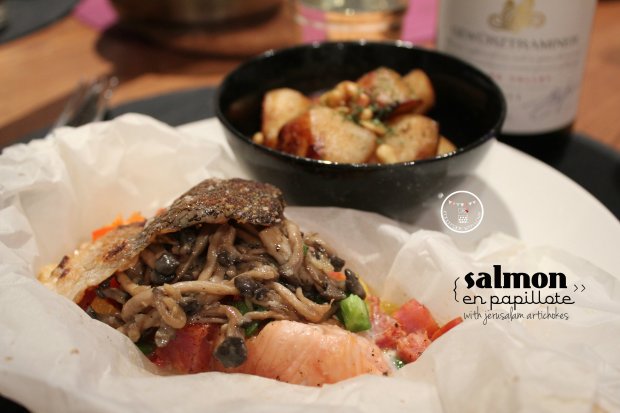
Salmon en papillote with pan fried jerusalam artichokes

There was one way that I’ve been wanting to try out ever since I’ve had it a few years back. En papillote is a method of cooking where food is put in a folded parchment paper in a shape of a pouch or parcel, and then baked! This method is perfect for fish, cause it keeps its moisture while steaming in the pouch. hehe I was taught this method by the talented chefs from Cookyn Inc, when they came to my place to do a private dinner party for my brother’s birthday! Amazing! So big thank you to them!

perfectly cooked salmon

This method doesn’t take long for the fish to be cooked, and the only time consuming step is the preparation of the ingredients. But once that is done, you get a beautifully cooked fish on your plate within 15 minutes! Of course, that depends on the thickness of your protein. hehe So definitely give this method a try, I’m sure you will love it as much as we did!

Salmon en papillote

Salmon En Papillote (Adapted from Cookyn Inc, serves 4)

Ingredients prepped

4 fillets of salmon, cut into 2 inches in width and skin removed & reserved

1 chorizo, cut into cubes

1/2 green capsicum, cubed

1/2 yellow capsicum, cubed

1/2 lemon, thinly sliced

4 tbs of Gewürztraminer (or any white wine, you could use champagne too if you feel generous!)

Salt & pepper, to season

1 packet of brown shimeiji mushrooms, washed and separated

2 cloves of garlic, finely chopped

1 tbs olive oil

2 tbs unsalted butter

thinly sliced lemon

Steps :

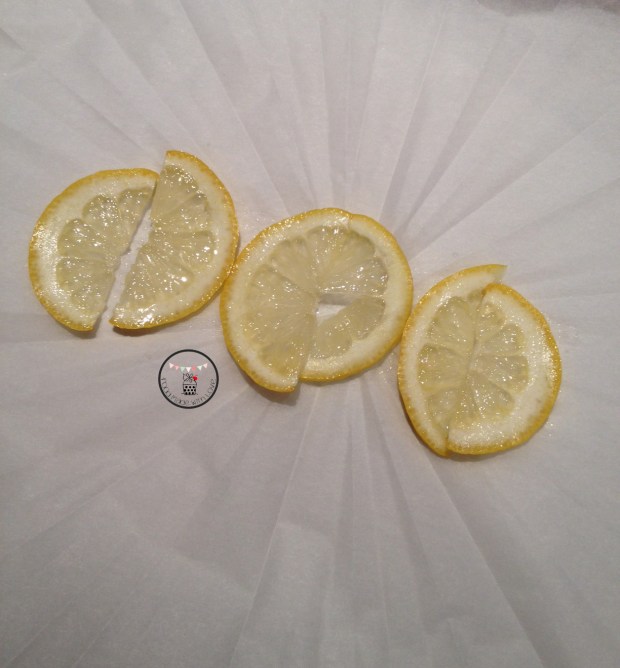
1) Preheat the oven to 170 degrees celcius. Cut 4 pieces of parchment paper (about 30 cm long) and lay them on a flat surface. Then place 3 slices of lemon on the paper without any overlap.

lemon on parchment paper

My paper is fluted and it can be easily done by folding your parchment into a square and then folding it into half diagonally again and again until it gets too small to do so. Then flatten it out before placing the lemon slices.

2) Place the slice of fish on top the of lemon, then add a tbs of chorizo, yellow capsicum and green capsicum.

All ready to be folded

3) Bring the two ends of the paper together and fold it over twice and scrunch them together so they do not unfold. Do the same for one side of the pouch, leaving the other side open.

One side of the pouch left open

4) Carefully pour 1 tbs of Gewürztraminer into each pouch. Then fold the rest of the pouch to seal all the ingredients in. Place the pouches onto a baking tray and bake it in the preheated oven for 17 minutes.

5) While the fish is cooking, heat up a small frying pan and add the olive oil. Fry the garlic till it’s fragrant, careful not to burn them as it will turn bitter. Add the mushrooms and fry till tender. Add the butter and allow it to coat the mushrooms well. Keep it warm until ready to be served.

6) In another frying pan, heat it up on medium heat and place the salmon skin in the pan. Fry both sides till it’s crispy and golden, place on a paper towel to absorb the excess oil. Set aside.

crispy salmon skin

7) To serve : Open the parchment paper, and place the sautéed mushrooms on the fish and top it with a piece of crispy salmon skin. Serve it with your favourite side (I had butter sautéed Jerusalem artichokes with pine nuts) and a glass of Gewürztraminer!

Salmon en papillote - served

Enjoy! (:

Just for fun, I’ve made a short video of the steps from start to finish! Sorry about the background noise but I hope it helps in clarifying how it is done! (:

Thank you Taylors Wines once again for the beautiful Gewürztraminer! It was delicious and definitely one that I can see myself having with my seafood! hehe Hope you all had a wonderful weekend and remember to always cook and bake with love! Till then, xx !

Being Bold – A Recipe & Hudsons Giveaway ! {Winners Announced}

Be Bold

Good afternoon my dear readers! Happy weekend! (: Hope it’s going well and you have lots of fun and yummy things planned ahead of you! Since it’s the start of Spring, I thought it would be a good time to make some new goals!

“Freedom lies in being bold” – Robert Frost

Being bold is about making each day count (be it today, weekly or even for the year), so why not step out of your comfort zone and express your boldness to the world right? hehe The first BOLD thing I’ve decided to do is trying my hardest to make a change in my life – Being healthier and fitter ! My goal couldn’t come in a better time, as Hudsons Coffee also decided to BE BOLD with their launch of a new Barista’s  Choice Blend – A rich and intense flavour with caramel undertones. YUM!

Hudsons Coffee Barista's Choice Blend

I was lucky to receive a a pre-ground take home bag of the new blend and I couldn’t wait to try it! Ever since my brunch at Three Bags Full, I have started a liking to french press coffee! This one wasn’t overly strong on the palette and not too sharp or acidic either! Smooth and a subtle taste of caramel, which the mr loved!

Barista's choice

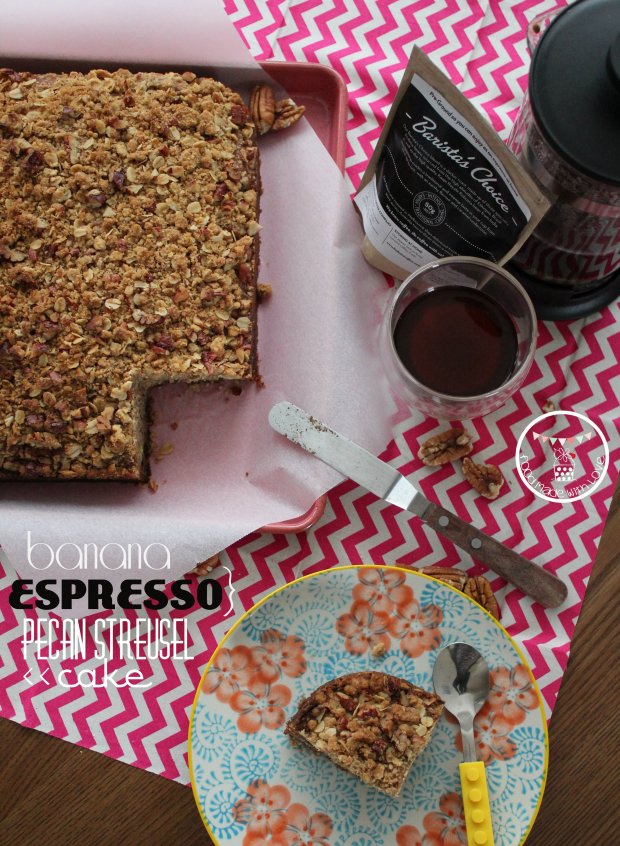
While enjoying my glass of coffee, I had a eureka moment! I really wanted to use it to bake! One particular ingredient came to mind – Banana! So I decided to combine the banana cake with some espresso, and to add some texture to the cake by adding a pecan streusel on top! I have made lots of banana cakes in the past, but never one with a coffee kick! This is me BEING BOLD (number 2) cause I don’t usually bake coffee cakes! So was really excited about this.

Banana Espresso Pecan Streusel Cake

While making the streusel, I couldn’t stop sneaking teaspoons of it, cause it was so addictive! The combination of pecan and oats were just delish! hehe It could easily be turned into a mixture for granola too!

close up

Although I am trying to get healthier and fitter, I still deserve the occasional treats yes? hehe So I added some dark chocolate chips in the cake to make it more indulgent! Anyway, dark chocolate is suppose to be good for you. I’m pretty sure there’s some scientific findings to back me up on this. haha

Slice of banana espresso pecan streusel cake

This cake was moist, full of flavour, and I just love having the bursts of chocolate and the crunch of the streusel top! Definitely one cake I would bake over and over again! You don’t need a very big piece to enjoy it, as it is quite rich. A small piece with a cup of tea or coffee is perfect!

Banana Espresso Pecan Streusel Cake (A Food Made With Love Original Recipe)

For the streusel :

1/2 cup + 2 tbs plain flour

1/2 cup rolled oats

1/2 cup brown sugar

1 tsp salt

85g unsalted butter

3/4 pecans, roughly chopped

Steps :

1) Mix the flour, rolled oats, brown sugar and salt in a medium bowl.

Adding the dry ingredients to make the streusel

2) Add the butter and rub with your finger tips intul the mixture holds together (my favourite thing to do actually, find it very therapeutic! haha).

3) Add the chopped pecans, mix and set aside in the fridge.

Pecan streusel topping

For the cake :

200g unsalted butter

170g castor sugar

4 eggs

1 tsp vanilla bean paste

4 tbs milk

5-6 tbs espresso (I used the Barista’s Choice Blend from Hudsons Coffee)

2 cups + 3 tbs plain flour

1 tsp bicarbonate soda

1 tsp baking powder

3-4 bananas, mashed

3/4 – 1 cup dark chocolate chips

Steps :

1) Preheat oven to 160 degrees C. Prepare a 26cm by 26cm square tin by lining the bottom and greasing the sides. Set aside.

2) In a mixing bowl, cream the butter and sugar until light and fluffy.

3) Add the eggs, one at a time, and mix until well combined. Add the vanilla bean paste and the mashed bananas. Mix till it is evenly mixed.

4) Mix the espresso and milk in a measuring cup and add it alternately with the plain flour (dry-wet-dry-wet-dry sequence). Careful not to over mix.

5) Pour the mixture into the prepared tin and tap it a few times on the bench to make the top even. Sprinkle the streusel and bake for 1 hour or until the top is golden and the toothpick comes out clean. Cover the cake with foil after 30 mins if it browns too quickly.

Ready to go into the oven

6) All it to cool in the tin for 10 minutes and remove it from the tin to rest it on the cooling rack.

all baked and cooled, ready to be sliced and enjoyed

Enjoy! (: It was my very first cake I was confident enough to bring to work and share with my colleagues, and they loved it! (: I brought it in during recess and it was gone by lunch! The feedback was that the cake was really moist and they really liked the surprise of the chocolate chips! Yippee!

So here comes the exciting bit! Tell me how you are going to BE BOLD and take that first step of making a positive change in your life! I’ve taken two, the first one will be on-going and the second one is completed, so I would love to hear your side of the story!

Hudsons Gift Package

Hudsons Coffee and Keep Left PR has been so generous to provide me with two packs of goodies to give away. Similar to what I received, each pack includes : 2 packets (50g each) of pre-ground Barista’s choice beans, 1 (12 oz) Hudsons Keep Cup and a  $10 voucher to enjoy a hot cuppa when you’re around a Hudsons store! So how do you win this awesome pack?

To enter this giveaway :

  • All you have to do is leave a comment letting me know : What kind of BOLD change(s) you want to make in your life. Remember it can be a daily, weekly or even a year long goal! Come on and let’s #BEBOLD together!
  • This giveaway is only open to Australian residents! (Sorry international readers!)
  • Follow me on Facebook, Instagram & Twitter, and let me know when you’ve done it!
  • Follow Hudsons Coffee on Facebook,  Instagram & Twitter as well!
  • Winners will be drawn on the 22nd of September 2013, Sunday at 8pm!
  • You may re-enter daily, one entry a day (Woohoo!)
  • Winners will be picked via random.org and notified on this blog post and via email.

Good luck and have a great weekend ahead! (:

Remember to always cook and bake with love!

Disclaimer : This post is sponsored by Hudsons Coffee & Keep Left PR. I tasted the Barista’s Blend coffee with compliments of both sponsors, however, the review, opinions are honest and based on my personal taste and preference. The recipe is a Food Made With Love original.

~~~~~~~~~~~~~~~~~~~~~~~~~~~~~~~~~~~~~~~~~~~~~~~~~~~~~~~~~~~~~~~~~~~~~~~~~~~~~~~~~

And the winners are…..

Iron Chef Shellie & Bonnie-Kate !! Congratulations!!!! I will be contacting you through email soon! x

Winner number 21

winner number 21 -  Comment

Winner number 18

Winner number 18 - Comment

Congrats again you two and hope you both enjoy your packages! Thank you everyone for your comments again and till the next post, x

{Product Review} Chobani

I have been truly blessed this year. Lots of exciting things happening ever since I got back to Melbourne. One of which is receiving an email from Chontelle, a representative from Chobani Australia, asking if I wanted some samples of their yogurt. Of course, being a yogurt lover, I immediately said “YES PLEASE!” (: The representatives from Chobani were really friendly and super organised! I received a call from them to arrange a suitable time for the goodies to be sent to my home. They said they would try for next day delivery, but no promises. But the next morning, there was a box of delicious greek yogurt delivered to my doorstep!

As you can see, I was still in my pjs! haha (: I was a very happy girl! I have to admit though, that when they told me they were going to send me some samples, I thought I was going to get a maximum of 6. So when I saw how big the box was, I was (delightfully) shocked! 12 generous tubs!

I was given 2 tubs of a variety of 6 flavours each : plain, pineapple, peach, mango, blueberry and strawberry! And I couldn’t wait to dive into them! They were all either low fat or no fat (2% or 0%) which just means there are really good for u! Especially those who are health conscious. Score!

So, before I get into the review, just want to share a little bit about myself. I come from a family who LOVES pineapples. Everyone (except my dear brother) loves pineapples. My dad would head to Pon Tian (a state in Malaysia) and buy back at least 8-10 of their sweetest pineapples for the whole family! The ones he gets are super good though! You can actually eat the core and it’s really crunchy! So when I saw pineapple as one of the flavours… Oh happy days! (:

So without a second thought, I tried (almost immediately after I unload them into my fridge) the pineapple! And when I first peel off the foil, I was greeted by a thick and smooth layer of greek yogurt, and started to wonder, where is the pineapple? Then you stick a spoon in and dig all the way to the bottom, and tadah! the yummy, jammy layer of fruit! Mmm mmm!

Almost similar to a kinder surprise where you don’t really know what at the bottom will look like till you dig in! hehe I’m not sure about you, but I only ever used greek yogurt in my cooking. The natural ones that it. And all I remember from trying a tiny bit of natural is my eye squinting cos of the tartness! haha and before Chobani, I never had a fruity greek yogurt before. I never thought the tartness of the greek yogurt would go so well with fruits! But boy was I wrong. The jammy layer of fruit was just sweet enough to go with the thick and creamy yogurt and really complimented each other! And before I knew it.

This.

Became this!

My favourite was no doubt the pineapple and also the blueberry! Unfortunately,there will always be a flavour that im not a big fan of, and that was the peach. To me the peach was a little too sour and just didn’t compliment the greek yogurt as well as the others, it still had a tartness to it, a bit too much to my liking! But I had a solution for that.

I added some homemade muesli and what a good brekkie that made! And healthy too! I did that for the mango as well (as pictured) and it was really good! Of course, it would also go well with the natural plain greek yogurt but I had other plans for it.

I mixed it with some aubergine and chilli pickle, and it went so went with my corn & okra fritters!

Of course, don’t just take my word for it, do go get some tubs to try it for yourself! They can be found in the yogurt aisle at Woolworths for $2 a tub! And do let me know what you think after you’ve given it a try! Would love to know what you think! (:

I just want to sincerely thank the representatives of Chobani for contacting me and being so generous with the samples! I couldn’t be happier with all the tubs of yogurt I tasted and it definitely made a good breakfast or snack for work!

Once again, thank you Chobani Australia! And as the slogan says, it is definitely ‘nothing but good!’ (:

Disclaimer : There is no financial attachment with this post. I am doing this review as a personal opinion of the product.