Hazelnut Olive Oil Cake

Hazelnut Olive Oil Cake

Hooray! It’s the weekend so let’s celebrate with cake! What better way yes? heh I don’t think anyone can really resist cake, even more so when it’s a gluten free and (almost) healthy one!

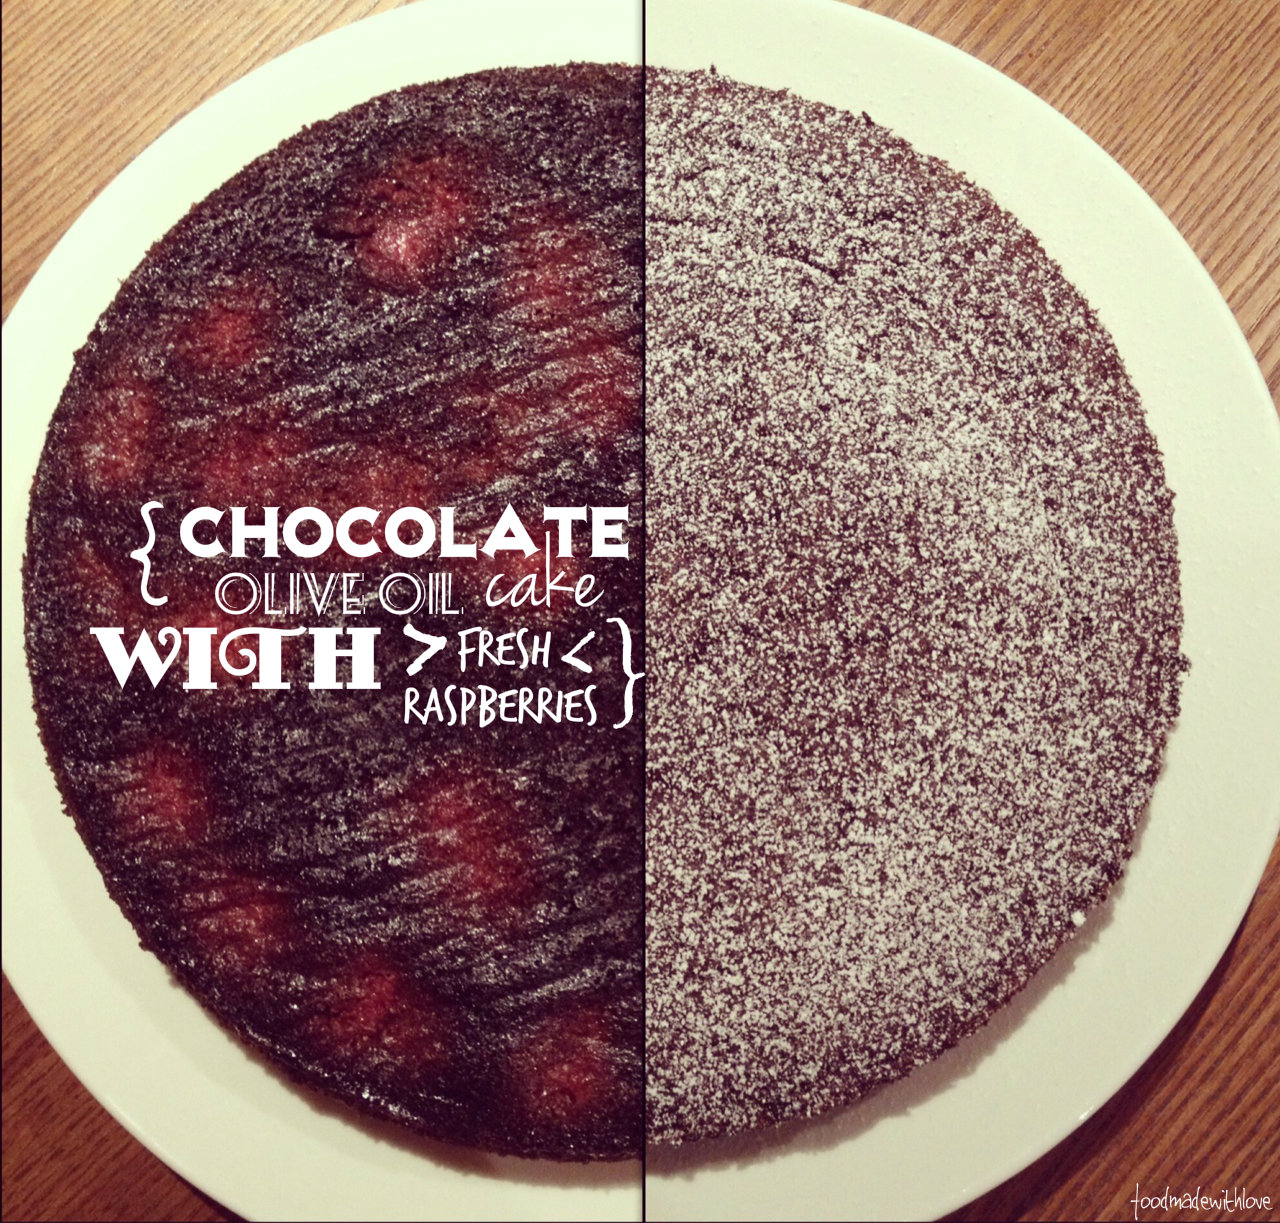
Is there a particular cake that you will never get tired of and would always go-to cause you know it will not fail you? I definitely do! This is one cake that I know that would definitely be a crowd pleaser! The chocolate olive oil cake by Nigella Lawson is simple, delicious and did I say delicious? Whenever I need to make a birthday cake for a close friend, I always turn to this recipe, top them with fresh raspberries and dust with icing sugar and viola! All ready to be consumed and put smiles on people’s faces!

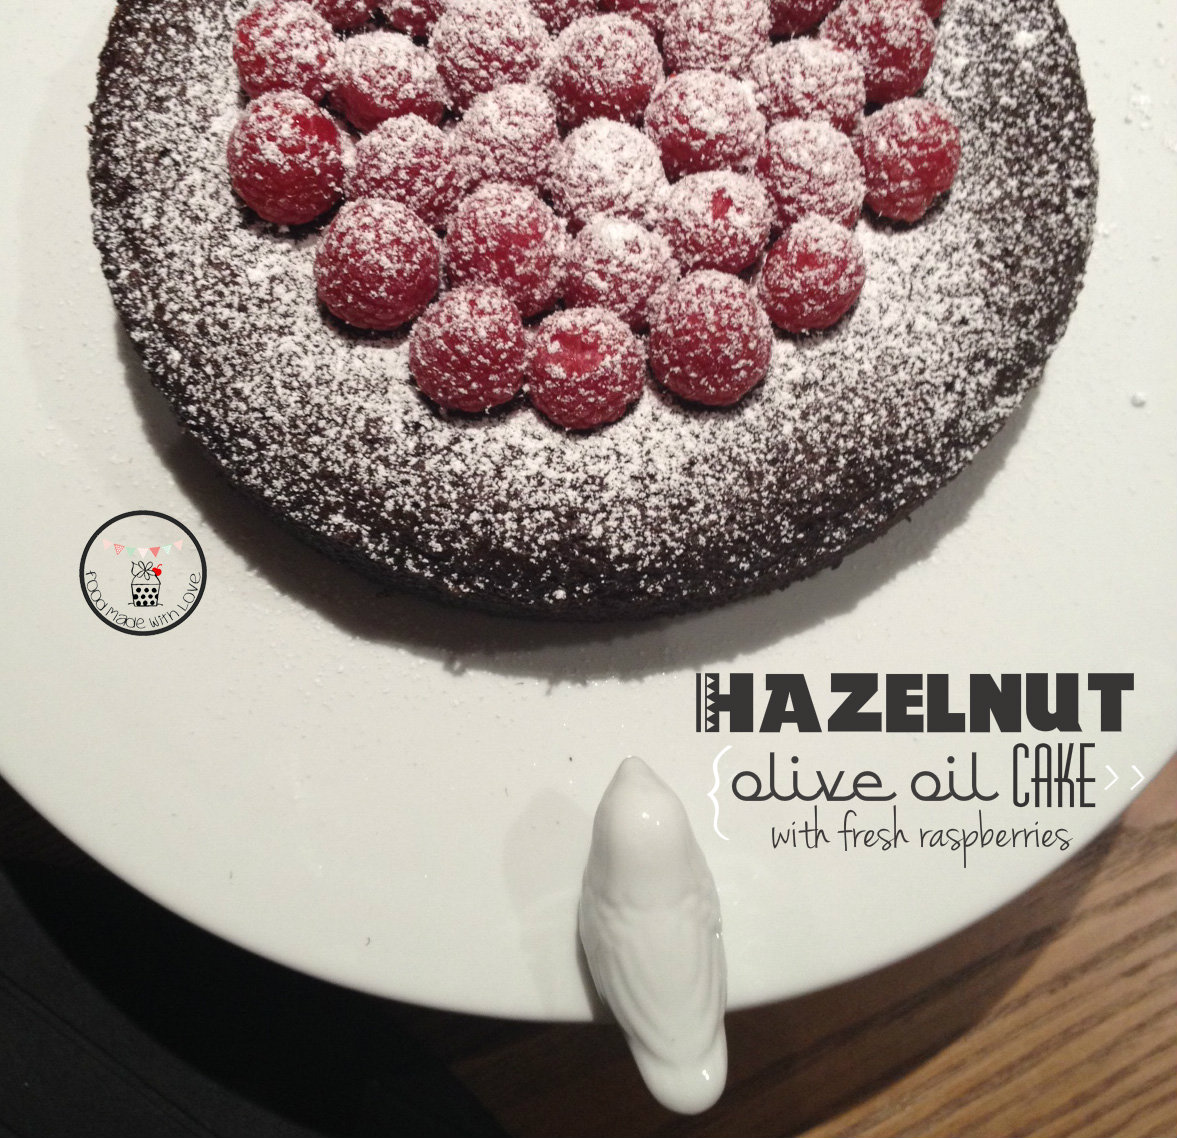
All along, I’ve made it using almond meal, but I few weeks back when I needed to bake a cake for a close friend’s 21st, I had a eureka moment. Why not use hazelnut meal? It would be like a fudgey and moist… nutella cake! How good does that sound? I was so so excited to give it a try!

And it came out just the way I envisioned it to be. Soft, really chocolatey, and so fudgey and moist! OOhhh la-la! It can definitely make one of the sexiest and most decadent chocolate dessert that I’ve ever made! The hazelnut meal elevated it to a whole new level! Definitely gonna stick to using hazelnut meal now. hehe One slice is never enough!

So give this a shot if you love nutella. You will definitely be hooked! It’s gluten free and if you are on a paleo diet, just change the sugar to 1/3-1/2 cup honey and you’re good to go!

Hazelnut Chocolate Olive Oil Cake (adapted from Nigella Lawson)

150 ml regular olive oil (plus more for greasing)

50 grams cocoa powder (good quality, sifted)

125 ml boiling water

1 tsp vanilla bean paste

150 grams hazelnut meal

½ tsp bicarbonate of soda

pinch of salt

170 grams caster sugar (or 1/3-1/2 cup of honey if you want it to be paleo)

3 eggs, room temperature

1 small punnet of fresh raspberries (to top the cake)

Icing sugar, to finish

Steps :

1. Preheat your oven to 170°C/gas mark 3. Grease your springform tin with a little oil and line the base with baking parchment. Measure and sift the cocoa powder into a bowl or jug and whisk in the boiling water until you have a smooth, chocolatey, still runny (but only just) paste. Whisk in the vanilla extract, then set aside to cool a little.

2. In another smallish bowl, combine the hazelnut meal with the bicarbonate of soda and a pinch of salt.

3. Put the sugar (or honey), olive oil and eggs into the bowl of a freestanding mixer with the paddle attachment and beat together vigorously for about 3 minutes until you have a pale-primrose, aerated and thickened cream. Turn the speed down a little and pour in the cocoa mixture, beating as you go, and when all is scraped in you can slowly tip in the hazelnut meal mixture.

4. Pour this dark, liquid batter into the prepared tin. Bake for 40-45 minutes or until the sides are set and the very centre, on top, still looks slightly damp. A cake tester should come up mainly clean but with a few sticky chocolate crumbs clinging to it.

5. Let it cool for 10 minutes on a wire rack, still in its tin, and then ease the sides of the cake with a small metal spatula and spring it out of the tin. Leave to cool completely and place the whole punnet of fresh raspberries neatly on the cake and dust with icing sugar. Serve with a side of freshly whipped cream or a scoop of your favourite ice cream!

Have a chocolatey and hazelnutty weekend everyone! (: Be warned that you won’t be able to stop at a slice for this one! hehe

Remember to always cook and bake with love! Till the next post, xx !

Going Healthy : Cauliflower Rice Salad

Cauliflower rice salad

Hola dear readers! Obviously I still wish I am back in Barcelona. hehe Have you ever felt the need to cut down on food and eat better? After all the good food (and don’t get me started on the amounts haha) that I’ve eaten in Europe, I decided to try and eat a little healthier when we got back. The thing that has been going around alot these days is the Paleo diet. Don’t worry, I’m not on it! haha I, for one, cannot go through a diet for the life of me. Plus my dearest husband will never allow me to. He’s a firm believer of exercise and eating everything in moderation. hehe But there are a few recipes out there which caught my eye and I’ve written down in my recipes-to-try list! hehe One of which is the cauliflower rice!

Cauliflower rice

I was intrigued by the cauliflower rice ever since I’ve seen it on instagram  (follow me on @lianneelow). It’s not rice, but it’s cauliflower that is made to look like rice, and it’s absolutely delicious! hehe There are many different ways to make it and there’s no right or wrong way. The best thing about it is that you can flavour it any way you want! Absolutely anything that you fancy!

Cauliflower rice with dishes

I had mine two ways. One as a substitute for rice/quinoa (with dishes) and another in a salad! They both worked really well but I am addicted to the salad. Which is the recipe I’ll be sharing with you today. And trust me, even though you don’t intend to change your diet, this is something you definitely should try making! Plus, there’s no harm in having something healthy yes? hehe

Cauliflower Rice (Adapted from Nom Nom Paleo)

1 head of cauliflower (cut into small pieces)

3 shallots, finely sliced

1-2 tbs olive oil

1 tsp garlic salt

1 tsp ground ginger

1 tsp ground coriander

A bunch of fresh coriander, roughly chopped

Freshly ground black pepper

cauliflower

Steps : 

1) In a food processor, pulse the cauliflower into the size of couscous or rice grains.

2) In a heavy-based pan, heat the olive oil and sautéed the finely sliced shallots until its soft and aromatic. When it’s softened, add the cauliflower and stir until it is well coated and mixed thoroughly.

3) Season the cauliflower rice with the garlic salt, ground ginger and ground coriander. Cover the pan and allow it to cook for 5-10 minutes. Season with freshly ground pepper and fold in the fresh coriander.

cauliflower rice salad

Cauliflower Rice Salad (Original recipe)

2 cups cauliflower rice

200-300g butternut squash, cubed

1 tsp smoked paprika

1 pint cherry tomatoes (250g, sliced into halves)

Juice of 1 lemon

3 tbs extra virgin olive oil

1 can of chickpeas, drained

salt & pepper, to season

handful of fresh coriander, roughly chopped

Steps :

1) On a lined baking tray, place the butternut squash and sprinkle paprika and salt. Drizzle some olive oil over. In a preheated oven (180 degrees celcius), bake the butternut squash for 15-20 minutes, or until the squash is tender. Remove from the oven and set aside to cool.

2) In a small bowl, emulsify the oilve oil with the lemon juice and set it aside.

3) In a large bowl, place the cauliflower rice, then top with the butternut squash, cherry tomatoes and season with salt & pepper. Drizzle the emulsified lemon juice and olive oil and add in the chopped coriander. Give it a good mix until well combined.

Cauliflower rice salad

4) Eat it by the spoonful or keep it in the fridge for up to 3 days.

my lunch

I had mine with some extra pine nuts and a hard boiled egg for some extra protein! hehe See, you can have it anyway you fancy!

Enjoy and remember to always cook and bake with love! 

Weekend Baking : Chocolate Olive Oil Cake with Fresh Raspberries

chocolate olive oil cake with fresh raspberries

It’s been a while since I’ve baked something and I was really craving for some olive oil cake. Since it’s the weekend, and it’s been pouring, I decided to stay in and bake! (: Which was a perfect idea, if I can’t say so myself. hehe I was searching around for a recipe, and thankfully, Miss D  shared with me Nigella Lawson’s chocolate olive oil cake. The best of my two worlds : olive oil & chocolate. Who wouldn’t like chocolate yes? Plus, it is actually good for you!

chocolate olive oil cake with fresh raspberries

I was a little worried about making it as I haven’t really made any cake with completely no flour. But it came out beautifully and was rich but surprisingly not too dense! It was still crumbly and actually pretty light. Was a hit with the mr from the first bite! (I sounded like I was rhyming there haha) Love the intensely deep colour of the cake in contrast with the white icing sugar. For some reason, icing sugar reminds me of snow. And it’s really magical, it makes every cake prettier! (:

Chocolate olive oil cake sliced and topped with freshly whipped vanilla bean cream

The original recipe of the cake is really quite healthy; no flour, no butter and not quite as much sugar as well. Just olive oil which is good for you and the chocolate component only consist of cocoa powder and water! How good is that? To make it a little healthier, I added fresh raspberries which added a little zing to the cake! And not to mention how pretty it looks with the specks on red when cut! (: Plus it’s gluten free! Wheeee!

chocolate olive oil cake with raspberries

Do note though that if you do put fresh raspberries in, you might have to finish it in a day or two if you leave it out. Probably can only be kept for up to a week in the fridge. But it probably won’t last longer than that anyways! hehe

Chocolate Olive Oil Cake with Fresh Raspberries (adapted from Nigella Lawson)

150 ml regular olive oil (plus more for greasing)

50 grams cocoa powder (good quality, sifted)

125 ml boiling water

1 tsp vanilla bean paste

150 grams ground almond

½ tsp bicarbonate of soda

170 grams caster sugar

3 eggs, room temperature

1 small punnet of fresh raspberries

freshly whipped vanilla bean cream, to garnish (or ice cream)

Steps :

1. Preheat your oven to 170°C/gas mark 3. Grease your springform tin with a little oil and line the base with baking parchment. Measure and sift the cocoa powder into a bowl or jug and whisk in the boiling water until you have a smooth, chocolatey, still runny (but only just) paste. Whisk in the vanilla extract, then set aside to cool a little.

2. In another smallish bowl, combine the ground almonds with the bicarbonate of soda and pinch of salt.

3. Put the sugar, olive oil and eggs into the bowl of a freestanding mixer with the paddle attachment and beat together vigorously for about 3 minutes until you have a pale-primrose, aerated and thickened cream. Turn the speed down a little and pour in the cocoa mixture, beating as you go, and when all is scraped in you can slowly tip in the ground almond mixture.

4. Scrape down, and stir a little with a spatula,and add the fresh raspberries. Give it a gentle stir until the raspberries are well mixed in. Pour this dark, liquid batter into the prepared tin. Bake for 40-45 minutes or until the sides are set and the very centre, on top, still looks slightly damp. A cake tester should come up mainly clean but with a few sticky chocolate crumbs clinging to it.

5. Let it cool for 10 minutes on a wire rack, still in its tin, and then ease the sides of the cake with a small metal spatula and spring it out of the tin. Leave to cool completely or eat while still warm with some freshly whipped vanilla bean cream or some ice cream.

pacman

Couldn’t help myself but had to take a shot of the cake when it looks like pacman! hehe (: Have a good week ahead everyone!

Remember to always cook and bake with love!