Toddler Eats : Cheesy Chicken & Veggies Meatballs

unnamed-2-1-1

Now that Lochlan has turned one (where did time go??), I’m trying to wean him from purees and introduce chunkier food, to encourage him to chew. Don’t get me wrong, he knows how to chew. But just prefers the purees cause he could finish it much quicker. haha So this marks the start to my new series of Toddler Eats! Hopefully it will be helpful to mummies out there who also want to try different foods and make them from their kitchen when time permits!

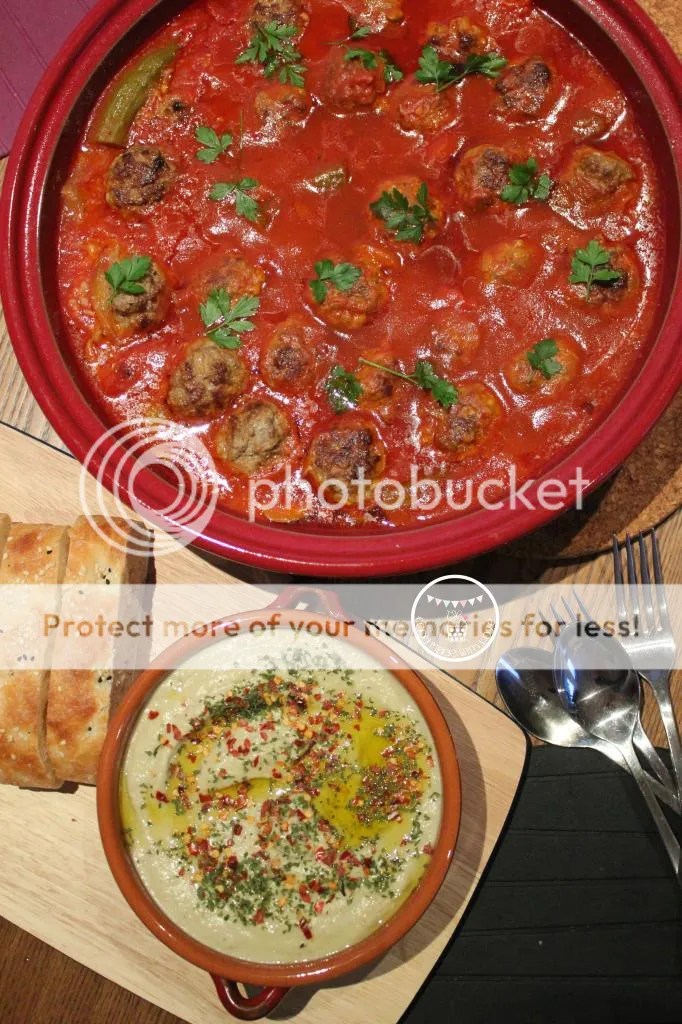
I decided to try making something I thought he might like! I mean, who doesn’t enjoy a good meatball? Especially with the addition of cheeeeese! These are quick and easy and you could have it on its own or mix it with pasta and some homemade tomato sauce and viola! Meatball pasta!

Meatball pasta

Lochlan’s Verdict : 2 1/2 meatballs (together with other food for dinner and strawberries for dessert hehe). I think thats a not too bad start!

 With the addition of cheese, you don’t even need to add salt to it. So it’s perfect even for babies from 10 months! Especially if you wanna do Baby-Led-Weaning. hehe Perfect finger food! These are not just for your little ones at home, the mr and I enjoyed it too!

So here’s the recipe, do give it a shot and let me know what u or your kiddos think!

Cheesy Chicken & Veggies Meatballs (A Food Made With Love Original Recipe)

Ingredients : Makes 24-26 meatballs

250g mince chicken (or meat of your choice)

2 stalks of spring onions, finely sliced

1 small carrot, grated

1/4 apple, grated

2 cloves of garlic, finely chopped

1/2 zucchini, grated

2-3 florets of broccoli, finely chopped

50g cheddar cheese, grated

1 egg

Ground black pepper, to season

Ingredients

(I’ve got a double yolk! Lucky me! hehe)

Steps :

1) Preheat your oven to 170 degrees celcius. Spray/Oil a baking tray/ casserole dish and set it one side.

2) Mix all the ingredients in a big bowl until well combined.

Mixed till well combined

3) Using a tablespoon, roll the mixture into balls. Do note that the mixture will be a bit wet and sticky. Wetting your hands might help in the rolling process.

Rolled out

4) Place the meatballs onto the baking dish, and bake for 12-15 mins, until the meatballs are cooked through and/or slightly browned.

All baked

5) Serve as is or you could cook it in a homemade tomato sauce and toss it through some cooked pasta for a variety!

Enjoy!

P.S : You don’t have to grate the vegetables if you’re cooking for yourself or older kids and want more texture. Just finely diced them and it would be as delicious! Also you could always change the types of vegetables in the meatballs, find a combination that wins the most votes in your house! (:

Have a lovely weekend everyone! Remember to always cook and bake with love!

Till the next post, xx !

Ratatouille & A Good Food and Wine Tickets Giveaway!

Ratatouille

I’ve always wanted to give this a try. Ever since I watched the little rat who could cook this dish perfectly in Ratatouille! The vibrant colours just catches my eye instantly, and I think it’s such a celebratory dish – A celebration of colours!

Also, it was my brother’s birthday and I just wanted to cook him something special! Of course, I didn’t only cook him one dish, I made 4! haha This dish pairs perfectly with seafood, so I made some white wine and cream mussels, homemade garlic bread and mushroom risotto! Mmmm!

kors birthday

mushroom risotto

Don’t you love just cooking for people you love? It’s seriously something I love to do. And seeing their reaction when they take the first bite, it’s worth all the time and effort!

Ratatouille

Making the ratatouille was so much fun! One reason was that I got to play with the mandolin. Slicing those vegetables into the same thickness couldn’t be any easier! Fastest prep ever! haha So if you would like to impress your guest the next time u cook for them, I highly recommend making them ratatouille! My family loved how it looked, and enjoyed every single bite!

Ratatouille

Ratatouille (Adapted from The Walsh Cookbook)

Ingredients : 

1 medium green zucchini

1 medium yellow zucchini

1 eggplant (preferably the thin ones)

1 red capsicum

1 yellow/green capsicum

3 tomatoes

1 red onion, diced

2 cloves of garlic, finely chopped

1 can of tomato puree

1 tsp red chilli flakes

1 tsp italian herbs/ mixed herbs

1 tsp salt

2 tbs olive oil

Parmesan cheese

Steps :

1) Preheat oven to 170 degrees celcius. Try to get the vegetables around the same size, so that they would look neater in your dish! Slice all the vegetables using a mandolin and set aside.

2) Heat a cast iron pot (or any pot that can be used in an oven) over a medium-high flame. Add the olive oil, garlic and onion and sauté till fragrant, careful not to burn them, as they will have a bitter after taste. Add in the tomato puree, salt, herbs & chilli flakes, and allow it to simmer for 5 mins.

3) Carefully arrange the vegetables, alternating the slices of zucchini, eggplant, capsicum and tomato. Continue laying them till you fill your dish and cover with a baking paper to allow it to steam and cook, keeping all the juices in. Bake for 45 mins.

Covered with baking paper

4) Remove the baking paper and sprinkle the parmesan cheese over the top and serve!

How easy is that? And I can promise you that everyone will definitely enjoy this! So definitely give it a try when you can!

~~~~~~~~~~~~~~~~~~~~~~~~~~~~~~~~~~~~~~~~~~~

Okie. So now… time for the GIVEAWAY!

GFWS Citi_Logo 2015-02

So everyone knows the one event I look forward to every year is no doubt the Melbourne Good Food and Wine Show. Endless food & wine, beautiful produce and you get to meet your favourite chefs!

Good Food Theatre

This year, I am lucky enough to be given 2 double passes to giveaway to my readers! Whoopeedoo! What’s more exciting is that this year, Ainsley Harriott will be there for all 4 days of the show (5-8 June), along with Miguel Maestre & Alastair McLeod! So you definitely don’t want to miss the show this year! I can still remember when the Mr bought me tickets to a Private Dining session with Manu Feildel 3 years ago! Definitely a dream come true and an experience I will never forget!

How do you win those tickets? Easy!

  • Leave a comment and share with me the favourite dish you love to cook for your loved ones for a special occasion!
  • This giveaway is only open to Australian residents! (Sorry international readers!)
  • Please join me on my journey! Follow me on FacebookInstagram and Twitter! Let me know once you have followed me!
  • You may re-enter daily! One entry a day! (Oh yeah!)
  • Winners will be announced on the 29th of April, 10pm.
  • Winners will be picked via random.org and notified on this blog post and via email.

So what are you waiting for? Let’s go!

~~~~~~~~~~~~~~~~~~~~~~~~~~~~~~~~~~~~~~~~~~~~~~~

WINNERS!

Congratulations to Good Food Good Karma and Ross! Here’s what they said :


Comment Number 8 Winner 1 - Number 8

Comment number 6 Winner 2 - Number 6

Salmon and roast! Two delicious things I too would cook for loved ones at a special occasion! Congrats again and I will be in contact with you soon, through email! Thanks everyone for participating!

Disclaimer : The tickets were given in compliments of Red Agency and I wasn’t paid to run this giveaway. 

Tagine Magic : Moroccan Meatballs & Baba Ganoush

IMG_8881-1-1

I haven’t had much Moroccan food, but I can distinctly remember the first time I had it while we were still living in Brunswick many years back. On Sydney Road sits a small little Spanish/Moroccan restaurant, LaPaella, that sells really delicious Moroccan food and it was from this experience where I drew my inspiration from! I was really lucky to receive an Emile Henry tagine from Kitchenware Superstore, so it was perfect for me to make something Moroccan for dinner!

emile_henry_red_tagine

(photo credits : The Kitchenware Superstore)

The 32cm tagine came in a beautiful dark red and the best thing was it was made using the new flame top tecnologyan innovation in ceramics, with the development of a new glazed clay, exceptionally resistant to heat. So it didn’t even need a flame diffuser if you’re using the stovetop! How good and convenient is that?

Moroccan meatballs with baba ganoush

It also keeps the food warm for a longer time! So you’ll still get hot food after all the photo taking! haha (: Definitely perfect for me! hehe

Moroccan meatballs with baba ganoush and turkish bread

I am all for having a balanced meal, so besides the Moroccan meatball, I charred some vegetables, added some okra and also made baba ganoush to go with as a side! This combination, I have to admit, is addictive! hehe You can’t stop having it. I assure you!

So here is the recipe and if you don’t have a tagine, I encourage u to get one, if not, you could always make it in a shallow frying pan. But a tagine is recommended! hehe

Moroccan Meatballs with Baba Ganoush (Recipes adapted from Baltic Maid & David Lebovitz)

For the meatballs :

300g mince pork

300g mince beef

1 small onion, finely chopped

2 cloves garlic, finely chopped

1 tsp salt

1 tsp ground ginger

1 tsp paprika

1 tsp ground coriander

1 tsp cumin

1/2 tsp cinnamon

2 tbs of olive oil, for frying

For the spicy tomato sauce : 

1 can of chopped tinned tomatoes

1/2 cup passata

2 cloves of garlic, finely chopped

1 tsp chilli flakes

1/2 cup of beef stock

1 packet of okra (about 200g)

1 red capsicum

1 yellow capsicum

1 green capsicum

1 tsp salt

For the baba ganoush :

2 medium size eggplant

2 heap tbs tahini

Juice of 1 lemon

2 cloves garlic, peeled and smashed

1/4 tsp chilli power

1 tbs olive oil, and extra to serve

1 tsp salt, or more to season

chopped parsley & chilli flakes, to garnish

Steps :

1) Under a hot grill, grill the capsicums and egg plant till they are tender and charred. Place them in a metal bowl and cover with cling wrap for about 10 mins. The charred skin would peel off easily. Slice the capsicum lengthwise and place in a bowl. Put the grilled eggplants (let whole) aside.

2) Place the tagine on the stove over medium heat. Add the tinned chopped tomatoes, passata, garlic, beef stock and allow it to come to a simmer for 10 mins. Add the okra and cover, allowing the okra to soften (about 10 mins). Add the chilli flakes.

making the spicy tomato sauce

3) Add the sliced roasted capsicum into the sauce and allow it to simmer for another 10 mins. Stirring to make sure the bottom is not sticking. Then switch it off, leaving the cover on.

Add the roasted capsicum into the sauce

4) For the meatballs : Add all the ingredients into a large meta bowl and mix till well combined.

Ingredients for the meatballs

5) Form the meatballs according to the size you fancy and place them on a plate. Heat a heavy based frying pan on medium heat then add the olive oil. Brown the meatballs on both sides then add them into the spicy tomato sauce (in the tagine). Cover and allow it to simmer on low heat for 20 minutes.

Frying the meatballs

6) While the meatballs are simmering away, slice the roasted eggplant into half, lengthwise, and scrape all the flesh into a food processor. Add the garlic, tahini, chilli powder and blend till quite smooth. Add the lemon juice, salt and olive oil. Blend till well combined. Place in a bowl, drizzle with more olive oil and garnish with chilli flakes and chopped parsley.

Moroccan meatballs

7) Garnish the meatballs with fresh parsley and serve with baba ganoush and warm turkish bread!

Moroccan meatballs with baba ganoush and turkish bread

Enjoy! (:

Hope you all had a great weekend and here’s to an awesome week ahead! Remember to always cook and bake with love! Till the next post, xx!

Disclaimer : I was given the tagine by Kitchenware Superstore to test and write a review, but all opinions and experience are based on my time of use! Thanks so much for this amazing tagine! 

Going Healthy : Cauliflower Rice Salad

Cauliflower rice salad

Hola dear readers! Obviously I still wish I am back in Barcelona. hehe Have you ever felt the need to cut down on food and eat better? After all the good food (and don’t get me started on the amounts haha) that I’ve eaten in Europe, I decided to try and eat a little healthier when we got back. The thing that has been going around alot these days is the Paleo diet. Don’t worry, I’m not on it! haha I, for one, cannot go through a diet for the life of me. Plus my dearest husband will never allow me to. He’s a firm believer of exercise and eating everything in moderation. hehe But there are a few recipes out there which caught my eye and I’ve written down in my recipes-to-try list! hehe One of which is the cauliflower rice!

Cauliflower rice

I was intrigued by the cauliflower rice ever since I’ve seen it on instagram  (follow me on @lianneelow). It’s not rice, but it’s cauliflower that is made to look like rice, and it’s absolutely delicious! hehe There are many different ways to make it and there’s no right or wrong way. The best thing about it is that you can flavour it any way you want! Absolutely anything that you fancy!

Cauliflower rice with dishes

I had mine two ways. One as a substitute for rice/quinoa (with dishes) and another in a salad! They both worked really well but I am addicted to the salad. Which is the recipe I’ll be sharing with you today. And trust me, even though you don’t intend to change your diet, this is something you definitely should try making! Plus, there’s no harm in having something healthy yes? hehe

Cauliflower Rice (Adapted from Nom Nom Paleo)

1 head of cauliflower (cut into small pieces)

3 shallots, finely sliced

1-2 tbs olive oil

1 tsp garlic salt

1 tsp ground ginger

1 tsp ground coriander

A bunch of fresh coriander, roughly chopped

Freshly ground black pepper

cauliflower

Steps : 

1) In a food processor, pulse the cauliflower into the size of couscous or rice grains.

2) In a heavy-based pan, heat the olive oil and sautéed the finely sliced shallots until its soft and aromatic. When it’s softened, add the cauliflower and stir until it is well coated and mixed thoroughly.

3) Season the cauliflower rice with the garlic salt, ground ginger and ground coriander. Cover the pan and allow it to cook for 5-10 minutes. Season with freshly ground pepper and fold in the fresh coriander.

cauliflower rice salad

Cauliflower Rice Salad (Original recipe)

2 cups cauliflower rice

200-300g butternut squash, cubed

1 tsp smoked paprika

1 pint cherry tomatoes (250g, sliced into halves)

Juice of 1 lemon

3 tbs extra virgin olive oil

1 can of chickpeas, drained

salt & pepper, to season

handful of fresh coriander, roughly chopped

Steps :

1) On a lined baking tray, place the butternut squash and sprinkle paprika and salt. Drizzle some olive oil over. In a preheated oven (180 degrees celcius), bake the butternut squash for 15-20 minutes, or until the squash is tender. Remove from the oven and set aside to cool.

2) In a small bowl, emulsify the oilve oil with the lemon juice and set it aside.

3) In a large bowl, place the cauliflower rice, then top with the butternut squash, cherry tomatoes and season with salt & pepper. Drizzle the emulsified lemon juice and olive oil and add in the chopped coriander. Give it a good mix until well combined.

Cauliflower rice salad

4) Eat it by the spoonful or keep it in the fridge for up to 3 days.

my lunch

I had mine with some extra pine nuts and a hard boiled egg for some extra protein! hehe See, you can have it anyway you fancy!

Enjoy and remember to always cook and bake with love! 

Kale Chips Two Ways

c7857fe0-131b-400e-8963-3bfbd3b9027b

Sorry for the long pause dearest readers! I’ve been away in Singapore spending time with my family and friends so didn’t really have the time to post the delicious food I’ve been having! But I promise that I will be sharing with you my food adventure in my next few posts! But before I do that, I want to share with you a super snack : kale chips !
Kale is not something I’ve eaten often. But the few moments that I had the chance to have it, I absolutely loved it. I had them as a side to my mains but never had it as a snack before. Some time last year, I’ve seen people making kale chips and I really wanted to make some myself. So when I saw some at Dandenong Markets this morning, I had to get a packet.
Kale
When I got home I couldn’t wait to get started! Just the idea of having a healthier snack option was enough to make my belly happy! hehe Especially since I’m trying to get back into a healthier lifestyle. That’s my goal set for this year (: So if you’re like me, and would like to have an option of a healthy snack. Do give this a go! The hubs and I are totally addicted to it now and it’s barely been 12 hours since I’ve made it!
So be warn, cause these are definitely addictive! hehe
Cayenne & Sesame kale chips
Cayenne & Sesame Kale Chips (A Food Made With Love original recipe)
1/2 a packet of kale
1/2 tsp salt
1 tsp cayenne pepper  powder
1 1/2 tbs toasted sesame seeds
1/2 tbs olive oil
Steps : 
1) Preheat the oven to 150 degrees celcius. Line 2 baking trays with baking paper. Trim the tough stems from the kale and discard. Cut the larger leaves into smaller pieces (about 2 inches); leave the small pieces whole.
2) Place the leaves in a large bowl and drizzle with olive oil. Give it a good toss. Season with salt, cayenne pepper and toasted sesame seeds. Give it another good toss, to make sure the leaves are well coated.
3) Arrange the kale on the baking sheets in a single layer and bake for 10 minutes before rotating and bake for another 5 minutes until crispy. Remove the trays from the oven and allow them to cool for a couple of minutes. Transfer to a large serving bowl.
Single layer kale leaves placed on baking tray ready to be baked!
Chilli & Parmesan Kale Chips (Adapted from Whole Foods Market)
1/2 a packet of kale
1/2 tsp garlic salt
1 tsp chilli powder
1/2 tbs olive oil
1 tbs grated parmesan
Steps :
1) Preheat the oven to 150 degrees celcius. Line 2 baking trays with baking paper. Trim the tough stems from the kale and discard. Cut the larger leaves into smaller pieces (about 2 inches); leave the small pieces whole.
2) Place the leaves in a large bowl and drizzle with olive oil. Give it a good toss. Season with garlic salt, chilli powder and the grated parmesan. Give it another good toss, to make sure the leaves are well coated.
3) Arrange the kale on the baking sheets in a single layer and bake for 10 minutes before rotating and bake for another 5 minutes until crispy. Remove the trays from the oven and allow them to cool for a couple of minutes. Transfer to a large serving bowl.
Chilli & Parmesan Kale Chips
Super kale indeed! Definitely something everyone would enjoy!
Ps : Remember to always cook and bake with love! (:

Okonomiyaki

I love Fridays! It’s not just a short day at work, but I also get to try something new for dinner which ushers in the weekend! So I decided that we shall have a Japanese-themed dinner! (: After searching Tastespotting for some inspiration, I decided on two dishes for the night : Okonomiyaki & salmon, shiitake and edamame  soba noodles!

So what is okonomiyaki? It is actually a savoury pancake that is mainly made up with cabbage and anything you wanna put in it! I’ve had it a couple of times, and really love it with the combination of mayonnaise and bbq sauce. Since it was Friday, we had ours with prawns! (:  I realised that I have been having heaps of Korean, and was really craving for some Japanese. I have to say though, I’m really lucky that the mr eats everything, so I am able to cook what I wanted. And he would happily eat it! hehe PHEW!

I think it turned out really well for a first-timer! (: But a pity I didn’t shred my cabbage thin enough so it was a little chunkier than I wished, and a little difficult to shape it into nice circles when pan-frying it. But besides that, it was really simple and yummy! And one thing I really enjoyed was alternating the sauces and using the toothpick to make the marbling effect on top of the pancake! hehe

Okonomiyaki (adapted from Las Vegas Food Adventures)

2 cups green cabbage, finely shredded

6 fresh shiitake mushrooms, thinly sliced

1 clove garlic, finely chopped

330g prawn, deveined and cut into half

1 cup plain flour

1 tbs corn flour

1/2 tsp baking powder

2/3 cup stock (I used fish stock, but you can always use chicken or dashi)

1 egg

salt, to season

Steps :

1) Combine the flour, corn flour and baking powder and mix it well. Mix the fish stock and egg together, and combine with the flour mixture. Mix until you get a thick pancake batter.

2) Add the cabbage, shiitake mushrooms, prawns and garlic to the batter. Season with salt. Heat a non-stick frying pan on medium fire, and add some vegetable oil. Add half of the pancake mix and flatten it to the depth of the prawns with a spatula.

3) Cook the pancake for about 10-15 minutes, flipping several times, until both sides are golden brown.

4) Serve it hot, drizzle the top with japanese mayonnaise and homemade bbq suace (recipe below).

~~~~~~~~~~~~~~~~~~~~~~~~~~~~~~~~

Bbq Sauce

1/2 cup ketchup

1/4 cup Worcestershire sauce

1/4 cup Soju/ Sake

1/2 tsp brown sugar

1) Mix everything together and whisk until the sugar is completely dissolved. Place in a squeeze bottle, so you could easily drizzle on the pancake.

~~~~~~~~~~~~~~~~~~~~~~~~~~~~~

ENJOY!

PS : Stay tuned for the recipe of the salmon soba noodles ! 

Corn & Okra Fritters with Smoked Salmon

Corn fritters. Who doesn’t like them? Whenever I go for brunch, I will first look out for corn fritters on the menu and if there isn’t any then I will venture out to try something else! That’s how much I like corn fritters. Nothing better than having something crispy on the outside and soft on the inside with corn kernels bursting in your mouth with every bite! mmmm.

Corn fritters at Replete Providore sparked my obsession with fritters (:

The best corn fritters I had was at Replete Providore in Hawthorn and I couldn’t get enough of it after that! I can proudly say Replete Providore sparked my addiction to corn fritters (yes, it was THAT good!)! They serve theirs with bacon, sour cream and tomato-chilli relish which was sweet and tangy which I love!

But cause I made these on a Friday, and it’s meatless Friday. I had to use something else besides bacon. So opening the drawers in the fridge, I found my last packet of smoked salmon! The first was used to make the tomato and cream smoked salmon pasta a week ago! *PHEW* Lucky I had a packet left, as I was sure the saltiness of the smoked salmon would be perfect with these fritters!

 Instead of layering it with sour cream and the tomato-chilli relish, I thought I made it less sinful (just a tad bit) by mixing plain greek yogurt with the aubergine (eggplant) and chilli pickle I bought from a little store at Mount Dandenong a while back.

It was perfect! Creamy-sourish-spicy and added just a little touch of sweetness with some sweet chilli sauce as garnish.

These fritters were crispy and I added cheese to it so it was cheesy in the center. Everything you would want in your breakfast. The addition of okra was surprisingly good because it added an extra crunch. Just love different textures in my dishes! hehe So if you’re a corn fritter lover like me and wanna try whipping this up, here is the recipe! (: I’m very sure you will love it! Cos the mr and I both did!

Corn & Okra Fritters with Smoked Salmon (makes 5 relatively large fritters, serves 2)

 12 pieces of okra, sliced

1/2 cup of corn kernels, roasted in the oven and cooled down

1/2 cup + 2 tbs plain flour

1/2 cup chredded tasty cheese

4 mini bocconcini, sliced thinly

2 tbs grated parmesan cheese

1/2 tsp sea salt

1/3 cup whole milk

1 egg

freshly ground black pepper, to season

fresh coriander, for garnish

2 tbs sweet chilli sauce, for garnish (1 tbs for each stack)

vegetable oil, for frying

aubergine & chilli pickle yogurt dressing (optional, recipe to follow)

100g smoked salmon

Steps :

1) Heat the vegetable oil in a deep frying pan over medium heat while preparing the fritter batter.

2) In a large mixing bowl, combined the okra, corn kernels, the cheeses, salt and pepper and mix it well. Add the flour and stir with a wooden spoon/spatula. Add the milk and egg and mix until there are no dry flour left in the bowl.

3) Once the oil is hot enough (test this by dropping a little of the batter into the oil, it should bubble vigorously), drop 2 heap tablespoons of batter into the oil and flatten it with a wooden spoon. Make sure it’s not too thick, or else the middle might be raw after being pan-fried.

4) Fry the batter one at a time, or at most 2. Fry each side for 2-3 minutes or until each side is a beautiful golden brown. Remove and place on a paper towel to absorb excess oil.

5) Serve with alternate layers of fritters, yogurt dressing and smoked salmon in a stack and top with a tablespoon of sweet chilli sauce for each stack and fresh coriander. Make sure you serve the fritters warm/hot!

Aubergine & Chilli Pickle Yogurt Dressing

2-3 heap tbs of aubergine & chilli pickle (or any relish you have in your pantry)

4-5 tbs plain greek yogurt

Step :

Just mix the pickled relish and the greek yogurt together till well combined. Chill in the fridge till ready to be used!

oh yes, if you don’t have the aubergine and chilli pickle, you can use any relish you want and use plain greek yogurt or sour cream instead! The beauty of making your own breakkie at home – use what you have at home and let your creativity run wild!

Enjoy! (:

Stir Fried Okra (Lady’s Finger)

I never really liked okra when I was young. The only memory I had of okra of is using it during Arts and Craft lessona at school. Have you done those vegetable prints before when you were little? We use to do heaps! And using okra was very popular as it makes pretty flower prints!

(image credit to http://bkids.typepad.com)

So I never really knew how it tasted! Also, the slimy texture on the inside kinda puts me off as well. Always thought it was kinda gross. haha My brother still thinks it’s gross! But he was never a fan of slimy or soft textured food. The first time I had it was in the fish head curry my mum cooked and I loved it! But I didn’t know if I liked it cause of the curry gravy that made it yummy! So mum sitr fried it during dinner one night and I absolutely loved it!

This is my mum’s version of the stir fried okra! Mine looks a little different. haha Hers is still a little crunchier and is less gooey. I think my wok wasn’t hot enough! :O But nonetheless, it was still yummy and the taste was quite similar! So I was really happy with my first attempt of cooking it!

I guess there are many ways you can slice your okra. I prefer mine thin and cut at an angle. But even if you cut it round, it would look nice too! Just that when it’s slightly thicker, might take a longer time to soften. So do take note!

Also, I am really lucky that my dearest mum made me a huge bottle of her own sambal chilli. But if you don’t have sambal in your fridge, just slice up a large chilli thinly and it would work too!

So here’s the recipe for my version of the stir fried okra. I decided to put it in a recipe card for a change! What do you think?

Have this dish with a hot bowl of rice! *slurps* ENJOY! (: