A Sugee Cake Just To Say Thank You.

I recently stopped work and really wanted to thank my boss and I knew from the very start sugee cake was her facourite cake of all time. So I couldn’t not bake it for her. I never really baked it before, and was a little nervous to be giving her my very first attempt to be honest. But as I was leaving for Melbourne very soon, I didn’t have much time to bake another. So a successful first attempt was what I was praying for!

Thankfully, I read Ju’s post on The Little Teochew (yes the same awesome person who baked and shared her Japanese Cheesecake recipe, thank you!) a couple of months ago, and bookmarked the recipe of the sugee cake she baked (adapted from Cherry on a Cake) and hers looks amazing! So I took a deep breath and plucked up my courage and gave this a try.

Ju did use almond silvers but I didn’t have that, and used pumpkin seeds instead. However, they didn’t stay on top and sank all the way to the bottom instead! hehe I must say it didn’t look very pretty, but it did taste pretty good! and goes well with a hot cup of coffee or tea. Thankfully, my boss enjoyed it very much! (: So thank you Zurin, for sharing the recipe, and thank you Ju for giving the tips!

so here’s the recipe from The Little Teochew, as adapted from Cheery on a Cake (: Enjoy!

Ingredients :

250g butter, softened
250g caster sugar (can reduce it to 220g)
125g self-raising flour
1 tsp baking powder
125g semolina flour
50g cashews, ground (I used grounded almonds instead)
1/3 cup evaporated milk
1 tsp pure vanilla extract
1 tsp buttercream essence (I left this out)
5 eggs plus 1 yolk, the whole eggs separated

Steps :

1. Preheat oven to 150 C.

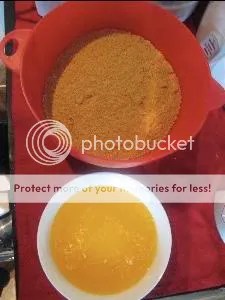
2. Stir semolina flour, Self Raising flour, baking powder and nuts together in a bowl and leave aside.

3. Seperate all the eggs. Cream butter and sugar till light and fluffy. Add the egg yolks one at a time. Add cold milk, vanilla extract and buttercream essence and mix well.

4. In another bowl beat egg whites till stiff. Fold in flour mixture into creamed mixture. Then fold in beaten egg whites gently until well mixed. Gently sprinkle almond silvers or any nuts (as mentioned above, I used pumpkin seeds and it sank, so just stick to the almond silvers) on top before putting it in the oven.

5. Bake 150 C for 50-60 mins until skewer comes out clean. (Tent the cake batter with foil because the high sugar content makes the cake brown easily)

I used a bread loaf pan and it came out pretty nice and close to the texture of Ju’s sugee cake, crumbly and nutty! (:

Thanks again to the both of you so generously sharing your recipe and tips!

Looks Can Be Deceiving!

Ever judge something or someone by it’s or their looks?

I am definitely guilty! Especially when I baked this cotton soft Japanese cheesecake! I have made it before back in Melbourne and it was successful but was very thin. So when i saw this post by Ju, The Little Teochew (she is AMAZING by the way), and I couldn’t resist trying the recipe she used! To my dismay, mine did not turn out any where near hers. Her cake stood tall and mine stood timid and small, no matter how long I allowed it to rest in the oven before taking it out. BUT! the taste and texture of the cake was still super good! So with more practice, hopefully mine would look closer to hers!

So here’s mine, looking a little sad. But really, it was very good and everyone enjoyed it! So don’t judge anything from it’s outer looks, always give it a chance! (:

It was Father’s Day so I baked one for my dad, and one for Lester’s dad as well. Was really happy to hear both of them enjoying it! (: So here’s to all the fathers out there :

HAPPY FATHER’S DAY !

Recipe adaptd from The Little Teochew (I strongly urge you to visit her blog!)

120g fine caster sugar

6 eggs whites

6 egg yolks

1/4 tsp cream of tartar

50g butter

250g cream cheese

100ml fresh milk

1 tbsp of lemon juice

60g cake flour

20g corn flour

1/4 tsp salt

Steps :

1. Melt cream cheese, butter and milk over a double boiler. Cool the mixture. Fold in the flour, the cornflour, egg yolks, lemon juice and mix well.

2. Whisk egg whites with cream of tartar until foamy. Add in the sugar and whisk until soft peaks form.

3. Add the cheese mixture to the egg white mixture and fold well.

Pour into a 8-inch round cake pan (lightly grease and line the bottom and sides of the pan with greaseproof baking paper or parchment paper). Wrap the base of your cake tin with aluminium foil if you are using a springform tin, to prevent seepage.

4. Bake cheesecake in a water bath for 1 hour 10 minutes or until set and golden brown at 160 degree celcius.

Tips : So that the top will not be too brown, I covered the top with aluminium foil for 40 mins and took it off for the last 30 mins. Ju recommended to leave it in the oven for 1 hour with the door ajar so that it will not sink. I did that, but it didn’t work for me. Will definitely try it again! Remember to check out her blog! (:

ps : love you daddy! (:

A Celebration.

Hard Rock Cafe
Festive Terrace
Resorts World Sentosa

It has been 8 years since I’ve met up with them. And it’s been really nice to be invited to celebrate their birthdays with them! (: and even better then the celebration is at a place I’ve never been before : Hard Rock Cafe at Resorts World!

I totally felt like a tourist, cause I got lost. I pretty much covered the whole RW in like 20 mins. haha But well, it’s all worth it! The catching up and having the company of a few of my ex-classmates were just awesome!

Thanks for inviting me babes! (: It was really good to catch up and I’m very happy to hear all of you are doing well! Hope to meet up once more before I head back!

For the life of me, I still can’t believe Hard Rock Cafe is not located in the Hard Rock Hotel. Although Mish told me it’s because they have their own signature restaurant in the hotel, so they had to move Hrd Rock cafe somewhere else. Oh wells. Love the atmosphere, but the lack of staff resulted in overcooked beef, and slow service. But nonetheless, it was a really good night!

(ps : thanks Choy for the photos!)

the starter which I missed! Looks good aye? hehe Huge portion though! Everyone was kinda full after sharing this!

Choy’s bacon and beef burger! Was yummy! (:

Love how they used the toothpick with the flag to keep everything together.

My steak sandwich! (: It was well done though I asked for medium. But the flavours were good! So I shall not complain too much! (:

Emma’s and Ven’s mac and cheese! (:

and I can’t remember what’s the name of Jem’s dish! But it looks yummy! hehe

Boulangerie
Festive Hotel
Resorts World Sentosa

our dearest Mish was so sweet to buy cakes from Boulangerie that are made from a French pastry chef! (: And they not only good good, they tasted yummy! Thanks babe!

I took this one home! (: Always have been and always be a chocolate person! hehe

Can’t wait to meet up again and have more yummy food and good company! (: Haven’t laughed like that for a long time! Always good to meet up with old friends!

Happy Mother’s Day !

To all mothers out there : Happy Mother’s Day!

To my mummy : Thank you for being so awesome all the time. Caring and loving us unconditionally. Love you very much! (:

I decided to bake a cake for both my mum and my baby’s mum. and was looking through blogs to get inspiration. Then it hit me when I saw a post on I am Baker : Heart Cake .

It’s not literally a cake that looks like a heart. It’s a heart in a cake! What better cake to bake for my mum right? hehe When I saw the steps to making it, I was a little taken aback. Firstly, big cakes aren’t really my thing. Secondly, neither is high layered cakes. haha so yes. I was taking a very huge risk! But I told myself, if I pull this off, it would all be worth it!

Like I am Baker, I used a white cake and filled it with red velvet cake to make the heart in the cake and topped it with buttercream icing. hehe The oohs and ahhs when the cake was cut made me smile, but sadly, the icing was too sweet for anyone’s liking! So I decided that when I do make it again, I should use a cream cheese icing instead. But well, I think the cake was yummy and the sweetness might still be bearable if u eat it with a cup of hot tea! haha but yes. Definitely changing the icing. hehe

The piece that was cut out had a nicer heart shape! haha the bigger piece looked like a butt according to my mum haha. I made a U-bottom heart instead of a V-bottom. Bad cutting skills!

overall, I enjoyed the making process very much. Though it was very time consuming. But the end result was worth every single minute working on it and also the smile on my mum’s face! Plus I found out it was difficult trying to surprise my mum. She would continuously ask questions. haha. (:

So here’s the recipe adapted from I am Baker! I won’t be writing the step by step cause her explanation is very very clear! and she has step by step pictures. hehe So hop over to her blog and give this cute cake a shot!

Continue reading

Marbled With A Twist

I’ve been in a celebratory mood lately. If you haven’t heard, I got into the course of my dreams : Masters of Education and I can’t be any happier! (: It starts in July so I am really looking forward to that! hehe Plus my significant other has found a job he really really loves, so everything is just falling into place now and I couldn’t be happier!

with happiness, comes my wanting to bake of course! Love to share my love and happiness with the things I cook and bake. I think that’s how the name of my blog came about. (: A couple of weeks back, I read Laureen’s post on roasted banana bundt cake. and I have been craving for banana cake for the longest time! The fact that she roasted her bananas before mashing them, I was intrigued by it and really want to give it a go! so what goes really well with banana? Chocolate! haha actually, I think chocolate goes well with almost everything and anything! SO I decided to make a marble cake, with a twist!

that’s right! Banana and chocolate marble cake! (: I think it’s a perfect combination! I was really excited cause I got a new bundt cake tin and was itching to use it! hehe and the cake came out beautifully the moment i overturned it! hehe

Banana cake has been a family favourite and I think it’s probably one cake I can safely say many people love. Baby and I went for a walk around the neighbourhood and walked into a fruit shop and the bananas were just starring at us! hehe So I had to get some and immediately I thought about Laureen’s banana cake. hehe so today was definitely the day to bake this yummy cake! hehe

Continue reading

Japanese Cheesecake

Saw this on Maria’s blog a while ago
and I have been wanting to make this for the longest time (:
and since I wanted to take a break from the typing of essays. haha.
(rather. just wanted to slack off a little)
I decided to bake it!
and I’m so glad I did. it turned out pretty good besides the cake sinking in a little.
but it still remained fluffy and light!

My mum use to get these on weekends when i was young
cause it was a family favourite! haha
I guess now we don’t have to buy it anymore.
I can bake for them to enjoy! (:
SUPER awesome!

so if you’re craving for cheesecake
but want to have it kinda guilt free (without the buttery base)
give this a try! I think it’s something everyone would like!


Ingredients :

7 ounces (200g) cream cheese, at room temperature
1/4 cup whole milk
1/2 cup caster sugar
3 eggs, seperated
1/4 cup cornstarch
2 tablespoons lemon juice
1/2 teaspoon cream of tartar
Boiling water

Steps :

1. Preheat oven to 170 degrees celcius and spray a 9-inch cake tin with cooking oil spray.

2. Beat cream cheese with milk to soften.
Add half of the sugar, egg yolks, cornstarch and lemon juice.
Beat till smooth.

3. Beat egg whites in a seperate bowl until foamy.
Gradually add remaining sugar and cream of tartar,
beating on high speed until soft peaks form.
(About 8-10mins)

4.Gradually fold beaten egg whites into the cream cheese mixture, stirring gently.

5. Pour into the cake pan and smooth the surface.
Place the cake pan into a larger roasting pan and place in lower rack of oven.
Pour enough water into the roasting pan to come halfway up the side of the cake pan.

6. Bake for 35-40mins, until a pick inserted in the middle of the center comes out clean.

can you see the wrinkles? haha
the cake sunk in a little. oopsie.

but still nice and fluffy and light on the inside! (:

i couldn’t stop at one slice. haha i needed to have 2!

YUMMY! (:

jelly hearts ♥


♥  on a plate. made with love.

I’ve made these a few times now.
but Baby never had a chance to try them
cos I made them last year when we were a million km away from each other. hehe
so i decided to make some for him to try!
and since I bought strawberries from our visit to Costco that day.
it was the perfect timing to make it! (:

see the HUGE box of Philly cream cheese and the HUGE block of unsalted butter?
I got them at Costco! hehe
I LOVE THE PLACE!
cos it’s buying in bulk and buying them at a cheaper price!
and the strawberries were cheap and super sweet.
just awesome (:


(pic stolen from Peggy’s album haha sorry babe!)

see the block of butter in comparison to Peggy’s face?
haha. SUPER huge right?
yes. I wasn’t overemphasizing the HUGE at all. haha

the cream cheese and the butter were bigger than the box of digestives for the first time!

now that I got the “logistics” explained. haha
here is the recipe so you all can enjoy!

Ingredients :

Base
320g digestive biscuits
160g melted butter

Filling
250g cream cheese
2 1/4 tsp gelatine powder
70g sugar
150ml hot water
1/2 tsp vanilla essence
20 medium sized strawberries

Topping (Jelly)
1 packet (170g) strawberry flavoured Jell’o
1 1/2 cups hot watr
1 1/2 cold water

Steps :

Base

1. Crush biscuits and stir in melted butter
2. Divide and press onto the base of the try. Chill for 15mins or until needed.

3. Prick base with the back of a skewer (I used a fork) before pouring in the filling.

Filling

1. Using a small heart shaped cutter (1″) and cut hearts out of the strawberry halves.
Place on a plate lined with paper towel.


(and don’t worry. the left over strawberries are not wasted! you can use it in your smoothies!)

2. Place gelatine and sugar in a bowl.
Pour boiling water over and stir until gelatine has dissolved.
If it doesn’t dissolve completely, place this bowl over a bigger bowl filled with boiling hot water.

3. Cream the cream cheese and vanilla essence together.
Add the gelatine syrup gradually and cream until smooth.
Pour into tray(s).

4. Place 20 hearts on each try, partially submerged in the cheese.
(I refrigerate the cream cheese for 15 mins before submerging the strawberries.
Just so they don’t sink in all the way).

Refrigerate until firm about 2 hours.

Topping

1. Dissolve Jell’O in boiling water. Add cold water and stir well.

2. Cool completely before pouring over the cheese filling.
(Try and pour really slowly and over the strawberries instead of the cheese so that the jelly stays clear)

3. Refrigerate for at least 4 hours before serving.

a row of ♥s. (:

we have a bit to last us for the week!

Baby’s verdict : it’s damn good la! haha. WHEEEE!

Brooklyn Blackout Cake

Since Peggy was going to be away for her birthday.
and she invited us over for dinner at their place.
I decided to bake a birthday cake for her.
and also a gesture to thank the both of them
cause they always invite us to join them for dinners or day adventures! hehe
so it was a must to bake her a cake.
was a bit worried. cause i decided to bake something I’ve never tried before.
seriously daring.
and maybe seriously OUT OF MY MIND. hahaha.
but yes. it turned out pretty well!
and hopefully she enjoyed it (:

it was my first three layer cake! (:
i kinda suck at baking big cakes.
more of a cupcake person.
but i think it doesnt look half bad! right? haha

i was quite happy with how it looks after we cut out a piece! (:

success! (:

im a happy girl. hehe

Recipe:
(From The Hummingbird Bakery Cookbook)

ingredients:

100g unsalted butter, at room temperature
260g caster sugar
2 eggs
1/4 teaspoon vanilla extract
45g cocoa powder
3/4 teaspoon baking powder
3/4 teaspoon bicarbonate of soda
a pinch of salt
170g plain flour
160 ml whole milk

chocolate custard:

500g caster sugar
1 tablespoon golden syrup
125g cocoa powder
200g cornflour
85g unsalted butter
1/2 teaspoon vanilla extract

also need:

3 20cm cake tins, base-lined with greaseproof paper

Steps :

1. Preheat oven to 170 degrees celcius (Gas 3)

2. Put the butter and sugar in a freestanding electric mixer with a paddle attachment (or a handheld electric whisk)
and cream until light and fluffy.
Add the eggs one at a time, mixing well and scraping any unmixed ingredients from the side of the bowl
with a rubber spatula after each addition.
Turn the mixer down down to slow speed and beat in the vanilla extract, cocoa powder,
baking powder, bicarbonate of soda and salt until well mixed.
Add half the flour, then all the milk, and finish with the remaining flour.
Mix well until everything is well combined.

3. Pour the mixture into the prepared cake tins and smooth over with a palette knife.
Bake in the preheated oven for 20 mins.
Leave the cakes to cool slightly in the tins
before turning out onto a wire cooling rack to cool completely.

4. For the chocolate custard: Put the sugar, golden syrup, cocoa powder and 600ml of water
into a large saucepan and bring to the boil over medium heat, whisking occasionally.

5. Mix in the cornflour with 120ml of water, then whisk into the cocoa mixture in the saucepan.
Bring back to boil , whisking constantly.
Cook until very thick, about 10 minutes.
Remove from heat and stir in the butter and vanilla extract.
Pour the custard into a bowl, cover with clingfilm and chill until very firm.

6. When the cakes are cold, using a serrated knife, slice a thin layer off one of the cakes.
Put this layer into a food processor and process to make fine crumbs.
Put one cake on a cake stand and spread about one-quarter of the chocolate custard over it with a palette knife.
Place a second cake on top and spread another quarter of the custard over it.
Top with the last cake and spread the remaining custard over the top and sides.
Cover with the cake crumbs and chill for about 2 hours.