{Spencer Cooks} Muah Chee

img_6451-1-1

I was always someone who loved snacking. Afternoon tea times are a time of the day I look forward to as I get to sit down, have a hot cuppa and something savoury or sweet to just fill my tummy before dinner. There are lots of small snacks that is easily attainable back in Singapore. However, it is a little more difficult to find it here.

So when I chanced upon a Muah Chee recipe, I HAD TO make it! It was the perfect snack for a Sunday afternoon. Muah Chee is a snack that we usually can get from night markets or hawker stalls. Small pieces of glutinous rice balls rolled in a sugar, peanut and/ or black & white sesame mixture! Every bite satisfies both the sweet and savoury craving to be honest! Which is why I love them!

img_6452-1

I couldn’t quite believe how quick and easy it was to make this in the Thermomix. Everything was done and ready to be enjoyed in 20 mins! And I can’t really put the joys of being able to make something from scratch in the comfort of my own home in words! So I will let the pictures do the talking! hehe

img_6463-1

Little nuggets of deliciousness wrapped in a sugary peanut, white and black sesame mixture! SO SO GOOD!

Here’s the recipe for the muah chee. For those who have been craving like me, and to those who’s never tried it before. Please do give it a go! You won’t regret it!

img_6456-1

Muah Chee 

150g roasted peanut (without skin)

30g toasted white sesame

30g toasted black sesame

40g coconut sugar

120g glutinous rice flour

180g water

2 tbs olive oil

1000g water, for steaming

Steps :

In the TM bowl, add the peanuts, half the amount of white & black sesame, and sugar. Chop for 5secs/ Speed 8.

Pour the mixture into a bowl and mix the rest of the sesame seeds. Set aside.

img_6466-1

In the TM bowl, add the glutinous rice flour, water and oil and mix for 1 min/ Speed 6. You should get a smooth flour mixture.

img_6469-1img_6464-1

Pour into a shallow bowl and place the bowl into the Varoma deep tray. Place 1000g of water into the TM bowl and place the Varoma deep tray on top of the lid. Steam the mixture for 15mins/ Varoma/ Speed 3.

img_6460-1

Once steamed, use a teaspoon, scoop and cut into pieces and toss into the peanut & sesame seed mixture. Make sure the glutinous rice balls are coated well.

img_6459-1

Serve and enjoy immediately!

img_6461-1

Hope you will give this a go and let me know what you think! I am salivating just looking at the pictures! Think I will have to make it again this weekend! hehe Have an awesome weekend everyone!

Remember to always cook and bake with love!

{Spencer Makes} Salted Chunky Chocolate Cookie

salted chunky chocolate cookie

Nothing beats the smell of freshly baked cookies. NOTHING. When the mr kindly requested for me to make these salted chunky chocolate cookies, I couldn’t say no. haha

The first time I made these were for the Biggest Morning Tea last year and everyone loved it! So I decided to try making it with Spencer (my Thermomix) today, and it was so easy and quick!

13895134_895993767213158_2941545152233463400_n1

These are like chocolate chip cookies, but BETTER! Imagine biting into big chunks of semi melted chocolate chunks and each bite had a hit of salt! There’s just something about sweets with a touch of savoury that I love.

13892224_895993793879822_1240977147308032361_n1

So if you are like me and love a little savoury in your sweets, definitely give this cookie a god! It’s crunchy on the outside and chewy in the middle. SO ADDICTIVE! Can’t stop at one!

Salted Chunky Chocolate Cookie (adapted from Smitten Kitchen)

Makes 20-24 cookies

Ingredients :

113g unsalted butter, cold and cut into cubes

180g packed light brown sugar

25g raw sugar

1 egg

1 tsp vanilla bean paste

3/4 tsp  baking soda

1/2 tsp baking powder

1/4 tsp sea salt

22og plain flour

220g dark chocolate, cut into chunks

Fluer de Sel, to finish (or flaky sea salt)

13873155_895993740546494_2996270339589433075_n1

Steps :

1) Preheat the oven to 180 degrees C. Line two baking trays with baking paper and set aside.

2) Place butter, light brown sugar, raw sugar, egg and vanilla bean paste into the bowl and mix 2 mins/sp 3.

3) Add plain flour, baking soda, baking powder and sea salt and mix for 40 secs/sp 4.

13907062_895993713879830_3778816521033936200_n1

4) Add dark chocolate chunks and stir for 30 secs/ sp 2.

13891887_895993727213162_4116234321963311953_n1

5) Form dough by scooping 1 heap tablespoon and rolling the dough into a ball. Place them on the baking tray with 3cm space between each of them. Sprinkle some fluer de sel or flaky sea salt on top of the dough.

13880273_895993753879826_7034193518650481516_n1

6) Place them in the oven for 10 mins, until golden on the outside but still very gooey and soft inside. Out of the oven, let the cookies rest on baking sheet for 5 minutes before transferring a cooling rack.

13901591_895993810546487_3505350499996016882_n1

Enjoy and try to stop at one, I dare ya! hehe

Remember to always cook and bake with love! xx

{Spencer Cooks} Claypot Rice

IMG_5917-1-1

Sine I had Spencer, I’ve been trying to convert my favourite recipes into one which I could use the Thermomix to cook in. Why you ask? There is less to wash (just the bowl) and it cooks quicker, without me needing to worry about burning anything!

This is a family favourite and I’ve cooked it in a few different ways. One of the most convenient way is to cook it in the rice cooker. That is before I tried making it using Spencer. hehe Of course, the main reason why people love having claypot rice is because they love the crispy bits at the bottom of the claypot. And yes, using the Thermomix won’t give you that result, but you can easily transfer everything into a claypot after it’s cooked and cook it over the stove for another 5 mins on high heat.

img_5914-1

The flavour though is still as delicious and with all my other dishes, it’s just full of wholesome ingredients. Every mouthful has a bit of chicken, chinese sausage, rice, shiitake mushrooms, fried shallots and spring onion. What’s not to love?

So here’s the steps to cooking it in a Thermomix if you have one, if not just click on the link about to make it in your rice cooker (:

Ingredients:

350g chicken thigh, cut into small chunks

200g jasmine rice

2 chinese sausages (lup cheong), sliced thinly

2 chinese liver sausages (optional), slice thinly

8 dried shiitake mushrooms, soaked and thinly sliced

4 cloves garlic

1 small onion (60-80g)

2 inch ginger, peeled and cut into coins

20g olive oil

900g water

For the marinade:

20g sesame oil

10g tamari/soy sauce

20g oyster sauce

20g dark sauce

10g black vinegar

10g shaoxing wine

pinch of ground white pepper

2 spring onions, finely sliced

fried shallots, to serve

thick dark sauce, to serve

IMG_5918-1

Steps :

  1. In your Thermomix bowl, place the garlic, onion & ginger and chop for 5 secs/sp 5/MC on. Scrape sides and add olive oil. Saute for 3 mins/100 degrees/reverse/sp 1/MC on.

IMG_5926-1

2. Add the chinese sausage and liver sausage, if using, and sauté for 2 mins/100 degrees/reverse/sp1/MC off. Then add the shiitake mushrooms and sauté for a further 3 mins/100degrees/reverse/sp 1.

IMG_5924-1

3. Add the chicken thigh pieces as well as the marinade and stir fry for 5 mins/100 degrees/reverse/spoon.

IMG_5922-1

4. Insert steaming basket into the bowl and weigh out 200g of jasmine rice. Rinse the rice under running water then toss it into the bowl with the rest of the ingredients. Fry the mixture for 1 1/2 mins/100 degrees/reverse/spoon. Place the steaming basket on a bowl, then carefully pour the rice & meat mixture into the steaming basket.

IMG_5920-1

IMG_5919-1

5. Without rinsing the bowl, place the steaming basket into the bowl and pour the sauce back into the bowl, as well as 900g of water. Cook the rice for 25 mins/Varoma/sp4/MC on, stopped at 15 mins to give it a stir using your spatula.

IMG_9658-1

6. Once it’s done, you can pour it into your thermoserver, and top it with the sliced spring onion and fried shallots and a swirl of thick dark sauce. If you prefer the crispy bits, place the cooked rice into a claypot and cook it over high heat for 5-10 mins, keeping a close eye to make sure it doesn’t burn. Then top it with spring onion, fried shallots and thick dark sauce when serving.

IMG_5916-1

ENJOY!

Toddler Eats : Cheesy Chicken & Veggies Meatballs

unnamed-2-1-1

Now that Lochlan has turned one (where did time go??), I’m trying to wean him from purees and introduce chunkier food, to encourage him to chew. Don’t get me wrong, he knows how to chew. But just prefers the purees cause he could finish it much quicker. haha So this marks the start to my new series of Toddler Eats! Hopefully it will be helpful to mummies out there who also want to try different foods and make them from their kitchen when time permits!

I decided to try making something I thought he might like! I mean, who doesn’t enjoy a good meatball? Especially with the addition of cheeeeese! These are quick and easy and you could have it on its own or mix it with pasta and some homemade tomato sauce and viola! Meatball pasta!

Meatball pasta

Lochlan’s Verdict : 2 1/2 meatballs (together with other food for dinner and strawberries for dessert hehe). I think thats a not too bad start!

 With the addition of cheese, you don’t even need to add salt to it. So it’s perfect even for babies from 10 months! Especially if you wanna do Baby-Led-Weaning. hehe Perfect finger food! These are not just for your little ones at home, the mr and I enjoyed it too!

So here’s the recipe, do give it a shot and let me know what u or your kiddos think!

Cheesy Chicken & Veggies Meatballs (A Food Made With Love Original Recipe)

Ingredients : Makes 24-26 meatballs

250g mince chicken (or meat of your choice)

2 stalks of spring onions, finely sliced

1 small carrot, grated

1/4 apple, grated

2 cloves of garlic, finely chopped

1/2 zucchini, grated

2-3 florets of broccoli, finely chopped

50g cheddar cheese, grated

1 egg

Ground black pepper, to season

Ingredients

(I’ve got a double yolk! Lucky me! hehe)

Steps :

1) Preheat your oven to 170 degrees celcius. Spray/Oil a baking tray/ casserole dish and set it one side.

2) Mix all the ingredients in a big bowl until well combined.

Mixed till well combined

3) Using a tablespoon, roll the mixture into balls. Do note that the mixture will be a bit wet and sticky. Wetting your hands might help in the rolling process.

Rolled out

4) Place the meatballs onto the baking dish, and bake for 12-15 mins, until the meatballs are cooked through and/or slightly browned.

All baked

5) Serve as is or you could cook it in a homemade tomato sauce and toss it through some cooked pasta for a variety!

Enjoy!

P.S : You don’t have to grate the vegetables if you’re cooking for yourself or older kids and want more texture. Just finely diced them and it would be as delicious! Also you could always change the types of vegetables in the meatballs, find a combination that wins the most votes in your house! (:

Have a lovely weekend everyone! Remember to always cook and bake with love!

Till the next post, xx !

Chicken Tagine – MealDish

chickentagine-1-1

Good evening dear readers! So sorry for the hiatus! It’s been a busy few months with Baby Ho’s grandparents (both paternal and maternal) and uncle & aunty coming to visit him consecutively! So I haven’t had the chance to sit down and churn posts out! But I will be doing it whenever I can, I promise!

So a few months back, I was introduced to MealDish. A website that aims to help people eat healthier, eat fresh, whilst minimising food waste and saving them time and money. This was absolutely perfect for me, especially since I can only get down to cooking with Baby Ho is asleep!

So off I went to the website and it’s so simple to use and follow!

MealDish 1

You just have to choose what you like, the number of recipes you want and then click the number of people you’re cooking for and get a meal plan! As easy as that!

MealDish 3

If you have any particular cuisine you would like to try, or specific ingredients to exclude or you have intolerances, there are options for you to tick too! So it’s really for everyone. I did different options and there are heaps of recipes to choose from. They even suggests side dishes that would go perfectly with the recipe you decide to cook that day. Sounds good, no?

MealDish 2

So I decided to just go with the quick option and choose the type of protein I wanted to cook with – Chicken! These were the 5 options I was given, and straight away I was drawn to the chicken tagine recipe, especially cause my beautiful tagine has been sitting on the shelf ever since I made my Moroccan meatballs one and half year ago! haha So it was time to get it on the stove again.

MealDish 4

If you’re a person who loves order and likes to get everything ready before you cook, Mealdish is definitely for you. The recipe comes with ‘Preparation Steps’ so that you have everything ready to go when you start cooking, missing nothing out! This cuts your cooking time and dinner will be on the table, pipping hot, in no time!

MealDish 5

Of course, there’s ‘Cooking Steps’ which are clear and easy to follow. What’s best about this website is that they have a ‘Shopping List’ tailored to the number of people you are cooking for. So there’s no waste and you just buy what is needed!

MealDish 6

Chicken Tagine

The results were as good as I thought it would be! The Mr loved it and even though I made enough for 4 people, we only had a serve left! What’s best is, this recipe had both protein and vegetables rolled into one! So we only needed that one dish for dinner. Paired with toasted Turkish bread – Dinner was ready within an hour!

So if you are looking for inspirations to cook your family or even just yourself something delicious, and want something quick and easy, hop onto the MealDish website and you will definitely find something you fancy!

Here’s the ingredients used for this dish. The steps are as described in the ‘Cooking Steps’ above! Or you could always just head to the website and search for the recipe to get the ingredient amounts tailored to the number of people you are cooking for!

Ingredients :

(For 4 people)

3/4 Onion whole

4 Garlic cloves

1 1/4 Celery stick

3/4 can tinned tomato

200g Pumpkin

2 tsp Coriander

3/4 tsp Ground Ginger

3/4 Cinnamon Stick

1/4 Lemon

1/4 cup apricot (I used raisins)

3/4 cup Chicken stock

8 Chicken drumstick

3/4 cup couscous

2 tbs fresh coriander

Chicken Tagine

Have a great rest of the day and hope you all will have an awesome hot dinner tonight since it’s freezing here in Melbourne!

Till the next post, remember to always cook and bake with love! xx

The Coconutty Baked Brownie Bites

unnamed-8-1-1

Brownie. Who doesn’t love them? If you don’t, I’m not sure we can be friends. haha Kidding! But brownie is always something I cannot resist. When I see it, I have to have it – warmed, with a scoop of vanilla ice cream. PERFECTO!

There are many different type of brownies, but the ones I love most is crispy on the outside, and fudgey in the middle, and I think I found the perfect recipe!

All baked and cut

Just seeing how the top bit cracks, puts a smile on my face! And being a tad bit OCD and one who is trying to (but failing) lose the baby weight, I decided to cut them into bite size, so that I don’t feel too guilty when having one, or two. hehe

I’m in a coconutty phase, so I decided to add some fine desiccated coconut through the batter before baking and the flavour wasn’t too overpowering. Chocolate was still the major flavour with a tinge of coconut! Mmmm. Plus this wasn’t too sweet. Just the right level of sweetness!

So if you do like your brownie, I urge you to try this recipe, if you haven’t already heard of The Baked Brownie! My dad was here when I made these and he actually said, “How come the brownie from outside doesn’t taste like that?” haha That was one big compliment for me! hehe

The Coconutty Baked Brownie with Vanilla Ice Cream

Coconutty Baked Brownie Bites (Adapted from Pretty Simple Sweet)

 155g plain flour

1 tsp salt

2 tbs desiccated coconut

2 tbs cocoa powder

310g dark chocolate, cut into smaller pieces

230g unsalted butter

1 tsp instant espresso powder

100g caster sugar

100g packed light brown sugar

1 tsp vanilla bean paste

5 eggs, room temperature

Steps :

1) Preheat oven to 180 degrees celcius. Line the baking tin (I used a 9×13 inch rectangular baking tray) with baking paper, leaving some extra hanging off the sides for easy removal of the brownie.

2) In a medium bowl, mix the plain flour, salt, cocoa powder and desiccated coconut together. Set it aside.

3) Put the chocolate, butter, and instant espresso powder in a large bowl and set it over a small pot of simmering water, stirring occasionally, until the chocolate and butter are completely melted and smooth. Turn off the heat, but keep the bowl over the water and add the sugars. Whisk until completely combined, then remove the bowl from the pan. Allow the mixture to cool till room temperature.

4) Add 3 eggs to the chocolate mixture and whisk until combined. Add the remaining 2 eggs and whisk just until combined. Add the vanilla bean paste and stir until combined. Don’t overmix at this stage or your brownies will be cakey.

5) Add the flour mixture to the chocolate mixture and fold until just a bit of the flour mixture is visible.

6) Pour the batter into the prepared pan and smooth the top. Bake in the center of the oven for 30 minutes, rotating the pan halfway through the baking time, until a toothpick inserted into the center of the brownies comes out with a few moist crumbs sticking to it. Let the brownies cool completely, then lift them out of the pan using the parchment paper.

Baked and ready to be cut

Cut into bite sized squares

7) Cut them into bite sized squares and serve them warm with a scoop of ice cream!

Hope you all had a great weekend! Make these and have them today so that you can chase away any Monday blues and have a fantastic week ahead!

Remember to always cook and bake with love! Till the next post, xx.

PS: There will be a give-away in the next post, so stay tuned! (:

BBQ Made Easy with Heat Beads® Chimney Booster

Heat Beads(r)

I love BBQs. It’s just something that could bring everyone together, around the fire, and enjoy the love for food. To me, BBQs are perfect all year round. In the Summer, with a beer or cider in one hand, and a pair of tongs on the other. In Winter, it will act as a heater or a camp fire, keeping us warm and toasty! hehe

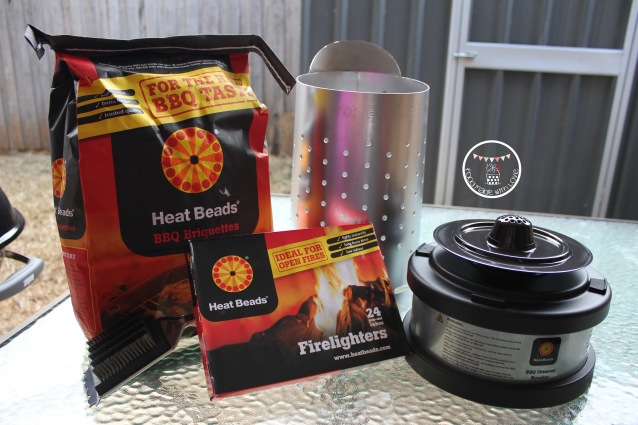
Setting up a BBQ can be tricky and time consuming, depending on the weather conditions. So when KeepLeft PR contacted me and asked if I would like to try the the Heat Beads® BBQ Chimney & Chimney Booster for a quick and easy BBQ experience, I couldn’t say no! I couldn’t be more thankful for the generosity of Heat Beads® as they didn’t only give me the Heat Beads® briquettes, firelighters, the Heat Beads® BBQ Chimney & Chimney Booster, they gave me my dream BBQ as well – The Weber! I was over the moon when the packages arrived!

The Weber BBQ

Heat Beads® BBQ Chimney & Chimney Booster

Instead of the usual hour or more taken to get the briquettes ready for some action, with the Heat Beads® BBQ Chimney & Chimney Booster, you can get your briquettes hot enough for the BBQ in 12 minutes (with a few minutes more if it’s cold and windy)! How amazing is that?? And it’s so easy to use as well! I was a little worried at first, as the Mr is in the USA doing a seminar tour. So I had no help, plus he’s always usually the one setting it up!

Setting up the BBQ Chimney & Chimney Booster

But trust me, it could all be done in a few quick steps!

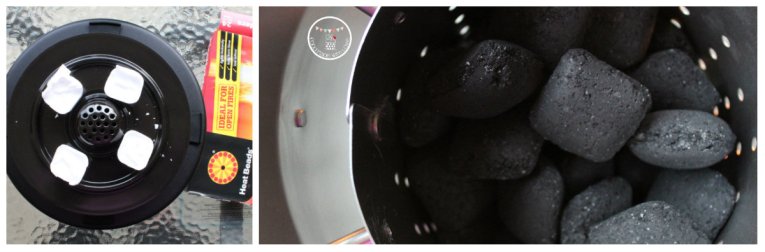
Put the Heat Beads® briquettes in the Heat Beads® BBQ Chimney, place the Heat Beads® firelighters on the firelighter plate of the Heat Beads® Chimney Booster, light the firelighters using a match or gas lighter, place your Heat Beads® BBQ Chimney on top of the Chimney Booster and turn on the switch!

Lighting the firelighters on the firelighter plate

Now all you gotta do is wait for 12 minutes! I decided to put the Booster to the test, and BBQed on a super windy and cold night. It took 14 minutes for the briquettes to be hot enough to be placed in the BBQ. 14 minutes! AMAZING!

Using the BBQ Chimney & Chimney Booster

By the 12th minute, the briquettes were close to being ready. And how do you know when their ready? The briquettes become ash over, turning a light grey colour. That’s when it’s ready to be popped into your BBQ!

14 minutes, Briquettes were ashed over and ready to go!

With the setting up time reduced to a mere 12-14 minutes, I’ve got more time to cook my meats now! I decided to do a comparison of cooking methods: low & slow vs quick & fast. Heat Beads® is perfect for both! The low & slow would be perfect for days when you have a little more time to spare. The quick & fast would be perfect for busy bees who are working, or have little time to get food time on the table. Trust me, cause now with bubba, all I have is under an hour to get our meals prepared and cooked! So what did I decide to cook? Smoked BBQ baby back ribs (low & slow) and Jamaican Jerk Smoked chicken wings (quick & fast)! Salivating yet? hehe I definitely was, smelling the aromas coming out of the Weber!

Ribs & Wings

All done within 1 1/2 hours, inclusive of prep time! I thought it was pretty impressive, don’t you? You must be thinking, how can it be? Well, I used the 14 minutes taken for the briquettes to be ready to season my meats! A win-win situation if you asked me!

Smoked Bbq Baby Back Ribs

Smoked BBQ Baby Back Ribs (Recipe from Weber’s Time to Grill™ by Jamie Purviance)

Dry Rub :

1 tbs sea salt

2 tsp granulated garlic

2 tsp paprika

2 tsp dried thyme

1/2 tsp freshly ground black pepper

1 racks of baby back ribs, about 1kg

1/2 cup BBQ sauce

Handful of Hickory Wood Chips

Steps : 

1) Soak your wood chips in water for at least 30 mins and drain. Set aside.

2) In a small bowl, mix the ingredients for the dry rub together. Remove the membrane of the ribs and cut them into half to create two smaller racks.

Dry rub - Ribs

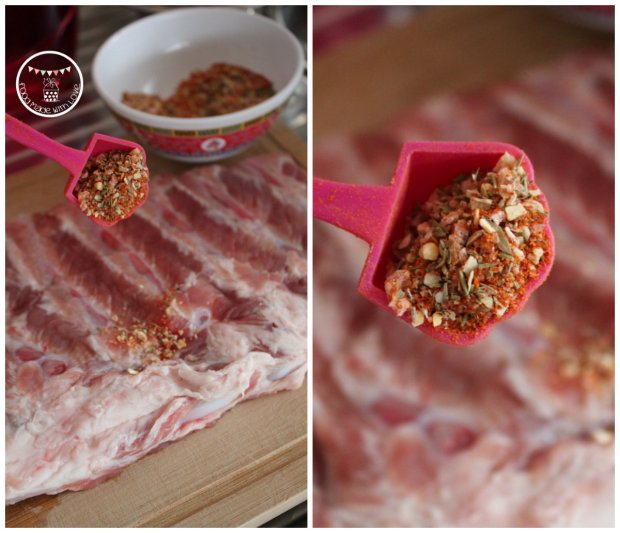
3) Season each rack evenly with the dry rub and place the ribs on a piece of foil, wrapping them up well. Double wrap them, making sure there are no holes.

Seasoned and ready to go

4) Place the packet of ribs on the clean grill and cook for 1 hour, with the lid closed, and turning the packets occasionally, making sure not to pierce the foil. At this point, you could go do other things! Go hang the laundry and just put your feet up and have a cuppa (:

Ribs on the bbq

5) Remove the packets from the grill and let rest for about 10 mins. Carefully open the packets, remove the ribs and discard the rendered fat and oil.

6) Place the wood chips onto the charcoal and a a tray of water under the grill. Close the lid and when the wood chips start to smoke, return the ribs onto the grill (above the water) bone side down. Grill and smoke, the the lid closed, for about 10-12 minutes, basting with the bbq sauce, until they are sizzling and lightly charred. Remove from grill and let it rest for 5 minutes before serving with the remaining bbq sauce.

Jamaican Jerk Smoked Chicken Wings

2 tsp Jamaican Jerk Rub (For a quick marinade, I used the one from The Spice Mill)

2 tsp sea salt flakes

10-12 chicken wings

Steps : 

1) Marinade the chicken wings with the Jamaican Jerk spice rub and sea salt and allow it to marinade while the ribs are cooking on the grill.

Seasoning the chicken wings

2) When the ribs are 10 minutes from getting done, I put the chicken wings on the grill and turned it occasionally to make sure it doesn’t burn.

3) When the ribs are smoking, leave the chicken wings on the grill to be smoked as well (for the same 10-12 minutes). It brings the chicken wings to a whole new level of deliciousness! Golden brown and lightly charred. PERFECT!

Grilling the chicken wings

Jamaican Jerk Smoked chicken wings

Have them with some baked sweet potatoes (you can throw them on the grill when you start cooking your ribs) and a side of salad! Dinner is served! (:

Smoked BBQ Baby back ribs

My parents and I were really impressed by how delicious the ribs and wings were! I had so much fun trying out the Heat Beads® BBQ Chimney & Chimney booster and couldn’t be happier with how the meats turned out. I’m sure by now you’re wondering where to get the Heat Beads® BBQ Chimney & Chimney Booster from? Or you want to read more about the Heat Beads® products? Do pop over to Heat Beads® to find out more!

Have a great weekend ahead and always remember to cook and bake with love!

Disclaimer : Lianne@Food Made With Love received the Weber BBQ & Heat Beads® products as a gift from Heat Beads® & KeepLeft PR. Thank you so much for this fantastic opportunity! 

Sugee Cookies : Easy and A Great Gift !

photo 2-1-1

Chinese New Year is no doubt a season of sharing food and every year, there is just one thing I love to make for my colleagues and close friends here in Melbourne. Sugee cookies! These melt-in-your-mouth cookies are so addictive, you will never be able to stop at one!

Sugee cookies

The best thing about these cookies are that they are so easy to make, and you don’t even need a mixer. All you need is a large bowl, a weighing scale and a wooden spoon! The you’re good to go! So if you’re thinking of making something that is a sure winner, try and make these! I am almost certain that your friends and family will love these!

Sugee Cookies (makes about 24-30 cookies)

80g almond meal

150g plain flour

100g sunflower oil

50g icing sugar

1/2 tsp salt

1/2 tsp bicarbonate soda

1 egg yolk + a splash of water (for egg wash)

Steps :

1) Preheat oven to 170 degrees celcius. In a large metal bowl, aft all the ingredients except for the egg wash.

Ingredients for the sugee cookies

2) Take teaspoons full of dough and roll them into round balls. Place them on a lined baking tray and brush the top with egg wash.

all ready to be baked

3) Bake for 7 mins and rotate the tray to bake for a further 7 minutes until cookies are golden brown.

packed and ready to be gifted

4) Allow it to cool on a cooling rack before you start popping them into your mouth or pack them in a bottle! Enjoy! (:

Just 4 easy steps to get this delicious bite, so don’t wait any longer! Go go go!

Remember to cook and bake with love! 

{Quick & Easy} Fig Jam

Fig Jam

As promise, I decided to share the recipe for fig jam I used to have with my scones! You will realise it’s so easy and something you can do in less than 30 minutes! Be warned though, cause this is VERY ADDICTIVE! haha Once you’ve tried a spoonful, you would want to have another, and another, and another!

chopped dried figs

Another plus point is that this recipe uses dried figs, so you can make this all year round! Trust me, you would definitely want a bottle of this in your fridge all the time. hehe I’ve had it on my scones, croissants, with cookies and of course, on it’s own! YUMMO! Just can’t get enough! (:

Fig jam bottled

So quickly get a packet of dried figs and make some jam now! (:

Dried Fig Jam (adapted from Tastespotting)

250g dried figs, chopped into quarters

1 cup of water

1 tsp lemon juice

Ingredients

Steps :

1) In a small heavy base pot, place the dried figs and water and bring it to a boil. Lower the heat and allow it to simmer for about 20 minutes, or until the figs are plumped up.

2) Turn off the heat and pour the mixture into a blender. Add the lemon juice and blend till smooth with a spreadable consistency. Be careful when blending as the mixture is very hot! If it’s too thick, just add more water, 1 tsp at a time.

Blending it into a spreadable paste

3) Allow the mixture to cool, and then place it in an air tight bottle, and keep it refrigerated. It can last up to 2 weeks.

Fig jam

Enjoy! (: If you’re like me, take a spoon and dig in immediately! hehe Simple, quick, delicious and addictive! Cannot get any better!

Have a great week ahead everyone!

Remember to always cook and bake with love!

My Mr The Chef : Polenta Chips

Polenta chips

Good afternoon dear readers! I hope you all had a wonderful Easter break and had lots of and hot cross buns! Cause I sure did! hehe (: Not too long back, the sis-in-law and I requested the mr to cook steak for us and he came up with his version of steak & chips! I’ve always considered myself blessed as I married a man who sure knows how to cook and the way to my heart is definitely through my tummy hehe

The mr's version of steak & chips

He was inspired by the MKR episode we watched as well as a recipe he came across in the Delicious (April 2013 issue) magazine to make polenta chips and they were SO ADDICTIVE! Crunchy on the outside, soft and fluffy on the inside. We couldn’t stop eating it the moment it was out of the frying pan! hehe

So do give these a go! (: It’s shallowed fried so it’s not too sinful! You will absolutely love them as much as we did. hehe

Polenta Chips (by the Mr adapted from Delicious Magazine April 2013)

200g polenta

50g unsalted butter

100g finely grated parmesan

4 tbs chopped flat-leaf parsley

salt & pepper, to taste and garnish

Steps :

1) Line a baking tray with grease-proof baking paper allowing 2cm to overhang. Boil 800ml of water in a small pot, then reduce the heat to low. Do note that the amount of water is different for different brands of polenta, so please do check how much water is needed for the amount of polenta.

2) Stir in the polenta in a slow, steady stream, then cook and stir continuously for 5 minutes or until it has thickened. Take it off the heat and stir in the butter, parmesan and parsley. Season with salt and pepper and spoon it into the tray and smooth the surface. Press it down and make sure the polenta is really compact. Allow it to chill for at least an hour.

3)  Tip the polenta onto a board and cut it half lengthways, then cut it into 1 1/2 cm thick chips.

The mr cutting the polenta up

4) Heat some vegetable oil in a large frying pan over medium heat. In batches, fry the polenta chips, turning, until golden and crisp.

Frying the polenta chips

5) Drain on the paper towel and keep warm in an oven or serve it immediately with a sprinkle of salt.

Polenta chips

ENJOY! (:

Perfectly cooked steak

On a separate note, how good does this look? The mr sure knows how to cook the perfect steak! AMAZING! hehe

Have a lovely day and a short week everyone! (: Remember to always cook and bake with love!