Galloping into the Year of Horse with Homemade Bak Kwa

photo 3-1-1

Happy Lunar New Year my dear readers! (: So sorry for the lack of posts! I’ve been back in Singapore and spending as much time as I could with my family. But I’m back and ready to share lots with you, so please hang in there with me. I promise to make your time worthwhile!

I’m not sure what your traditions are for Chinese New Year, but for me, it’s about coming together as a family and feast on delicious food! Of course it’s not always about food, it’s also about spending time with your loved ones and just reminescing on the good things from the past year, setting goals for the new one!

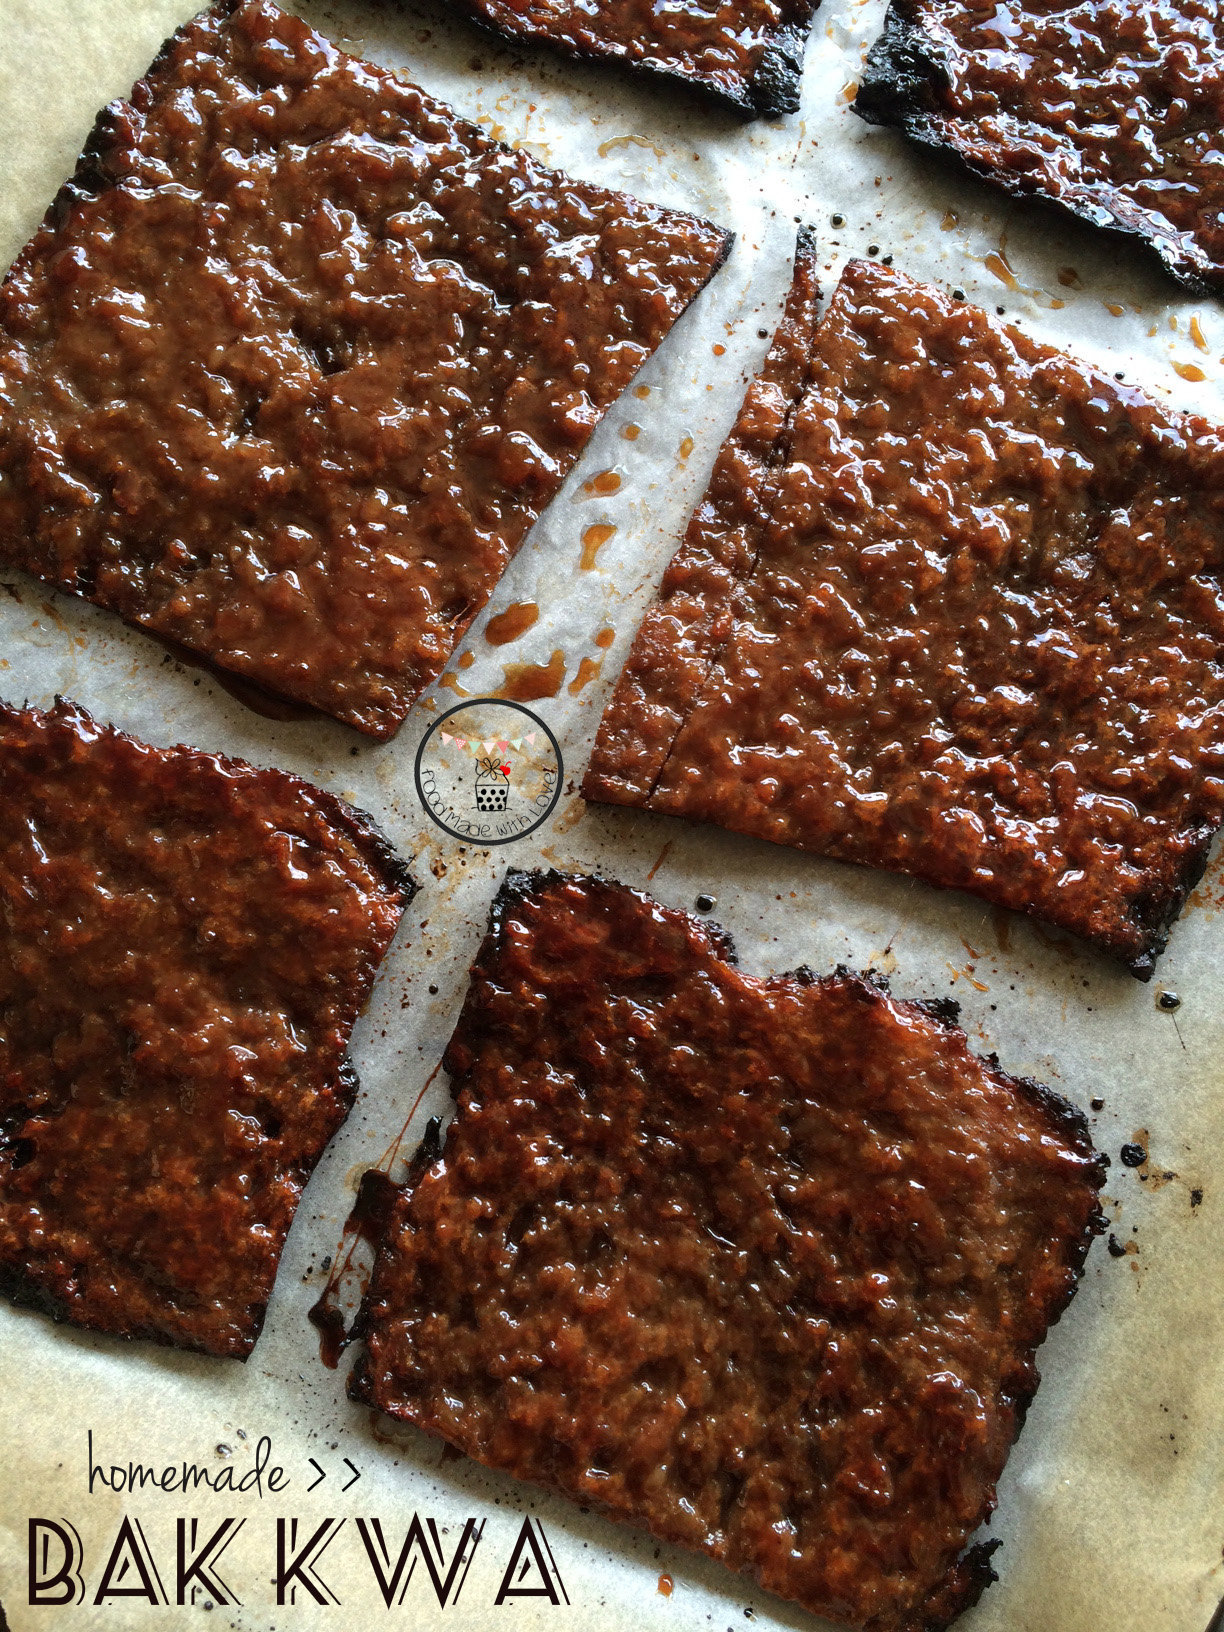
There are many different kinds of Chinese New Year goodies that we love to eat. Lucky for me, I got to eat my fair share before I flew back to Melbourne. But there is one that I didn’t quite get to have and also sadly, we aren’t allowed to bring it back cause it’s meat. BAK KWA! It’s like a chinese pork jerky that is sweet and salty and just delicious!

homemade bak kwa

Singaporeans really do love their bak kwa, and many would actually queue for hours to get some! So instead of queueing (plus I don’t think I can get any that are similar to those back home), I decided to try making them this year!

The best thing about this is that you can freeze it and just grill it when you feel like having some! Trust me. Once you have a bite, you would definitely want to keep some in your freezer. These are so addictive! So give them a go, you won’t regret it!

Homemade Bak Kwa (adapted from Nasi Lemak Lover)

Ingredients :

900g mince pork

130g caster sugar

2 tbs light soy sauce

1 tbs shaoxing wine

2 tbs oyster sauce

1 1/2 tsp thick dark soy

1/4 tsp five spice powder

Ground white pepper

1 tbs honey

Steps :

1) Marinade the mince pork a day before you intend to make it. In a large bowl, add all the ingredients and mix with a pair of chopsticks.

Marinating the mince pork

Stirring the mixture in one direction

2) Make sure you stir it in one direction and until the mixture becomes gluey. Do make sure it’s gluey as it will allow the meat to stay as one piece after being baked. Cover the bowl with cling wrap and place it in the fridge overnight or for at least 3 hours.

Gluey mixture

3) Preheat the oven to 160 degrees Celcius. Spread the marinated pork mince thinly onto the baking tray using a spatula.

pork mince mixture spread onto baking tray

4) Bake the pork mince for 15 mins and remove it from the oven. Allow it to cool slightly before cutting it into desired shape and size using scissors or a pizza cutter. If you intend to freeze it, allow them to cool completely before placing them in a zip lock bag and freeze it up to 2 weeks.

baked and cut

5) Turn the grill on at 240 degrees Celcius and grill one side for 5 mins before flipping and grilling the other side for a further 5 mins, until the meat is golden brown or slightly charred on the sides. Let is cool down (it actually tastes better the day after it’s grilled!) and enjoy! (:

homemade bak kwa

So you ready to make some bak kwa? You’ll love it for sure! Have a prosperous year of the horse everyone!!

Remember to always cook and bake with love.

{Guest Post} Homemade Bacon

homemade bacon

Happy midweek ! Hope everyone is having a great week so far. I’m really excited about today’s post, cause for the first time, the Mr is posting as a guest of Food Made With Love! (: If you follow my instagram (@lianneelow), you would know how much the Mr and I love cooking together. The kitchen is definitely our happy place, trying new recipes and creating yummy dishes. Teamwork! hehe Recently though, the Mr have been trying new things on his own. Which is why I thought it was perfect for him to do a guest post of something that was so so delicious! So do enjoy (:

~~~~~~~~~~~~~~~~~~~~~~~~~~~~~~~~~~~~~~~~~~~~~~~~~

Homemade Bacon 

(Guest Post by The Mr, The Training Geek)

The Mr with his bacon - post curing

Why?

Our usual weekend brunch brought us to Merchants Guild which my wife truly adores! There, we made our choices and I added an additional side of bacon. When it came, this bacon was not the usual bacon you get. Thick-cut bacon. Not something you can easily find or purchase. So that’s why I set off on making my own bacon.

Bubble and Squeak with a side of thick cut bacon

What is involved?

Lots of salt, lots of sugar and anything else which impart flavour to the pork which you want to put in. And of course, a nice big slab of pork belly. The equipment required is minimal if you have a bbq pit somewhere.

Curing the pork belly

Ingredients:

1 slab of pork belly (minimum 2kg)

2 parts salt to 1 part sugar (you can put in any amount you want but keep to the ratio).

Herbs and spices (anything you want; but I used 6 cloves of garlic, 3 sprigs of rosemary, handful of peppercorns, 3 sprigs of lemon thyme, 1 tbs ground coriander and 3 dried bay leaves)

Equipment:

Ziplock bag/Tupperware

Smoker/Bbq

Hickory wood chips

How?

The Curing Process

1. Combine the salt, sugar, herbs and spices into a food processor and blend till everything is evenly combined.

Blending the herbs and spices

2. Once the cure mixture is done, pack the mixture all over the pork belly, covering the pork with a layer of the curing mixture.

3. Carefully place this into a ziplock bag or into a Tupperware box with a rack at the bottom to allow any liquid to drip.

4. Leave the pork in the fridge for at least 7 days for it to cure and let the curing mixture remove as much liquid as possible. Through the 7 days, check for any accumulation of liquid. Feel free to drain the liquid or add more curing mixture to the pork. At the end of the 7 days, the pork should be of a solid nature and there would be no bounce when pressing into the flesh.

5. Once this is done, rinse the pork under water to remove the curing mixture and allow the pork to dry out more in the fridge uncovered. This also allows a sticky layer to form around the pork which helps retain the smokeness from the next process.

After the salt is washed off

Leaving it uncovered in the fridge for a day

The Smoking Process

1. After leaving the pork belly in the fridge uncovered for a day, the cured meat is now ready for smoking in the bbq. To prepare your bbq, heat the bbq up till the temperature of the bbq reaches 200 degree Celsius.  Prepare your hickory chips by soaking them in liquid for at least half an hour. At this time, you can choose to use any liquid which could impart more flavour to the pork. In my case, I decided to use apple juice (with the understanding that apple and pork go well together).

2. Once the hickory chips are ready, you can either place them with the coals (if yours is a charcoal bbq) or in a smoking box (for electric/gas bbqs) and allow the smoke to fill the bbq up. Once the bbq is ready, place your pork into the bbq and rest it on a rack and allow the smoking process to begin. This will take 2-4 hours depending on how much smokeness you want your bacon to have.

Smoking the meat

3. Constantly monitor the temperature of the bbq, ensuring it stays around 200 degrees Celsius or an internal temperature of the meat at 150 degrees. Once you feel that you have imparted enough smokey flavour to the bacon, feel free to remove it from the bbq.

The Cutting Process

1. Once you have taken your bacon out of the bbq, you can begin slicing it up, ready for storage or consumption. Please remember that despite the smoking process, the bacon is still not fully cooked and you will need to cook it before consuming it.

Smoking process complete!

2. Firstly, remove the rind of the pork belly which should easily come off. Put that in an preheated oven (200 degrees celcius) for 20-30 mins and enjoy a nice piece of crackling from it.

beautiful crackling

3. Next, slice the sides off so that you get an even piece of pork belly. These cut-offs can be sliced up into bacon bits for future use.

4. From there, I chose to slice thick pieces of bacon (as I enjoy a thick-cut piece of bacon). If you have a meat slicer, you can slice it up to your desired thickness. If not, just use a knife and be patient with it. In total, I managed to get at least 20 thick slices of bacon from one pork belly. Either keep it in the fridge for quick consumption or in the freezer if you choose to slowly savour it.

bacon all sliced up

sliced bacon

5. The next thing to do is fry the bacon up and enjoy the fruits of your labour!

perfectly fried thick-cut bacon

Enjoy!

~~~~~~~~~~~~~~~~~~~~~~~~~~~~~~~~~~~~~~~~

Open homemade beef patty sandwich with homemade thick-cut bacon

To enjoy the bacon, the Mr whipped up his burger patty (my ultimate fav dish of his) and we had an open beef sandwich with his beautiful fried thick-cut bacon! Let me tell you, the 1 week is definitely worth the wait! It does not taste anything like bacon you buy from the supermarket! The flavours were so good, with a slight hint of apple! YUMMO!

I do hope you enjoy my first ever guest post and hopefully it has inspired you to make some bacon of your own! Can’t wait to hear your adventures! Have a great rest of the week and let’s all welcome the long weekend together! Wheeee! (:

Remember to always cook and bake with love! 

PS : Thank you my dearest Mr for taking time to write up this post! I love you! x

Babi Guling

Babi Guling

Good evening dear readers. So sorry for the lack of posts of late! Been really busy at work, and will crash the moment I hit the beds! But tonight, to make up for it, I’m going to share a recipe that would make you salivate from start to finish! Babi guling! I’m not sure if you have had this before, but let me tell you, it’s something you definitely want to try!

babi guling in Ubud

The first time I had babi guling was in Ubud when the Mr and I went for our honeymoon! (: It was highly recommended by a close friend, and the moment we tried a mouthful, we understood why. It was absolutely delicious. The meat was so tender and melts in your mouth. The skin was so crispy! Just the way we love our pork! hehe While walking to the shops after our delicious meal, we were lucky enough to see one of the suckling pigs delivered to the shop on top of a man’s head! hehe Love to see things that we don’t get to see everyday. Made our trip more memorable! The suckling pig was roasted to perfection! We were so tempted to have another plate just looking at it! hehe

Babi guling out of the oven

My memories were triggered when I was watching MKR and the winning team made their version of babi guling. It looked so so good and I was hoping they would post their recipe on the MKR website. Thankfully, they did! The mr requested for me to make it a few weekends ago and I happily and most willingly did! (:

spice paste - base gede

When I made the spice paste (base gede), I knew immediately it was gonna be really good as it smelt really close to the one we had in Ubud! I got more and more excited as the spices were blending as the smell of the aromatics just filled the kitchen. I couldn’t wait to get it into the oven and bake it! hehe The only thing that I would do when I make it again is to marinade the pork with the spice paste for at least a couple of hours, so that it would flavour the meat more!

Babi guling - sliced

Other than that, everything was perfect, from the crispy skin to the tender meat. Absolutely divine! We just wanted to finish everything, but had to leave some for lunch the next day! hehe So do give this a try, it’s no surprise why Dan & Steph are the winners of MKR. Their recipe was spot on and definitely a keeper! heh Please don’t get overwhelmed by the amount of ingredients! It’s really worth the trouble of finding them all!

Babi guling - Served

Babi Guling (Recipe adapted from MKR)

1.5kg pork belly, rind scored

2 1/2 tbs olive oil

300ml coconut milk

100g bean shoots

2 tsp kecap manis

A bunch of bok choy, boiled and drained

2 tsp shallot oil

Steamed jasmine rice, to serve

Spice Paste (Base Gede)

Juice of 1 lime

4 long red chillies, deseeded

1 stalk of lemongrass,  white part only, bruised and finely chopped

4 green spring onions (white tender part only) roughly chopped

2 cloves of garlic

2cm piece of fresh ginger, finely chopped

2 cm piece of galangal, finely chopped

1 tbs ground tumeric

1 tbs ground coriander seeds

1 tbs vegetable oil

1 tbs palm sugar

2 tsp ground black pepper

1/2 tsp shrimp paste

1/2 tsp salt

Sambal (For the bean shoots)

4 green spring onions (the green part)

2 small red chillies, deseeded

2 cloves of garlic

 1 cm piece of fresh ginger, finely chopped

1 lemongrass (white tender part only), bruised and finely chopped

2 fresh lime leaves

1/2 tsp shrimp paste

Juice of 1/2 lime

1 tbs vegetable oil

1/2 tsp salt

pinch of ground black pepper

Spice paste rubbed on pork belly

Steps :

1) Preheat oven to 240 degree C.

2) To make spice paste, process all ingredients in a blender to form a smooth paste. Reserve 1/4 cup for the sauce.

3) Lightly prick the meat side of pork with a sharp knife or skewer and rub in spice paste in a thick layer. Roll lengthways and secure at several intervals with butchers string. Place in a baking dish. Rub salt into skin.

Spice paste and pork belly

Spice paste evenly spread on the meat side of the pork belly

All rolled up!

4) Roast for 20 minutes. Reduce oven to 175 degree C and cook for a further 1 hour 15 minutes or until tender and cooked through. Remove from oven. Rest lightly covered with foil for 30 minutes.

Babi guling - ready to be sliced

5) To make sauce, heat 2 teaspoons of the oil in a small saucepan over medium heat. Add reserved spice paste. Cook for 5 minutes or until fragrant. Stir in coconut milk and juices from rested pork. Bring to a boil. Simmer for 5 minutes.

6) To make sambal, process all ingredients until smooth.

7) Cook bean shoots in a saucepan of boiling salted water until tender. Drain and set aside. Heat a lightly oiled frying pan. Cook sambal until fragrant. Add bean shoots and toss to combine. Stir in kecap manis.

8) In the same pot of water, boil the bok choy until tender, drain and place in a bowl. Add the shallot oil and toss it well.

8) To serve, slice the pork into 1-inch pieces and serve on hot steamed jasmine rice with the sambal bean shoots, bok choy and lots of sauce.

Babi guling with sambal bean shoots and sauce

ENJOY! (:

Babi guling - Served

So dear readers, hopefully you’re not too hungry after reading this post! But do give this a go as you would definitely not regret it! Especially if you and your loved ones are meat lovers. This is definitely a dish for you! (: Hope all of you had a good (and delicious) weekend! Here’s to a good week ahead!

PS : The sauce is so good, even my mr who usually isn’t a fan of sauce couldn’t stop pouring over his rice! hehe

Remember to always bake and cook with love!

Wantons in Chilli Oil & Vinegar (红油抄手)

Wantons in Chilli Oil & Vinegar

Wantons. Don’t you just love them? I can’t get enough of them! I love them in soups, with noodles and even on it’s own. Steamed, boiled and fried, gimme gimme! I love it when it is really stuffed to the max, and all you need is a few to fill your tummies. Recently, I went back to Food Republik with my dearest Peach Water, and decided to try their wantons in chilli oil and vinegar.

Wantons in Chilli oil and vinegar from Taiwan - Shilin Night Market

Wantons in chilli oil and vinegar in Taiwan - Shilin Night Market

(Photo from my Taiwan trip in 2009, please excuse the blurry picture of the food, I think I was too excited and hungry haha)

The first time I had these were at the Shilin Night Market in Taiwan itself. Let me tell you, it’s a small bowl of yummy-ness! Silky smooth wantons, with flavoursome stuffing, chopped lettuce and a sauce that I still can’t replicate. It had chilli oil, sesame oil, vinegar and a nutty paste (might either be sesame paste or peanut). Just so so good! And because it’s so small, I could easily slurp down 2 bowls! haha

Wantons in chilli oil & vinegar from Food Republik

These from Food Republik were quite yummy too! Although they didn’t have the same sauce, but a really good balance of chilli oil and vinegar! They also garnished with crushed peanuts and coriander. All I needed was a bowl of these wantons and the popcorn chicken. My belly was very happy! (:

Rows of handmade wantons

So a few days after having them. I was somehow craving for more. So instead of going down all the way to Boxhill, I decided to make my own version of it. I have to say, mine wasn’t anywhere close to the ones from Taiwan, but it was pretty similar to the one from Food Republik. Hooray! (:

I think the next time I will try to add a bit of sesame paste just to get the nutty flavour through the sauce. Lucky thing I made heaps of wantons, and because I only eat 4 each time (cos they are ginormous haha) so I could slowly try different versions! But if you’re a fan of the combination of spicy with a sour kick, do give these a try! I’m pretty sure you’ll be hooked! Even though the wantons take a while to make, but it’s actually a pretty fun process and you’ll realise there are many ways to fold your wantons! Mine is just one of which (:

Cross section of the wanton

Wantons in Chilli Oil & Vinegar (An Original Recipe of FoodMadeWithLove)

Wantons 

250g mince pork

100g fish paste

8 prawns, finely chopped

4 shitake mushrooms, soaked and diced finely

20g dried shrimp, soaked and finely chopped

3 cloves of garlic, finely chopped

2 tbs fish sauce

1 tbs soy sauce

1 tbs sesame oil

1 tbs oyster sauce

1 tsp ground white pepper

1 heap tsp corn starch

1 stalk of spring onion, finely chopped

Wanton wrappers

Sauce (for 4 wantons)

1 tbs chilli oil* (I used 老干妈)

1 tbs black vinegar*

1 tsp sesame oil

1 tsp oyster sauce

toasted sesame seeds, chopped peanuts & fried shallots (for garnish)

Steps :

1) For the wantons : In a frying pan, fry the dried shrimp and garlic till fragrant. Set aside. In a large metal bowl, add all the ingredients as well as the fried dried shrimp and garlic and mix till well combined.

2) Place a portion on a wonton wrapper, wet the two sides with water and fold it into half. Press all the air out and stick the two ends together.

Steps to making wantons

3) In a pot of boiling water, drop the wantons in and cook for 8-10 minutes or until the wantons start floating at the top. Drain and set a side.

4) In a small bowl, combine the sauces together until well combined. Place the wantons on top of the sauce and garnish with toasted sesame seeds, peanuts and fried shallots.

Wantons in chilli oil & vinegar

5) Give it a good mix to make sure the wantons are coated with the sauce and soaking in all the good stuff! ENJOY!

* Note : I do love spicy food and I love my black vinegar too, so do give it a taste after mixing the sauces and adjust accordingly to what you fancy!

Remember to always cook and bake with love ! (:

Kong Ba (Twice-Cooked Pork Belly)

I have a weakness. Pork belly is my weakness. There’s just something about tender meat that melt-in-your-mouth the moment it touches your tongue. I never really use to like eating the fatty bits of the pork belly. I remember when I did marketing, I used to look for the piece that had less fat and more meat. But now, I look for equal proportions haha. The mr has changed me for the better. I didn’t know what I have been missing! And now when we are back in Singapore, we would meet Stephie for a meal of fatty pork! Can’t wait till the end of the year! (:

After the mr’s family went back, we had heaps of food left in the freezer and I needed to clear it or I won’t be able to buy other things! I opened the freezer and saw a container of sliced pork belly. Immediately, I knew what I wanted to cook – kong ba (twice-cooked pork belly). Nothing beats slow braised pork belly that is caramelised till the meat is soft and easily breaks apart. YUMS!

Traditionally, you would eat it with a soft steamed bun. But I was too lazy to head out to Springvale to get it and found some man tou in the fridge so I steamed that instead. Though it’s not as soft as the traditional buns, they worked well too! Plus, to off-set the unhealthy fatty bits, we had it with lettuce! This is the epitome of a balanced diet haha (:

Do note that usually, you would use a whole slab of pork belly and slice it up after, but mine was already sliced up. To me, there wasn’t much difference, in fact I think it works better and you don’t have to risk burning your fingers to slice them up later. But either way, you’ll have yummies in your tummies!

Kong Ba (adapted from  To Food With Love)

1kg pork belly (either whole or sliced)

1/2 tsp thick caramel black soy + 4 tbs extra

2 shallots, thinly sliced

5 cloves of garlic, finely chopped

1/2 tsp five-spice powder

2 tbs light soy

1 tbs honey

2 tbs sugar

1/2 star anise

1 tsp sesame oil

2 cups water

bunch of coriander, roughly chopped and separate into 2 portions

ground white pepper

Vegetable oil, for deep frying

Steps :

1) Boil a large pot of water and boil the pork belly for 15-20 minutes. Remove and rinse the pork under cold water before patting them dry. Allow it to cool slightly and rub the skin with 1/2 tbs of thick caramel dark soy.

2) In a frying pan, heat enough vegetable oil on medium heat. Be careful not to heat it too high. Carefully lower the pork belly into the oil and fry till the skin is crisp (about 5 minutes). Do be very careful as there will be a very big splatter, use a splatter screen to avoid being burnt. Take the pork belly out carefully and drain off the excess oil using paper towel. (If you use a whole slab of pork belly, slice the pork belly to 1/2 inches thick after it has cooled down.)

3) In a large metal bowl, add the rest of the caramel thick dark soy, light soy, honey, sugar, star anise, five-spice powder, garlic, shallots and sesame oil and mix till well combined. Add the fried pork belly and marinade for at least 30 minutes.

4) In a medium sized pot, add 1 tbs vegetable oil and fry the pork belly until they are seared well. Add the rest of the marinade and top it with 2 cups of water. Cover the pot and bring it to a boil, then lower the heat to low and simmer for 1 1/2 hours. Add half of the coriander (including the stems) and continue to simmer for 1/2 hour. Check occasionally and turn the pork to make sure it is evenly covered in the sauce. The pork should be tender and the liquid should be reduced to a thicker consistency. Season with ground white pepper. Garnish with the rest of the coriander before serving with hot steamed buns and lettuce!

Enjoy! (:

Remember to always cook with love!

Wanton Noodles

I’ve been on a hawker food journey of late. There has been the black fried carrot cake (chai tow kway), XO fried carrot cake, prawn noodle soup and from a long time ago – minced meat noodle (bak chor mee). It’s no secret that I’m missing home, and it’s just evident with the food that I’ve been cooking recently! My ultimate source of comfort, besides the mr of course. (:

One other thing that I miss is wanton noodles. Especially the ones my grandma makes during our lunar birthdays. Her wontons are the bomb! hehe And when we head back for our holidays, wanton noodles would be one of the first things on our food-list that we wanna have after we’ve touched down. Fei Fei wanton noodles is one place we can’t miss, and let me tell you. Their bowl of noodles is magical. Looks simple, but tastes so good! Just talking about it is making me want a bowl now!

I came home craving for some wanton noodles from work one day and went to get some wanton wrappers to make some. If you know me well enough, you know that I  love spontaneity! When I think of a dish, I’ll head to the markets and get the necessary ingredients and will whip it up and serve it for dinner. hehe Not much of a weekly planner, I have to admit!

Usually, my grandma only has mince pork in her wantons. But I like to add a bit more ingredients to mine, and stuff it to it’s maximum. Whoops! hehe Well, just can’t help myself. hehe Need textures for the extra bite! So just before I share my recipe, just a heads up that making the wantons is quite labour intensive. Especially if you’re making it for the first time. So do make this when you have ample time to prep and do know that all your effort would be worth it! hehe  And also, the sauces for the noodles could always be altered to your own taste! I might prefer my noodles a little on the salty side hehe

Wantons Noodle (an original recipe of FoodMadeWithLove)

Egg noodles

8 slices of fish cake

a bunch of choy sum

bean sprouts

fried shallots and coriander, to serve

Wantons :

250g mince pork

100g fish paste

8 prawns, finely chopped

4 shitake mushrooms, soaked and diced finely

20g dried shrimp, soaked and finely chopped

3 cloves of garlic, finely chopped

2 tbs fish sauce

1 tbs soy sauce

1 tbs sesame oil

1 tbs oyster sauce

1 tsp ground white pepper

1 heap tsp corn starch

Wanton wrappers

Sauce for noodles (per serve) :

1 tsp shallot oil

1 tsp fried shallots

1/2 tsp sambal

1 tsp fish sauce

2 tsp thick dark soy sauce

1/2 tsp sesame oil

Stewed Mushrooms (optional) :

6 dried shitake, soaked and sliced thinly (reserve 1 1/2 cup of water)

Knob of ginger, thinly sliced into strips

1 tbs shallot oil

1 tbs oyster sauce

1 tbs shaoxing wine

1 tbs fish sauce

1 tbs light soy sauce

1 tbs dark soy sauce

Steps :

1) For the stewed mushrooms : In a small pot, heat the shallot oil on medium heat and fry the ginger till fragrant. Add the mushrooms and fry it for 5 mins before adding the sauces. Add the water and allow it to simmer on low heat for at least 30 mins. Of course, the longer the better. Just stir it occasionally and add more water if needed.

2) For the wantons : In a frying pan, fry the dried shrimp and garlic till fragrant. Set aside. In a large metal bowl, add all the ingredients as well as the fried dried shrimp and garlic and mix till well combined.

3) Place a portion on a wonton wrapper, wet the two sides with water and fold it into half. Press all the air out and stick the two ends together.

4) In a pot of boiling water, drop the wantons in and cook for 8-10 minutes or until the wantons start floating at the top. Drain and set a side.

5) In a serving bowl, add the sauces for the noodles and give it a good mix so that it’s well combined. In the same pot of boiling water, blanch the noodles, fish cake, choy sum and bean sprouts separately. Toss the noodles in the sauce that was previously prepared.

6) To serve : Place the choy sum and bean sprouts on top of the noodles, and top that with the fish cake. Place the cooked wantons on top, followed by the stewed mushrooms (and some extra sauce of course). Last but not the least, sprinkle some fried shallots and coriander. ENJOY!

Homemade BBQ Pork (Char Siew)

I’ve always been a fan of roast meats, especially roast duck and roast pork belly. If you follow me on instagram, I actually head to Golden Harvest Restaurant at Footscray for their roast duck and it’s the best roast duck I’ve had!

It’s usually a treat when we head there for dinner. A celebratory meal (:

Of course another favourite of mine is BBQ pork (char siew) and not just any char siew, specifically my mum’s. Ever since she made her version of BBQ pork, my brother and I have never liked any other versions that we had that is bought. Something that bothers my dad alot is the artificial red colouring of most of the store bought BBQ pork. And mum’s has no sign of that at all.

Tender and juicy pieces of BBQ pork that were cooked in an AMC pot! AMC pots are magic, really. And I’m a super lucky girl, cos whenever I am back for a holiday, mum would surely make her char siew for me. (:

So when I’m back here in Melbourne. Of course I miss mummy’s char siew and I decide to give it a shot, without the AMC pot. haha with my fingers ans toes crossed, I marinated the meat and baked it in the oven!

I have to say, it was close but it’s still lacking the same punch and kick as the one mummy makes. But for now this would have to do and we will just have to keep trying and altering the marinade until we get it spot on! But this definitely satisfied our cravings that night!

So here’s my take on BBQ pork, how do you usually make yours?

Homemade BBQ Pork (An original recipe of Food Made With Love)

400g pork fillet (or any tender cut)

2 tbs Lee Kum Kee Char Siew Sauce

1 tbs Hoisin Sauce

1 tbs oyster sauce

1 tsp dark soy sauce

2 cloves garlic, chopped garlic

1 tbs shao xing wine

1 tsp ground white pepper

1 tsp garlic salt

Steps :

1) Marinade the pork fillet with all the other ingredients listed above for at least 2 hours (even better overnight).

2) Preheat the oven to 180 degrees celcius. In a deep baking tray, place the marinated pork and pour 1/3 of the marinade on top of the pork. Cover the pork with baking paper to make sure the top doesnt burn (not yet anyways!). Bake for 20 mins and take it out to flip it to the other side.

3) Pour another 1/3 of the marinade on top and bake it for another 15 mins without covering this time.

4) Take it out and flip it for the last time, pouring the remaining marinade on top of the pork fillet and bake it for another 10 mins, or until tender.

5) For the last 5 mins, turn the grill on and allow the top of the pork fillet to char.

6) Allow the pork to rest for 10 mins before slicing it to thin pieces. Remember to scrape all the yummy sauce on the baking tray and serve it with the pork or on the side. ENJOY!

I prefer to have the sauce on my char siew. Have it with your choice of carbs. Of course mine is quinoa, how bout you?

Minced Pork with Thai Basil (pat Krapao Moo Sap)

Thai food. Absolutely adore them. The spicy-ness, the tangy-ness.

There is something about the combination of sweet, sour and spicy. Especially on a cold day. The spicyness would definitely help warm your tummy up! (: I first had this at a small, authentic thai restaurant on Lygon Street called Ying Thai 2. Their food, is absolutely delicious! I remembered having this particular dish, and they having different level of spice. And being gungho. I decided to be brave and ordered the spiciest, level 3. It was soooo spicy but sooo good! The tummy suffered a little after that. Just a tad. But all was worth it. haha

But of course, I didn’t wanna put my stomach through the same thing again, so I reduced the spicyness when attempting to make it at home! A very good idea, by the way. (:

Minced Pork with Thai Basil and A Sunny Side Up

Ingredients :

1 tbs olive oil

450g mince/ground pork

3 cloves garlic, finely chopped

2 chilli padi, deseed and chopped finely

yellow onion, halfed then finely sliced

1 tbs oyster sauce

1 tsp fish sauce, extra for fried egg

pinch of sugar

handful thai basil leaves

handful of dried shrimp, fried till crispy

Sunny-side-up egg (optional)

spring onion, finely chopped for garnish

Steps :

1. Heat a wok on medium to high heat and add the olive oil. Fry the garlic and chilli till fragrant (not brown) and add the ground pork. Fry till brown. Make sure there are no lumps.

2. Add the oyster sauce and fish sauce and fry for 5 minutes. Add the sugar, onion and basil leaves and fry for a further 5 minutes.

3. Top the mince with the crispy dried shrimp and garnish the sunny-side-up with the spring onion and a sprinkle of the fish sauce

4. Serve with steamed jasmine/long grain rice.

ENJOY! (:

ps : So please share with me what is the dish that you MUST ORDER when you’re at a thai restaurant?

Not Your Usual Lasagne.

Who doesn’t like lasagne? The layers of rich meat sauce with cheese. Doesn’t just saying that line make you want to sink your teeth into it? It’s one of my source of comforts. Besides garlic mash, mac and cheese. haha okie. the list could go on. I think food, on the whole, is my comfort. hee.

When I was deciding what to cook for dinner, lasagne came straight to my mind. But I was hoping to cook something a bit healthier. so layers of vegetables was the only thing that I could think of! And as colourful as they can get! I think I got it all covered. Swede (yellow), eggplant (purple), zucchini (green) and the meat sauce (red/orange). I couldn’t help myself. (:

of course, I made a little bit of white sauce to combine all the veg together so that they could stay (kinda) in shape! Guilty! but SO GOOD! (:

Tomatoey goodness (: It was a big hit among the boys! They loved it. I know it looks heavy, but i only sprinkled a bit of mozzarella cheese on the top to melt under the grill for the last 5 mins before serving. It’s worth the extra calories, I say. haha

So here’s the recipe, a Food Made With Love original (:

Ingredients :

400g mince (beef or pork)

1 big onion, finely diced

3 cloves garlic, finely chopped

2 tbs olive oil

1 carrot, grated

1 green capsicum, finely diced

1 tsp dried mixed herbs

3 tbs tomato paste

1 can (400g) tinned chopped tomatoes

3 swedes, sliced thinly

1 large eggplant, sliced thinly

2 zucchini, sliced thinly

100g spinach

Salt and pepper, to taste

For the simple white sauce :

150ml milk

50g butter

3 tbs plain flour

50g parmesan

salt and pepper, to taste

grated mozzarella, to finish

Steps :

1. After slicing the eggplant, salt both sides and allow it to stand on a rack for 30 mins. Pat them dry and set them aside. Preheat the oven at 180 degrees Celcius.

2. Heat a frying pan with the olive oil, fry the onion and garlic till soft and fragrant. Add the carrot and capsicum and fry for a further 5 minutes.

3. Add the mince and fry till brown. Make sure there are no chunks. Add the tomato paste and dried herbs, stir till well combined. Add the chopped tomatoes, season with salt and pepper, stir and allow the liquid to reduce till almost totally dry.

4. In a baking dish, lay the eggplant at the bottom and top with the meat sauce. Top with a layer of spinach. Then layer the zucchini, another layer of eggplant and swede.

5. The white sauce : Melt the butter in a small pot over low-medium, add the flour and stir, allowing it to cook for 3 mins. Add the milk and using a whisk, make sure it is well combined and there are no lumps. Add the parmesan and stir until sauce thickens. Season with salt and pepper. If it is too thick, just add a bit more milk.

6. Pour the white sauce over the baking dish and bake for 40-45 minutes. Take the baking dish out and top with mozzarella cheese and put it under a grill for 5 minutes or until golden brown!

SERVE and ENJOY! (:

What is your favourite comfort food of all time ?

Valentine’s Day Surprise!

( Us 7 years ago ♥ )

Surprises. Don’t you just love them? Cause I definitely do.

My past year has been filled with happy surprises. First the proposal, then the engagement party and now valentine’s day! (: Regardless of the size of the surprise, I feel very very loved and very very lucky to be loved.

The Mr and I talked about it before hand that we won’t be celebrating Valentine’s Day as we would have arrived back in Melbourne just a day before and really, we just didn’t wanna spend the astronomical amount that restaurants would charge on this day for lovers. So I decided that I was going to cook for him.

Baby surprised me with a rose when I met him for coffee! (: It’s the small things like that that counts!

and see that lego guy? He’s Leroy. hehe

okie. TO THE POINT. I’m sorry if I’m telling my life story in one post. SO. I decided to make something that my baby had always wanted to have and so I walked around in Woolworths trying to get inspiration. He always wanted to get those pork medallions stuffed with herb butter but being me, I refuse to get things that pre-marinated unless I really can’t get the flavour that they have. So I decided to get pork chops and made my own herb butter!

I was so happy I did it. Cos the smile on my baby’s face was worth every single second spent deciding on what to cook and executing it.

Love on a plate. (:

Together with the pork chops, I made a side of caesar salad! I remembered when watching masterclass in the second season that Donna Hay made caesar salad in a totally different way. So I decided to try it, just through my own memory of how to do it. and it turned out great!

I do hope everyone had an awesome valentine’s day and you spent it with your loved ones! (:

Herb Butter

125g unsalted butter, softened

2 pinches of salt

2 tablespoon of fresh oregano

handful of chopped parsley

Steps :

1) In a mortar and pestle, pound the herbs with the salt till it’s almost in a paste.

2) Add the butter and with a spoon combine both the herb paste and butter till well combined.

3) Remove from the mortar and put it in a cling wrap. Roll it up and put it into the fridge to set.

Caesar Salad

1 baby cos lettuce

4 slices of bacon

2 hard boiled eggs, sliced into half

Your favourite Caesar dressing

Parmesan cheese

Avocado (optional)

Sunflower seed (optional)

Steps :

1) Preheat the oven to 180 degrees Celsius, and bake the bacon for 10mins. Remove from the oven (need it for the pork chops, so do not slice it up yet).

2) Slice the baby cos into half lengthwise

3) Cut the bacon onto the lettuce (only after the pork chops are done). Sprinkle some parmesan cheese.

4) Pour the caesar dressing on the lettuce, the amount that you would like. Place the egg on the side and the avocado and top the salad with some sunflower seeds.

Herb Butter Pork Chops

2 pork chops with bone

salt and pepper, to taste

Vine tomatoes

Steps :

1) Rub some of the herb butter and marinade the pork chops generously. Season both sides with salt and pepper.

2) Heat the frying pan and sear both sides of the pork.

3) Take the tray which you used to bake the bacon and place the pork chops on top of the bacon. Place the vine tomatoes on the side of the tray and baked for another 10-15mins (depending on how thick the chops are)

4) Plate the different components. Cut a slice of cold herb butter and place on top of the pork chops.

5) SERVE (: