Osso Bucco in A Rich Tomato Red Wine Sauce & Creamy Parmesan Polenta

IMG_9684-1-1

Being pregnant, I cook according to what I crave these days, or some might like to say, according to what the baby wants! hehe To be honest, most of the things I cook are food I miss from home, but currently, my daily cravings are anything tomatoey and cheesy! Mmmmm (: How can that go wrong?

Taylors Estate Pinot Noir

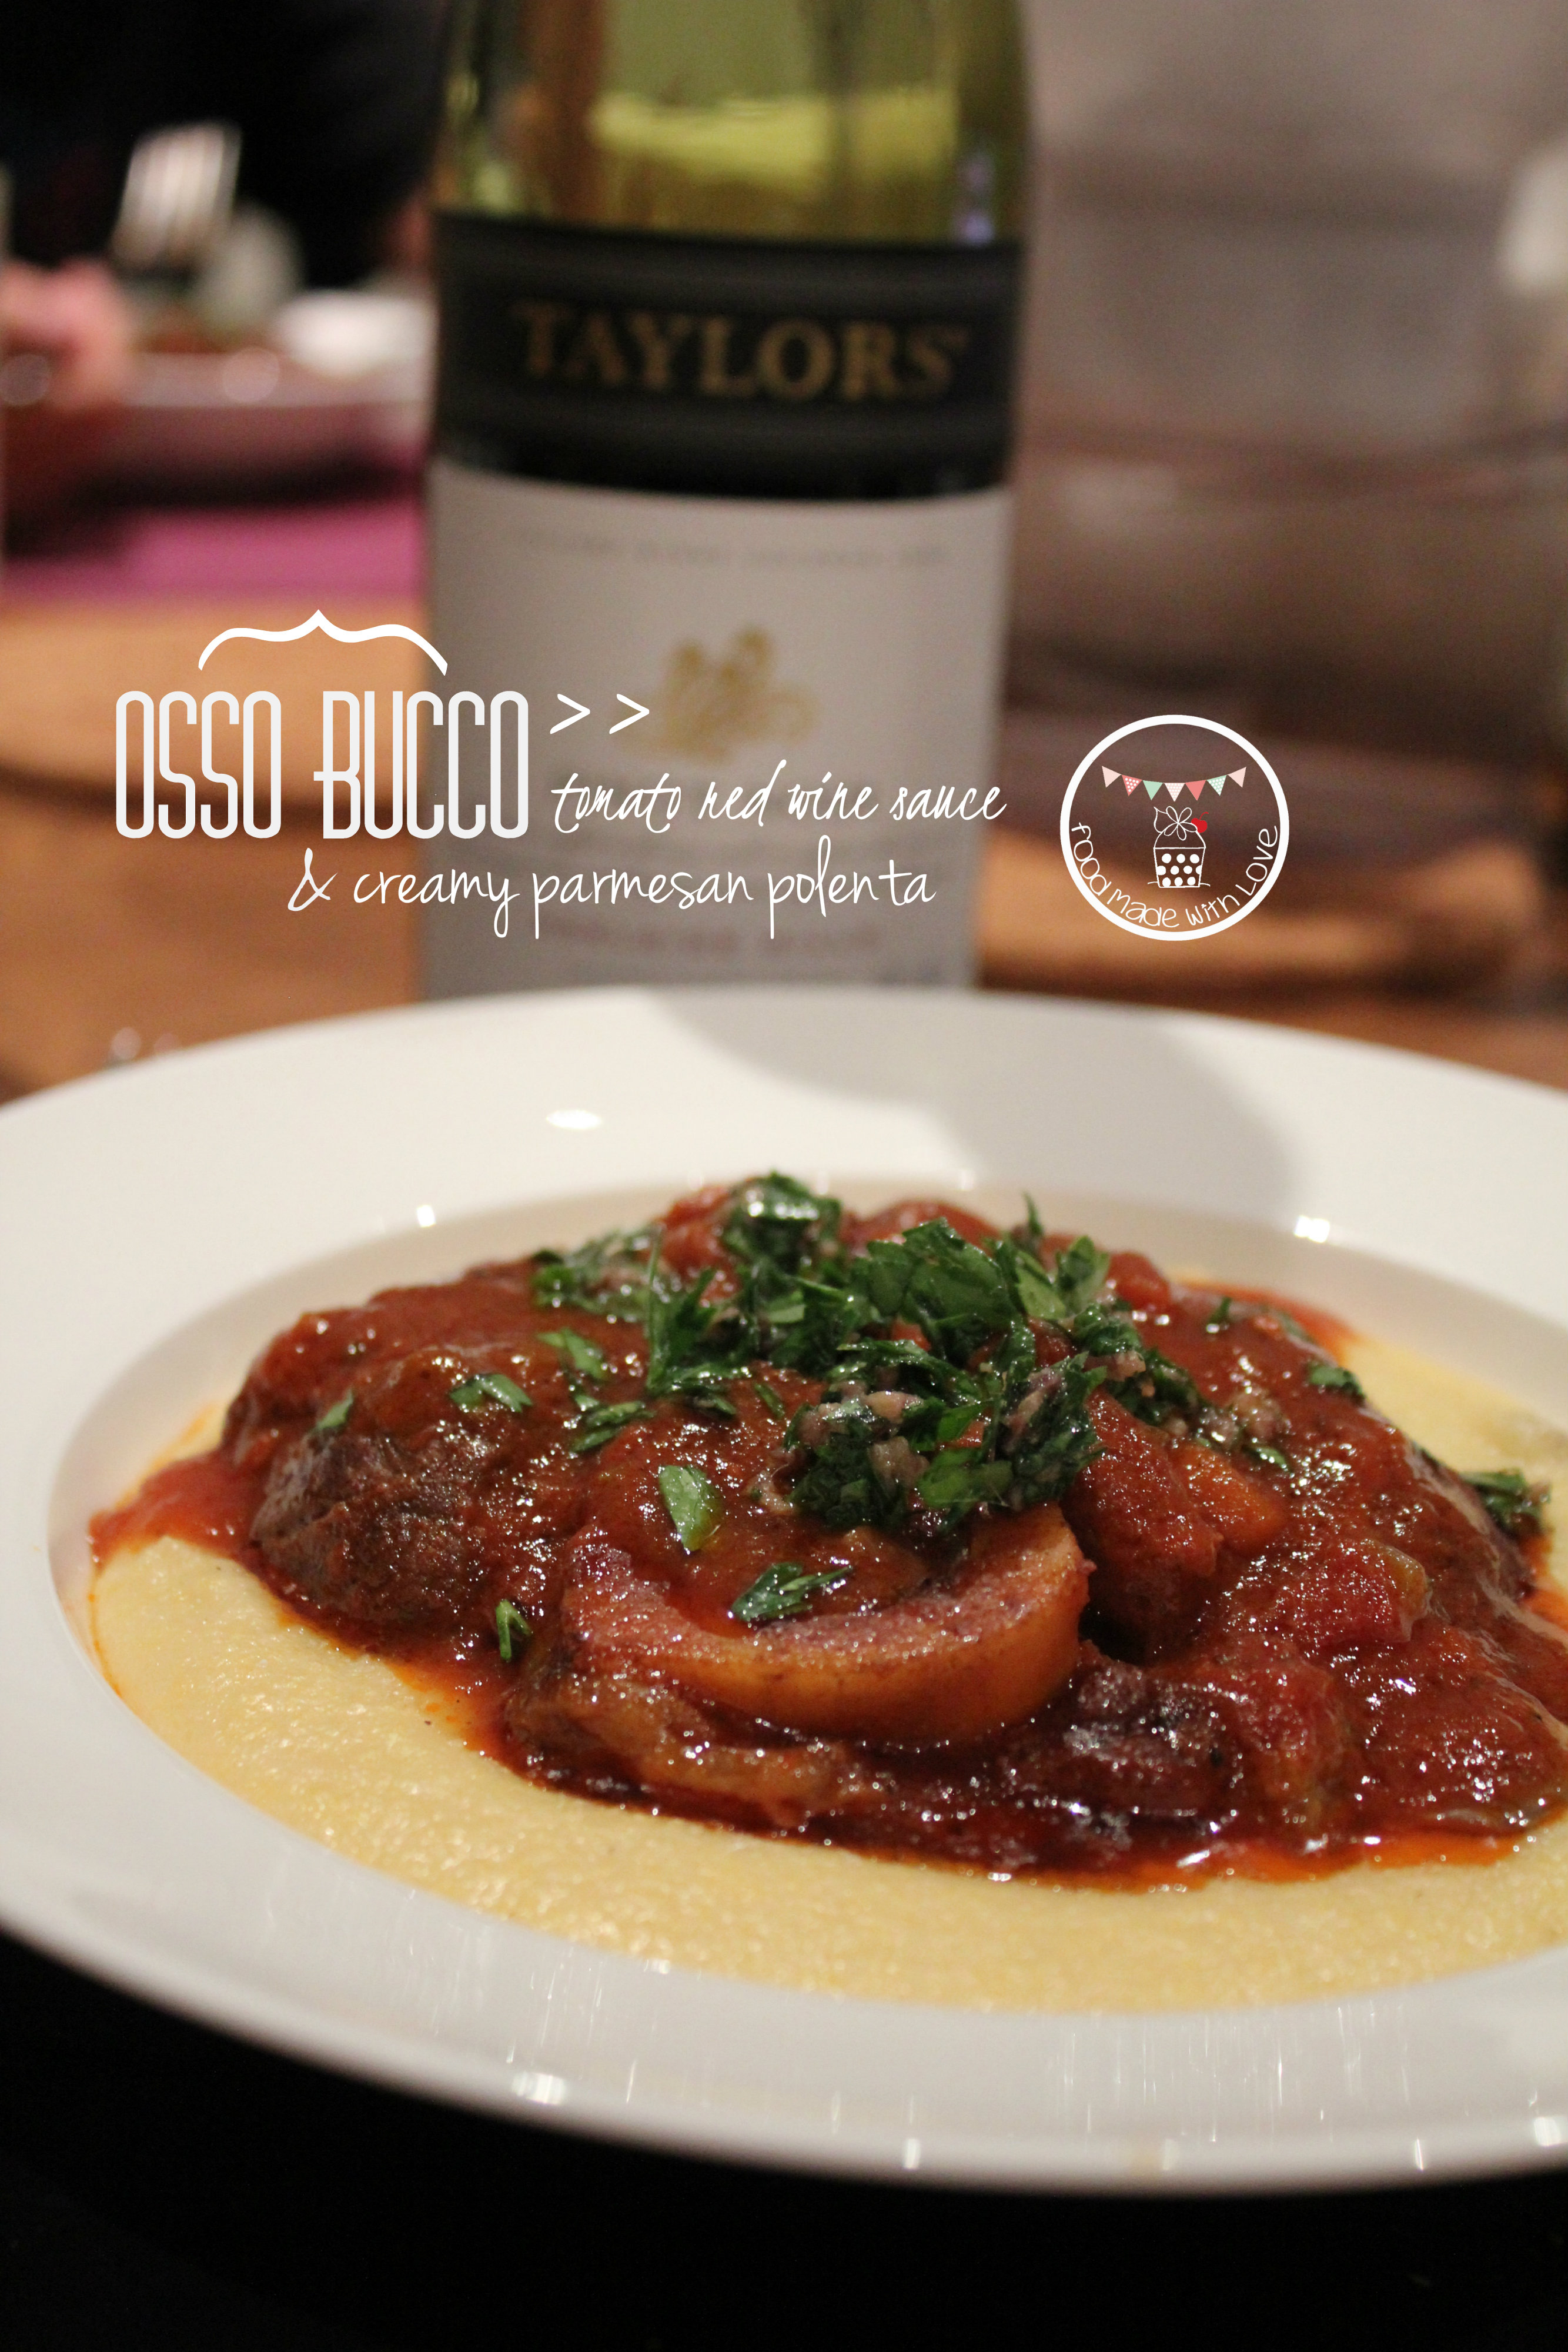
It is the time of the month again when I’m so lucky to receive a couple of bottles of Taylors Wines! I know, I know. Please do not worry, I’m not drinking! I also make sure that I cook it long enough to get all the alcohol content out of the dish, leaving just the intense flavour of the wine. hehe So you can take a deep breath! hehe I decided to ask for Taylors Estate 2012 Adelaide Hills Pinot Noir. This medium bodied wine has flavours of ripe cherry and the freshness of berries. It’s soft on your palate and has tones of subtle spiciness. I knew immediately what it would be great for – Osso Bucco!

Tomato and red wine cooked osso bucco with creamy parmesan polenta

This was one perfect dish for satisfying my pregnancy cravings! Melt-in-the-mouth beef pieces cooked in a thick, luscious tomato and red wine sauce and served on a creamy parmesan polenta! I’m not a huge fan of marrow, but the mr is, so it was also a winner with him! hehe

So here’s the recipe, hope you will enjoy it as much as I did! (:

Osso Bucco in a Rich Tomato & Red Wine Sauce with Creamy Parmesan Polenta (serves 6-8)

For Osso Bucco :

8 pieces of osso bucco

salt & pepper, to season and to taste

hot paprika, to season

plain flour, to season

4 tbs olive oil

2 red onions, finely chopped

2 carrots, peeled and sliced into rounds

2 stalks of celery, finely sliced

3 cloves of garlic, finely chopped

2 large chilles, deseeded and thinly sliced

2 anchovy fillets

1 tin of chopped tomatoes (400g)

1 cup passata

1 cup Pinot Noir

1 cup beef stock

aromatics chopped up

For creamy parmesan polenta :

4 cups chicken stock

1 cup yellow cornmeal

1 cup finely grated Parmesan

2 tbs unsalted butter

1/4 cup thickened cream

Salt & ground black pepper, to season

For Anchovy Gremolata (optional)

4 tbs flat leaf parsley, finely chopped

9 anchovy fillets, finely chopped

Steps :

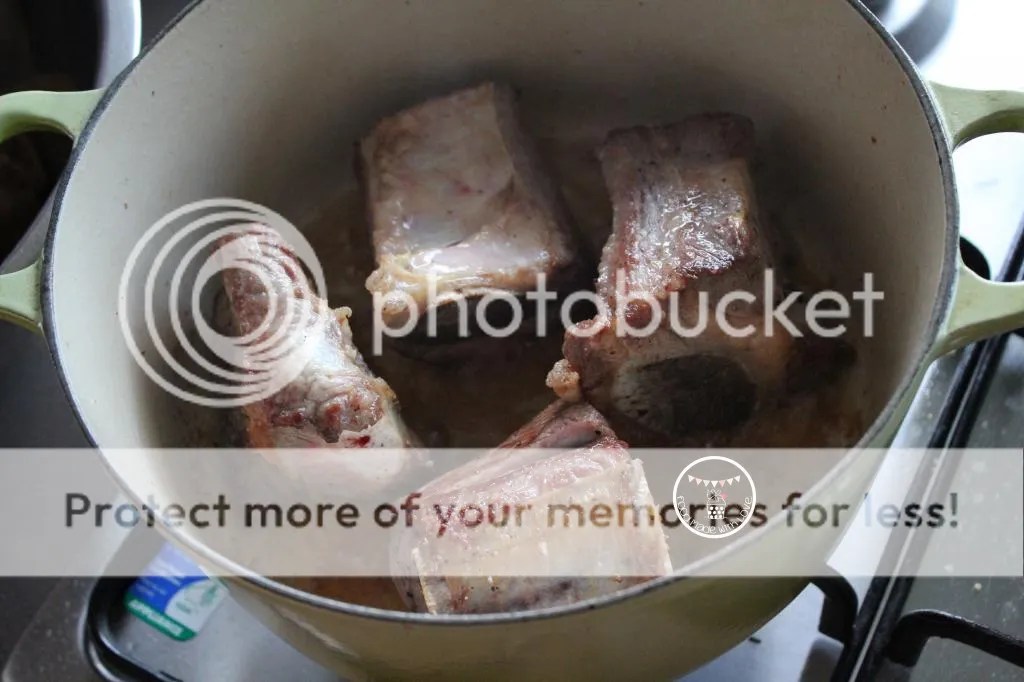
1) For the osso bucco : In a heavy based frying pan, add the olive oil and heat it on medium heat. Season the osso bucco pieces with salt, black pepper, hot paprika and flour on both sides. Fry and seal the osso bucco and place it on the plate, set it aside while preparing the sauce.

Season the osso bucco

Sealing the osso bucco

sealed osso buccos

2) Add the red onion, carrots, celery, chilli and garlic into the pan and fry till soft and fragrant.

Frying the ingredients till fragrant

3)  Add the red wine and allow that to reduce till 1/4 left.

adding the red wine

4) Once the red wine is reduced, add the tinned chopped tomatoes, passata, anchovies and beef stock. Allow the mixture to come to a boil then carefully add the osso bucco.

Slow cooking the osso bucco

5) Cover and allow it simmer on low heat for 2-31/2 hours. The meat should separate from the bone.  Give the pan a shake every 30 mins, to make sure it’s not stuck /burnt at the bottom.

6) For the polenta : In a medium sized pot, bring the chicken stock to a boil. Reduce to medium heat, and slowly add the cornmeal, whisking continuously with a whisk to prevent lumps. Switch to a wooden spoon and continue stirring until the mixture thickens (about 10 mins), season with salt and black pepper. Make sure you scrape the bottom to make sure nothing burns or stick. Take it off the heat and add the parmesan, butter and thickened cream.

7) For the anchovy gremolata : Mix the chopped parsley and anchovy until well combined.

8) To serve : Place the osso bucco on top of a bed of creamy parmesan polenta and top with more tomato and red wine sauce. Scatter the anchovy gremolata on the osso bucco and ENJOY! (:

Osso bucco served

Thank you Taylors Wines once again for the beautiful Pinot Noir, and although I can’t have a glass (or two), I’m so happy I’m still able to have them in my food! hehe Have a great mid week everyone! Remember to always cook and bake with love! Till the next post, xx

Sugee Cookies : Easy and A Great Gift !

photo 2-1-1

Chinese New Year is no doubt a season of sharing food and every year, there is just one thing I love to make for my colleagues and close friends here in Melbourne. Sugee cookies! These melt-in-your-mouth cookies are so addictive, you will never be able to stop at one!

Sugee cookies

The best thing about these cookies are that they are so easy to make, and you don’t even need a mixer. All you need is a large bowl, a weighing scale and a wooden spoon! The you’re good to go! So if you’re thinking of making something that is a sure winner, try and make these! I am almost certain that your friends and family will love these!

Sugee Cookies (makes about 24-30 cookies)

80g almond meal

150g plain flour

100g sunflower oil

50g icing sugar

1/2 tsp salt

1/2 tsp bicarbonate soda

1 egg yolk + a splash of water (for egg wash)

Steps :

1) Preheat oven to 170 degrees celcius. In a large metal bowl, aft all the ingredients except for the egg wash.

Ingredients for the sugee cookies

2) Take teaspoons full of dough and roll them into round balls. Place them on a lined baking tray and brush the top with egg wash.

all ready to be baked

3) Bake for 7 mins and rotate the tray to bake for a further 7 minutes until cookies are golden brown.

packed and ready to be gifted

4) Allow it to cool on a cooling rack before you start popping them into your mouth or pack them in a bottle! Enjoy! (:

Just 4 easy steps to get this delicious bite, so don’t wait any longer! Go go go!

Remember to cook and bake with love! 

Galloping into the Year of Horse with Homemade Bak Kwa

photo 3-1-1

Happy Lunar New Year my dear readers! (: So sorry for the lack of posts! I’ve been back in Singapore and spending as much time as I could with my family. But I’m back and ready to share lots with you, so please hang in there with me. I promise to make your time worthwhile!

I’m not sure what your traditions are for Chinese New Year, but for me, it’s about coming together as a family and feast on delicious food! Of course it’s not always about food, it’s also about spending time with your loved ones and just reminescing on the good things from the past year, setting goals for the new one!

There are many different kinds of Chinese New Year goodies that we love to eat. Lucky for me, I got to eat my fair share before I flew back to Melbourne. But there is one that I didn’t quite get to have and also sadly, we aren’t allowed to bring it back cause it’s meat. BAK KWA! It’s like a chinese pork jerky that is sweet and salty and just delicious!

homemade bak kwa

Singaporeans really do love their bak kwa, and many would actually queue for hours to get some! So instead of queueing (plus I don’t think I can get any that are similar to those back home), I decided to try making them this year!

The best thing about this is that you can freeze it and just grill it when you feel like having some! Trust me. Once you have a bite, you would definitely want to keep some in your freezer. These are so addictive! So give them a go, you won’t regret it!

Homemade Bak Kwa (adapted from Nasi Lemak Lover)

Ingredients :

900g mince pork

130g caster sugar

2 tbs light soy sauce

1 tbs shaoxing wine

2 tbs oyster sauce

1 1/2 tsp thick dark soy

1/4 tsp five spice powder

Ground white pepper

1 tbs honey

Steps :

1) Marinade the mince pork a day before you intend to make it. In a large bowl, add all the ingredients and mix with a pair of chopsticks.

Marinating the mince pork

Stirring the mixture in one direction

2) Make sure you stir it in one direction and until the mixture becomes gluey. Do make sure it’s gluey as it will allow the meat to stay as one piece after being baked. Cover the bowl with cling wrap and place it in the fridge overnight or for at least 3 hours.

Gluey mixture

3) Preheat the oven to 160 degrees Celcius. Spread the marinated pork mince thinly onto the baking tray using a spatula.

pork mince mixture spread onto baking tray

4) Bake the pork mince for 15 mins and remove it from the oven. Allow it to cool slightly before cutting it into desired shape and size using scissors or a pizza cutter. If you intend to freeze it, allow them to cool completely before placing them in a zip lock bag and freeze it up to 2 weeks.

baked and cut

5) Turn the grill on at 240 degrees Celcius and grill one side for 5 mins before flipping and grilling the other side for a further 5 mins, until the meat is golden brown or slightly charred on the sides. Let is cool down (it actually tastes better the day after it’s grilled!) and enjoy! (:

homemade bak kwa

So you ready to make some bak kwa? You’ll love it for sure! Have a prosperous year of the horse everyone!!

Remember to always cook and bake with love.

Tagine Magic : Moroccan Meatballs & Baba Ganoush

IMG_8881-1-1

I haven’t had much Moroccan food, but I can distinctly remember the first time I had it while we were still living in Brunswick many years back. On Sydney Road sits a small little Spanish/Moroccan restaurant, LaPaella, that sells really delicious Moroccan food and it was from this experience where I drew my inspiration from! I was really lucky to receive an Emile Henry tagine from Kitchenware Superstore, so it was perfect for me to make something Moroccan for dinner!

emile_henry_red_tagine

(photo credits : The Kitchenware Superstore)

The 32cm tagine came in a beautiful dark red and the best thing was it was made using the new flame top tecnologyan innovation in ceramics, with the development of a new glazed clay, exceptionally resistant to heat. So it didn’t even need a flame diffuser if you’re using the stovetop! How good and convenient is that?

Moroccan meatballs with baba ganoush

It also keeps the food warm for a longer time! So you’ll still get hot food after all the photo taking! haha (: Definitely perfect for me! hehe

Moroccan meatballs with baba ganoush and turkish bread

I am all for having a balanced meal, so besides the Moroccan meatball, I charred some vegetables, added some okra and also made baba ganoush to go with as a side! This combination, I have to admit, is addictive! hehe You can’t stop having it. I assure you!

So here is the recipe and if you don’t have a tagine, I encourage u to get one, if not, you could always make it in a shallow frying pan. But a tagine is recommended! hehe

Moroccan Meatballs with Baba Ganoush (Recipes adapted from Baltic Maid & David Lebovitz)

For the meatballs :

300g mince pork

300g mince beef

1 small onion, finely chopped

2 cloves garlic, finely chopped

1 tsp salt

1 tsp ground ginger

1 tsp paprika

1 tsp ground coriander

1 tsp cumin

1/2 tsp cinnamon

2 tbs of olive oil, for frying

For the spicy tomato sauce : 

1 can of chopped tinned tomatoes

1/2 cup passata

2 cloves of garlic, finely chopped

1 tsp chilli flakes

1/2 cup of beef stock

1 packet of okra (about 200g)

1 red capsicum

1 yellow capsicum

1 green capsicum

1 tsp salt

For the baba ganoush :

2 medium size eggplant

2 heap tbs tahini

Juice of 1 lemon

2 cloves garlic, peeled and smashed

1/4 tsp chilli power

1 tbs olive oil, and extra to serve

1 tsp salt, or more to season

chopped parsley & chilli flakes, to garnish

Steps :

1) Under a hot grill, grill the capsicums and egg plant till they are tender and charred. Place them in a metal bowl and cover with cling wrap for about 10 mins. The charred skin would peel off easily. Slice the capsicum lengthwise and place in a bowl. Put the grilled eggplants (let whole) aside.

2) Place the tagine on the stove over medium heat. Add the tinned chopped tomatoes, passata, garlic, beef stock and allow it to come to a simmer for 10 mins. Add the okra and cover, allowing the okra to soften (about 10 mins). Add the chilli flakes.

making the spicy tomato sauce

3) Add the sliced roasted capsicum into the sauce and allow it to simmer for another 10 mins. Stirring to make sure the bottom is not sticking. Then switch it off, leaving the cover on.

Add the roasted capsicum into the sauce

4) For the meatballs : Add all the ingredients into a large meta bowl and mix till well combined.

Ingredients for the meatballs

5) Form the meatballs according to the size you fancy and place them on a plate. Heat a heavy based frying pan on medium heat then add the olive oil. Brown the meatballs on both sides then add them into the spicy tomato sauce (in the tagine). Cover and allow it to simmer on low heat for 20 minutes.

Frying the meatballs

6) While the meatballs are simmering away, slice the roasted eggplant into half, lengthwise, and scrape all the flesh into a food processor. Add the garlic, tahini, chilli powder and blend till quite smooth. Add the lemon juice, salt and olive oil. Blend till well combined. Place in a bowl, drizzle with more olive oil and garnish with chilli flakes and chopped parsley.

Moroccan meatballs

7) Garnish the meatballs with fresh parsley and serve with baba ganoush and warm turkish bread!

Moroccan meatballs with baba ganoush and turkish bread

Enjoy! (:

Hope you all had a great weekend and here’s to an awesome week ahead! Remember to always cook and bake with love! Till the next post, xx!

Disclaimer : I was given the tagine by Kitchenware Superstore to test and write a review, but all opinions and experience are based on my time of use! Thanks so much for this amazing tagine! 

Salmon En Papillote

Salmon En Papillote

Cooking. Definitely something I find joy in. Something I love. No matter how tired or long the day is, I always look forward to being in the kitchen. Be it something I’ve cooked many times before, or trying out a new recipe, it always makes a sweet end to my day. Not to mention the smile on the Mr’s face after eating it. Just can’t get any better than this!

Taylors Clare Valley Gewurtztraminer 2011

It’s the time of the month again when Taylors Wines has so generously given me two bottles of wine to taste and come up with a recipe that includes it as well as be perfect to pair with! This month, I decided to choose one that I never had much experience with – The Taylors Estate 2011 Clare Valley Gewürztraminer! This wine is light and crisp, with citrusy notes so I only had one protein in mind for it. FISH!

Salmon en papillote with pan fried jerusalam artichokes

There was one way that I’ve been wanting to try out ever since I’ve had it a few years back. En papillote is a method of cooking where food is put in a folded parchment paper in a shape of a pouch or parcel, and then baked! This method is perfect for fish, cause it keeps its moisture while steaming in the pouch. hehe I was taught this method by the talented chefs from Cookyn Inc, when they came to my place to do a private dinner party for my brother’s birthday! Amazing! So big thank you to them!

perfectly cooked salmon

This method doesn’t take long for the fish to be cooked, and the only time consuming step is the preparation of the ingredients. But once that is done, you get a beautifully cooked fish on your plate within 15 minutes! Of course, that depends on the thickness of your protein. hehe So definitely give this method a try, I’m sure you will love it as much as we did!

Salmon en papillote

Salmon En Papillote (Adapted from Cookyn Inc, serves 4)

Ingredients prepped

4 fillets of salmon, cut into 2 inches in width and skin removed & reserved

1 chorizo, cut into cubes

1/2 green capsicum, cubed

1/2 yellow capsicum, cubed

1/2 lemon, thinly sliced

4 tbs of Gewürztraminer (or any white wine, you could use champagne too if you feel generous!)

Salt & pepper, to season

1 packet of brown shimeiji mushrooms, washed and separated

2 cloves of garlic, finely chopped

1 tbs olive oil

2 tbs unsalted butter

thinly sliced lemon

Steps :

1) Preheat the oven to 170 degrees celcius. Cut 4 pieces of parchment paper (about 30 cm long) and lay them on a flat surface. Then place 3 slices of lemon on the paper without any overlap.

lemon on parchment paper

My paper is fluted and it can be easily done by folding your parchment into a square and then folding it into half diagonally again and again until it gets too small to do so. Then flatten it out before placing the lemon slices.

2) Place the slice of fish on top the of lemon, then add a tbs of chorizo, yellow capsicum and green capsicum.

All ready to be folded

3) Bring the two ends of the paper together and fold it over twice and scrunch them together so they do not unfold. Do the same for one side of the pouch, leaving the other side open.

One side of the pouch left open

4) Carefully pour 1 tbs of Gewürztraminer into each pouch. Then fold the rest of the pouch to seal all the ingredients in. Place the pouches onto a baking tray and bake it in the preheated oven for 17 minutes.

5) While the fish is cooking, heat up a small frying pan and add the olive oil. Fry the garlic till it’s fragrant, careful not to burn them as it will turn bitter. Add the mushrooms and fry till tender. Add the butter and allow it to coat the mushrooms well. Keep it warm until ready to be served.

6) In another frying pan, heat it up on medium heat and place the salmon skin in the pan. Fry both sides till it’s crispy and golden, place on a paper towel to absorb the excess oil. Set aside.

crispy salmon skin

7) To serve : Open the parchment paper, and place the sautéed mushrooms on the fish and top it with a piece of crispy salmon skin. Serve it with your favourite side (I had butter sautéed Jerusalem artichokes with pine nuts) and a glass of Gewürztraminer!

Salmon en papillote - served

Enjoy! (:

Just for fun, I’ve made a short video of the steps from start to finish! Sorry about the background noise but I hope it helps in clarifying how it is done! (:

Thank you Taylors Wines once again for the beautiful Gewürztraminer! It was delicious and definitely one that I can see myself having with my seafood! hehe Hope you all had a wonderful weekend and remember to always cook and bake with love! Till then, xx !

Thai Fish Cakes & Red Nam Jim

Thai fish cake with red nam jim

Thai food. I absolutely adore it. It’s just a cuisine that makes the tongue do a dance after every bite/ mouthful! Sweet, sour, salty, spicy, tangy! All rolled into one! Absolutely mouth-watering! However, I have to admit, thai is the one cuisine that I seldom cook at home. I usually head out to the restaurants and leave it to the pros! Especially with the balancing of the flavours!

thai fish cakes

But I decided to be adventurous one Friday afternoon after getting off work early. I saw Wince (The Hungry Excavator) post a photo of him making some Thai Fish Cake earlier in the week, and I knew instantly I had to make some! So I looked for a recipe during my lunch time, and off I went to Springvale to grab the ingredients after work!

Thai fish cakes close up

It actually wasn’t too difficult to make! In fact, the only time consuming thing was cutting the long snake beans thinly. Besides that, everything is whizzed in the food processor and viola! You’ve got some delicious fish cakes for dinner! hehe So give these a shot. They are perfect party food, and are also great as starters. hehe Oh yes! Let’s not forget the spicy and tangy red nam jim sauce to go with the fish cakes! SO GOOD! The mr couldn’t get enough!

Thai Fish Cakes with Red Nam Jim (adapted from SBS, a Teage Ezard recipe)

600g fish paste

70g red curry paste

1 egg

1 tbs fish sauce

1 tsp sugar

4 fresh kaffir lime leaves, finely shredded

10 snake beans (or green beans), thinly slices

Vegetable oil for shallow frying

Steps :

1) In a food processor, place the fish paste, red curry paste, egg, fish sauce and sugar and blend till mixture is smooth and well combined.

Blending the ingredients in the food processor

2) Scoop the mixture into a large mixing metal bowl and add the finely shredded kaffir lime leaves and snake beans.

Adding the snake beans and kaffir lime leaves

3) Mix them together till everything is well combined.

All well combined

4) In a non-stick pan, heat some vegetable oil on medium heat, enough for shallow frying. Roll the mixture into balls and flatten them with your palm. Mine was about 5 cm in diameter and about 1 cm in thickness. Fry them until both sides are brown and crispy.

Frying them

frying both sides till brown and crispy

5) Drain them on some paper towel and serve them with the homemade red nam jim sauce (to follow).

cross section

Red Nam Jim Sauce

2 red birdseye chilli, seeded and roughly chopped

4 long red chillies, seeded and roughly chopped

2 cloves of garlic, peeled

Handful of coriander leaves and roots

2 tbs shaved palm sugar, add more if needed to balance flavour

125ml lime juice

1 1/2 tbs fish sauce

Steps :

1) In a mortar and pestle, add the chillies, garlic and coriander and pound till it forms a paste. Do be patient, as this might take a while!

Pounding the ingredients

2) Add the palm sugar and combine. Add the lime juice, a little at a time, until the mixture is well combined then add the fish sauce to balance the taste. It should be a little like a wetter version of a salsa. Remember to taste and add more of the flavourings to balance the sweet, sour and tang!

Thai fish cakes and red nam jim

ENJOY!

Remember to always bake and cook with love! xx

For A Berry Pink Cause – Ski Yogurt & A Giveaway ! {Winner announced}

Lemon & Berry yogurt mini loaf with cream cheese and yogurt icing

Paying it forward. I always feel that we should always count our blessings and do what we can for people around us. As many of you know, October is Breast Cancer Awareness Month, and I was approached by Keep Left PR to be involved in it. Without any hesitation, I agreed!

Ski Yogurt turning pink

If you’ve walked the yoghurt aisle in the supermarkets, you’ve realised that Ski yoghurt has turned pink! In fact, they have pledged a three-year commitment to the McGrath Foundation and have promised a $350,000 donation to fund a McGrath Foundation Breast Care Nurse in the community. How amazing is that? I’m so honoured to be ask to be part of this Pink event!

lemon & berry mini loaves

Yoghurt has become part of my daily breakfast and morning tea routine, so I was really glad that I was asked to come up with a recipe that incorporates Ski yogurt!

So as I stood in front of the different flavours in the supermarket, my ideas were just popping up!

Close up

As I got a new mini loaf tin, I decided to make some yogurt mini loaves! Just too cute! But to give it a little bit of ZING, I added lemon zest to it! Mmmm.. berries and lemon do make a really good match! The best thing about incorporating yogurt in your cake is that it makes it really moist!

Lemon & berry yogurt mini loaf with a cream cheese yogurt icing

In all honesty, the icing didn’t quite turn out the texture I wanted. I wanted to be able to pipe rows. hehe I tested it out, but it went everywhere! haha So i decided to go with the flow (literally) and let it have some free form! It worked out well, don’t you think so? hehe The addition of the fresh raspberries just made everything pop, giving a subtle tinge of pink reflection on the icing. Without trying to over do the self-praise, I have to be honest and say that this was one of my best cakes I’ve made to date!

mini loaves - light reflection

So here’s the recipe and my humble contribution to the Breast Cancer Awareness Month! (: Hope you all enjoy!

Lemon & Berry Yogurt Mini Loaf with Cream Cheese Yogurt Icing (an original recipe of Food Made With Love)

Lemon & Berry Yogurt Loaf :

1 1/2 cups plain flour

2 tsp baking powder

1/2 tsp salt

300g Ski Wild Strawberry yogurt

1/2 cup castor sugar (plus 1/4 cup for syrup)

3 large eggs

Lemon zest  of 2 lemons

1 tsp vanilla bean paste

1/2 cup olive oil

1/4 cup lemon juice

1/2 cup frozen mixed berries

10 mint/basil leaves, washed and pat dry

Steps :

1) Preheat oven to 170 degrees celcius. In a clean bowl, sift the flour, baking powder and salt. Set aside.

yogurt, sugar and lemon zest

2) In a mixing bowl, combine the yogurt, 1/2 cup of sugar, lemon zest and vanilla bean paste. Mix till well combine then add the eggs, one at a time, making sure each one is well incorporated before adding the next.

3) Add the dry ingredients slowly, 1/2 cup at a time, and make sure it is well combined. Be careful not to over mix.

4) Pour the olive oil into the mixture, and using a spatula, slowly fold it in until everything is combined. Add the frozen berries and fold them in. Don’t worry if they start to “bleed”, just gives the batter a nice swirl of pink/purple!

5) Coat the mini loaf tin with olive oil (I used the olive oil spray) and dust with plain flour. Carefully fill the tin 3/4 way up. Drop them a few times on the bench to even the top and place them in the oven. Bake them for 25 mins, turning them half way to that they are evenly coloured.

6) While the cakes are baking, pour the lemon juice and add the 1/4 cup sugar into a small saucepan. Add the basil/mint leaves into the pot and allow it to come to a boil. Lower the heat and simmer for about 5 mins. Take it off the heat and allow it to cool slightly.

Pouring the lemon mint/basil syrup on the cakes

MIni loaves cooling and soaking up the lemon syrup

7) Once the cakes are done, allow them to cool in the baking tin for 10 mins. Slowly and carefully pour the lemon syrup on the cakes and allow them to absorb completely. Let it cool in the tin completely before taking them out.

Cream Cheese and Yogurt Icing 

1 block of Philadelphia cream cheese, cold

2/3 cup Ski Wild Strawberry yogurt

1-1 1/2 cup pure icing sugar

1 tsp lemon juice

Fresh raspberries, to garnish

Steps :

1) In a mixing bowl, whip up the cream cheese till smooth, then add the yogurt and mix till they come together. Don’t worry if it looks clumpy. Add the icing sugar, 1/2 cup at a time, and taste as you go (YUM!). Stop adding when you feel the sweetness is right! Add the lemon juice and mix until smooth.

2) Using a tablespoon, drop the icing in the middle of the loaf and allow it to flow down. You could use the back of your spoon to help shape it the way you like. Garnish the loaves with fresh raspberries. ENJOY!

Finished product

I had mine with a small glass of intense berry smoothie! hehe and I thought I would share with you my favourite smoothie recipe since it also uses yoghurt! (: So bear with me. The giveaway is up next!

Intense berry smoothie

Intense Berry Smoothie

150g Ski Wild Strawberry Yogurt

150g coconut water

100g frozen mixed berries

Step :

Place all the ingredients in a blender and whizz it up! Easy peasy!

GIVEAWAY TIME!

And now for the part you all have been waiting for! So sorry for the super long post and thank you for being so patient! Keep Left PR has very kindly offered a giveaway! It’s a set of super pretty and cute pink silicone Scullery kitchen utensils worth $47.73! How can you resist?

giveaway

Giveaway

Yes! All 7 items! How awesome is that? I love the striking shade of pink! Ladies, start commenting. Men, start commenting too so you could win these for your loved ones! hehe

How do you get these you ask? Easy!

  • Leave a comment and share with me your favourite way of having yogurt, and what part of the day do you usually have it?
  • This giveaway is only open to Australian residents! (Sorry international readers!)
  • Please join me on my journey! Follow me on Facebook, Instagram and Twitter!
  • You may re-enter daily! One entry a day! (Oh yeah!)
  • Winners will be announced on the 31st of October, Thursday at 8pm!
  • Winners will be picked via random.org and notified on this blog post and via email.

Disclaimer : This post is sponsored by Ski Yoghurt & Keep Left PR. I tasted the Ski’s D’lite Wild Strawberry yoghurt  with compliments of both sponsors, however, the review, opinions are honest and based on my personal taste and preference. The recipe is a Food Made With Love original.

Ski Pink

Remember to always bake and cook with love ! Till the next post, xx

~~~~~~~~~~~~~~~~~~~~~~~~~~~~~~~~~~~~~~~~~~~~~~~~~~~~~~~~~~~~~~~~~

The winner is…..

TINA! Congrats dearie! (: I will be contacting shortly through email!

winner- random org

Winner

Hope you like your pink kitchen utensils!!! xx

Hazelnut Olive Oil Cake

Hazelnut Olive Oil Cake

Hooray! It’s the weekend so let’s celebrate with cake! What better way yes? heh I don’t think anyone can really resist cake, even more so when it’s a gluten free and (almost) healthy one!

Is there a particular cake that you will never get tired of and would always go-to cause you know it will not fail you? I definitely do! This is one cake that I know that would definitely be a crowd pleaser! The chocolate olive oil cake by Nigella Lawson is simple, delicious and did I say delicious? Whenever I need to make a birthday cake for a close friend, I always turn to this recipe, top them with fresh raspberries and dust with icing sugar and viola! All ready to be consumed and put smiles on people’s faces!

All along, I’ve made it using almond meal, but I few weeks back when I needed to bake a cake for a close friend’s 21st, I had a eureka moment. Why not use hazelnut meal? It would be like a fudgey and moist… nutella cake! How good does that sound? I was so so excited to give it a try!

And it came out just the way I envisioned it to be. Soft, really chocolatey, and so fudgey and moist! OOhhh la-la! It can definitely make one of the sexiest and most decadent chocolate dessert that I’ve ever made! The hazelnut meal elevated it to a whole new level! Definitely gonna stick to using hazelnut meal now. hehe One slice is never enough!

So give this a shot if you love nutella. You will definitely be hooked! It’s gluten free and if you are on a paleo diet, just change the sugar to 1/3-1/2 cup honey and you’re good to go!

Hazelnut Chocolate Olive Oil Cake (adapted from Nigella Lawson)

150 ml regular olive oil (plus more for greasing)

50 grams cocoa powder (good quality, sifted)

125 ml boiling water

1 tsp vanilla bean paste

150 grams hazelnut meal

½ tsp bicarbonate of soda

pinch of salt

170 grams caster sugar (or 1/3-1/2 cup of honey if you want it to be paleo)

3 eggs, room temperature

1 small punnet of fresh raspberries (to top the cake)

Icing sugar, to finish

Steps :

1. Preheat your oven to 170°C/gas mark 3. Grease your springform tin with a little oil and line the base with baking parchment. Measure and sift the cocoa powder into a bowl or jug and whisk in the boiling water until you have a smooth, chocolatey, still runny (but only just) paste. Whisk in the vanilla extract, then set aside to cool a little.

2. In another smallish bowl, combine the hazelnut meal with the bicarbonate of soda and a pinch of salt.

3. Put the sugar (or honey), olive oil and eggs into the bowl of a freestanding mixer with the paddle attachment and beat together vigorously for about 3 minutes until you have a pale-primrose, aerated and thickened cream. Turn the speed down a little and pour in the cocoa mixture, beating as you go, and when all is scraped in you can slowly tip in the hazelnut meal mixture.

4. Pour this dark, liquid batter into the prepared tin. Bake for 40-45 minutes or until the sides are set and the very centre, on top, still looks slightly damp. A cake tester should come up mainly clean but with a few sticky chocolate crumbs clinging to it.

5. Let it cool for 10 minutes on a wire rack, still in its tin, and then ease the sides of the cake with a small metal spatula and spring it out of the tin. Leave to cool completely and place the whole punnet of fresh raspberries neatly on the cake and dust with icing sugar. Serve with a side of freshly whipped cream or a scoop of your favourite ice cream!

Have a chocolatey and hazelnutty weekend everyone! (: Be warned that you won’t be able to stop at a slice for this one! hehe

Remember to always cook and bake with love! Till the next post, xx !

Slow Cooked Shiraz Beef Ribs

slow cooked shiraz beef ribs

Good afternoon dear readers, I hope you’re having a great weekend so far. I definitely am! Wish I could sleep in more and how I wish we had an extra day of weekend just to anything we love. How good would that be? Any who! It’s the weekend should we should all just embrace it! hehe I’ve got some exciting news to share! Remember the Taylors Wine giveaway I did a few months back? They decided to send me a different type of wine each month to come up with a dish and share the recipe! This month, I chose their Taylors Estate 2010 Clare Valley Shiraz.

Taylors Wine Clare Valley 2010 Shiraz

Before the wines even arrived, I already had a few ideas in my head. But after reading the palate notes, there was only one dish that came to my mind : beef ribs ! The wine was really smooth and robust, with notes of plum, blackcurrant and dark cherries! Yum! I am by no means an expert on wines, but it is really easy to drink, and not too dry!

slow cooked shiraz beef ribs

What I love is the intensity of the colour of the ribs and sauce! A deep red colour especially after it’s been cooking and reducing in the oven. And what’s better than tender, melt-in-your-mouth pieces of meat? Absolutely nothing! hehe

slow cooked shiraz beef ribs with cauliflower puree and cauliflower florets & hazelnuts

And I was debating if I should make a creamy mash to go with it, but because I’m in a current cauliflower phase (check out the cauliflower rice that I’m addicted to!), I decided to make some cauliflower puree which paired perfectly with the ribs! Plus it’s like killing two birds with one stone, cause I didn’t need to make a side of greens! hehe But just to make the dish have some kind of crunch, I sauteed some cauliflower florets with toasted hazelnuts. AMAZING!

So go get yourself a bottle of Taylors Wine Clare Valley Shiraz and give this a shot! You won’t regret it, my tummy assures you! (:

Slow Cooked Shiraz Beef Ribs (A Food Made With Love Original)

2 kg beef short ribs

500ml Shiraz

500ml beef stock

1 heap tbs tomato paste

2 tbs olive oil, extra for sealing the ribs)

2 tbs passata

1 bulb garlic, cut into half

2 large chillies, deseeded and roughly sliced

salt and ground black pepper, to season

garlic cut into half

Steps :

1) Preheat oven to 160 degrees Celcius. Season the beef ribs generously with salt and ground black pepper. Heat a heavy based pot (I used my cast iron pot) on high and add some olive oil. Seal the ribs on all sides and set aside.

beef ribs

Searing the ribs

Seared beef ribs

2) In the same pot, add the tomato paste, passata, garlic, chilli and the shiraz. Bring it to a boil and allow it to reduce by half.

Bringing the wine mixture to a boil and reducing it

3) Return the beef ribs into the pot and add the beef stock, making sure it covers at least 3/4 of the ribs.

After adding the beed stock

4) Bring it to a boil, then cover and place the pot into the preheated oven and allow it to cook for at least 2 hours, or until the meat falls off the bones, and the liquid has reduced to a sticky and thicker consistency. The colour of the gravy has also become an intense red!

5) To serve, place the beef ribs on the cauliflower puree (recipe to follow) or a rich and velvety smooth mash, top with the cauliflower florets and hazelnut and drizzle the thick and luscious gravy. DIG IN!

Final dish

Cauliflower Puree (recipe from Manu’s French Bistro)

500g cauliflower florets

200ml milk

50g unsalted butter

sea salt and ground black pepper

Steps : 

1) Place the cauliflower and milk in a large saucepan and bring to a boil. Simmer over medium heat for 8-10 minutes or until the cauliflower is tender, then drain and discard the milk.

cauliflower puree

2) Place the cauliflower, butter, salt & pepper in a food processor and process still you get a smooth puree. Transfer to a clean saucepan and keep warm.

Cauliflower Florets & Hazelnuts Mixture (Recipe from Manu’s French Bistro)

50g hazelnuts

200g cauliflower, cut into small florets

50g unsalted butter, cubed

Steps :

1) In a small frying pan, toast the hazelnuts until golden brown. Place them in a clean tea towel and remove the skins by giving it a rub. Place them in a plastic bag, crush them slightly, using a rolling pin. Set aside.

2) In a larger frying pan, melt the butter over medium heat. Add the cauliflower florets and cook for 5-6 minutes or until golden and tender. Add the hazelnuts and stir to combine. Transfer to a bowl and keep warm.

cauliflower florets with hazelnuts

So go grab yourself a bottle of Taylors Clare Valley Shiraz and give this a try! (: Thank you Taylors Wines once again for the beautiful bottles of wine and the opportunity to come up with a recipe with it! Have a great week ahead everyone! Remember to always cook and bake with love!

Till the next post, x

Milo Brownie Pound Cake

Milo Brownie Pound Cake

MILO. Just the thought of it brings me back to my childhood. Milo was something I grew up drinking. A cup everyday and even when I was older, I would still love drinking it. And yes, eating it by spoonfuls too! Don’t be shocked! I’m sure lots of you do it! heh I remember when we had to do the yearly cross country run (more walk than run to be honest haha), the one thing that we all look forward to was the milo van at the finishing line!

milo brownie pound cake

These days, what I would sometimes crave for when I’m back home in the heat is some ice milo or even milo dinosaur, which is pretty much ice milo with a whole heap of milo powder on top. Can you say YUM?!! Can’t get enough!

Milo brownie pound cake

So when I came across this recipe of a milo cake on Pencil Kitchen, I couldn’t wait to start baking to taste it! I have to admit though, I probably overbaked mine cause it didn’t come out as gooey and light like hers, but after warming it up before eating it, it was still pretty delicious! Definitely tasted like having a warm cup of milo! So definitely gonna make this again, but cutting down my baking time!

milo brownie pound cake

Milo Brownie Pound Cake ( Recipe closely adapted from Pencil Kitchen )

175g butter, room temperature

150g caster sugar

3 eggs

1 tsp vanilla bean paste

200 ml milk

200g milo powder, extra 50g for dusting

a pinch coffee granules

40g cocoa powder

200g all purpose flour

1 tsp baking powder

2 pinch salt

1 tbs salted butter, melted

Steps : 

1) Preheat oven to 175 degrees celcius.  Prepare a 9×9 inch springform baking tin by lining the bottom with grease proof paper and lightly coating the interior with olive oil.

2) Dissolve 100g of milo powder and coffee granules in milk. Heat it a little to allow it to dissolve quicker. Set it aside and allow it to cool completely.

3) In a large bowl, sift the flour, 100g of milo powder, cocoa powder, baking powder and salt. Set aside.

4) In another bowl, cream the butter and sugar until light and fluffy. Beat in the eggs, one at a time, and beat till just combined. Stir in the vanilla bean paste.

5) Add the flour mixture and milo milk alternately, starting with the flour mixture.

Before going into the oven

6) Pour the mixture into the prepared baking tin and spread it out to make sure it’s evenly spread. Bake the cake for 30-40 mins (nothing more as it will overcook!) and allow it to cool in the tin for 10 mins.

all baked and ready to cool

7) Carefully release the spring and invert the cake onto a cooling rack. Brush the top with the melted salted butter and dust with 50g of milo powder.

milo brownie pound cake

Slice and enjoy it as it is, or zap it in the microwave to have it warm with a scoop of your favourite ice cream! (:

So dear readers, what is your favourite childhood drink? Would love to know!

Till then, remember to always cook and bake with love! xx