{Spencer Cooks} Hainanese Chicken Rice

dscf5320-1-1

One thing I truly miss is the food from back home. So when I got hold of the recipe of Hainanese Chicken Rice from the Taste of Asia Thermomix cookbook, I HAD TO try making it. Of course, I also had to make the dipping sauces, or else it wouldn’t be complete.

Prior to having Spencer, I have made chicken rice before, and it turned out great. But the multilayer cooking does make it a lot easier, and I have to say, the taste definitely doesn’t lose out to cooking it in the traditional way! Plus it was a huge hit with the two boys! hehe HOORAY!

dscf5291-1

One thing I cannot do without when having chicken rice is the dipping sauces. Especially this ginger dipping sauce! I usually buy them off the shelf at an asain supermarket, but I love that I am able to make it from scratch and also to get it on the table in about 5 mins!

dscf5293-1

Of course, the chilli dipping sauce too!

dscf5323-1

This is definitely is and will continue to be the staple in our house. Succulent chicken pieces with flavourful rice, I cannot think of anything that is more comforting for dinner.

I was asked by a customer at a Varoma cooking class recently to post about how I cooked my chicken rice. Sorry it took so long, but here it is! Step-by-step! I hope you all will enjoy it as much as we do!

Hainanese Chicken Rice (Adapted from Taste of Asia)

Ginger Dipping Sauce

120g young ginger, peeled

50g eschalots, peeled

100g vegetable oil

1/2 tsp salt

Steps:

  1. Place ginger and eschalots into the bowl and chop for 5 secs/ Speed 7. Scrape the side of the bowl.dscf5285-1
  2. Add remaining ingredients and blend for 20 secs/ Speed 8.dscf5286-1
  3. Scrape down the sides of the bowl and cook for 5 mins/100 deg C/ Speed 2. Pour into bowl or mini thermoserver, and set aside to have with Hainanese chicken rice.

dscf5289-1

Note : Can be kept in a jar for 1 week or frozen for 3 months.

Chilli Dipping Sauce

100g big red chillies, cut into 3 pieces

20g ginger, peeled

50g garlic, peeled

80g white vinegar

1 tsp salt

1/2 tbs sugar

Steps:

  1. Place chilli, ginger and garlic into the bowl and chop for 5 secs/ Speed 8. Scrape the sides of the bowl, and repeat process for 2 more times.
  2. Add remaining ingredients and blend for 1 minute / Speed 6.
  3. Add salt and sugar. Pour into a serving bowl or mini thermoserver and set aside.

Hainanese Chicken Rice (Serves 4-6)

2 tsp chinese wine

2 tsp light soy sauce

2 tsp sesame oil

1 whole chicken (about 1.7kg)

4 cloves of garlic

2 spring onion, cut into half

8 slices of ginger, peeled

4 eschalots, peeled

1 tbs olive oil

300g jasmine rice, rinsed

1.5L chicken stock

2 pandan leaves

A packet of bean sprouts

Fried shallots & thinly sliced spring onion, to garnish

Steps :

  1. Mix the chinese wine, soy and sesame oil in a small bowl and rub it all over the chicken as well as inside the cavity.dscf5297-1
  2. Stuff two cloves of garlic, spring onion, and 4 slices of ginger into the cavity and place into the Varoma dish. Make sure the chicken doesn’t cover all the holes to ensure the steam can be circulated. Set aside. dscf5301-1
  3. Place the remaining garlic, ginger and eschalots and oil into the bowl and sauté for 2 mins/ Varoma temperature/ Reverse, Speed 2. Add the rice and sauté for 2 mins/ 100 deg C/ Reverse, Speed 2. Pour mixture into the steaming basket and place pandan leave in the middle and set aside.dscf5309-1dscf5312-1
  4. Place 1 L of chicken stock into the bowl. Place the steaming basket of sautéed rice into the bowl as well and set the Varoma into position. Steam for 20 mins/ Varoma temperature/ Speed 4. Remove the steaming basket from the bowl, and place the rice into the Thermoserver to keep warm while the chicken continues steaming. dscf5303-1
  5. Top up the bowl with another 500ml of chicken stock. Replace the Varoma back into position and continue cooking for another 30-45 minutes/ Varoma temperature/ Speed 4, depending on the size of your chicken. In the last 10 minutes of steaming, add the bean sprouts around the chicken to steam. dscf5313-1
  6. Mix 3 tsp light soy sauce, 2 tbs of hot water, 1/2 tsp sesame oil and 1/4 tsp of sugar in a bowl. Chop up the chicken and pour this sauce over the chicken before serving.

dscf5315-1

Garnish with fried shallots and thinly sliced spring onions. Serve with the two dipping sauces prepared and a thick black soy sauce.

dscf5321-1

Tuck in and enjoy!

Would love to hear what you think after you’ve tried this! Email me photos of your creation as I would love to see them!

Follow me on Thermolove to get more inspiration!

Remember to always cook and bake with love!  

The Coconutty Baked Brownie Bites

unnamed-8-1-1

Brownie. Who doesn’t love them? If you don’t, I’m not sure we can be friends. haha Kidding! But brownie is always something I cannot resist. When I see it, I have to have it – warmed, with a scoop of vanilla ice cream. PERFECTO!

There are many different type of brownies, but the ones I love most is crispy on the outside, and fudgey in the middle, and I think I found the perfect recipe!

All baked and cut

Just seeing how the top bit cracks, puts a smile on my face! And being a tad bit OCD and one who is trying to (but failing) lose the baby weight, I decided to cut them into bite size, so that I don’t feel too guilty when having one, or two. hehe

I’m in a coconutty phase, so I decided to add some fine desiccated coconut through the batter before baking and the flavour wasn’t too overpowering. Chocolate was still the major flavour with a tinge of coconut! Mmmm. Plus this wasn’t too sweet. Just the right level of sweetness!

So if you do like your brownie, I urge you to try this recipe, if you haven’t already heard of The Baked Brownie! My dad was here when I made these and he actually said, “How come the brownie from outside doesn’t taste like that?” haha That was one big compliment for me! hehe

The Coconutty Baked Brownie with Vanilla Ice Cream

Coconutty Baked Brownie Bites (Adapted from Pretty Simple Sweet)

 155g plain flour

1 tsp salt

2 tbs desiccated coconut

2 tbs cocoa powder

310g dark chocolate, cut into smaller pieces

230g unsalted butter

1 tsp instant espresso powder

100g caster sugar

100g packed light brown sugar

1 tsp vanilla bean paste

5 eggs, room temperature

Steps :

1) Preheat oven to 180 degrees celcius. Line the baking tin (I used a 9×13 inch rectangular baking tray) with baking paper, leaving some extra hanging off the sides for easy removal of the brownie.

2) In a medium bowl, mix the plain flour, salt, cocoa powder and desiccated coconut together. Set it aside.

3) Put the chocolate, butter, and instant espresso powder in a large bowl and set it over a small pot of simmering water, stirring occasionally, until the chocolate and butter are completely melted and smooth. Turn off the heat, but keep the bowl over the water and add the sugars. Whisk until completely combined, then remove the bowl from the pan. Allow the mixture to cool till room temperature.

4) Add 3 eggs to the chocolate mixture and whisk until combined. Add the remaining 2 eggs and whisk just until combined. Add the vanilla bean paste and stir until combined. Don’t overmix at this stage or your brownies will be cakey.

5) Add the flour mixture to the chocolate mixture and fold until just a bit of the flour mixture is visible.

6) Pour the batter into the prepared pan and smooth the top. Bake in the center of the oven for 30 minutes, rotating the pan halfway through the baking time, until a toothpick inserted into the center of the brownies comes out with a few moist crumbs sticking to it. Let the brownies cool completely, then lift them out of the pan using the parchment paper.

Baked and ready to be cut

Cut into bite sized squares

7) Cut them into bite sized squares and serve them warm with a scoop of ice cream!

Hope you all had a great weekend! Make these and have them today so that you can chase away any Monday blues and have a fantastic week ahead!

Remember to always cook and bake with love! Till the next post, xx.

PS: There will be a give-away in the next post, so stay tuned! (:

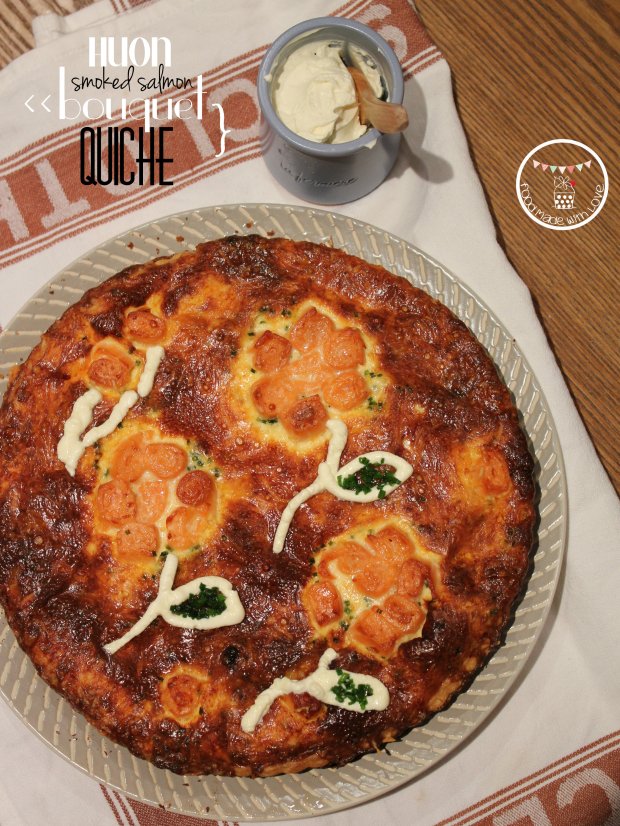
HUON Smoked Salmon Bouquet Quiche

IMG_9891-2-2

I’m late, I’m late, I’m late! That was the only thing on my mind when I was trying to come up with something to make for the HUON Blogging Challenge as the post is due tomorrow! I have to admit, I was a bit hesitant to take up the challenge as we had to use smoke salmon and the only way I could have it is cooking it!

HUON smoked salmon banquet rolls

While looking at the HUON Reserve Selection range and deciding on what I should get, I was drawn to the banquet rolls immediately! If only I could have them as is, cos I would love to have man a roulette out of it! Oh wells! haha Have to concentrate on what I can have!

ingredients used

So I did what I usually do to get inspirations for the dish I want to make – walk down the aisles of the supermarket! It’s seriously the best place to come up with ideas for what to cook! Absolutely love doing it. hehe So I decided to make a quiche, for the first time! I know, what’s so exciting about a quiche? Well, I decided to make it look very different from a usual quiche, turning the salmon rolls into bouquet of flowers!

Smoked salmon bouquet quiche

I was super nervous making it because I’ve never made a quiche before, and I didn’t know if the shapes were going to last through the baking process! Thank goodness, the flowers were still “blooming” when I took it out of the oven. HOORAY! It worked! hehe The mr and sister-in-law really enjoyed it too! That’s always a plus! (: So here’s the recipe! Hope you will enjoy it as much as we did!

Smoked Salmon Bouquet Quiche (Serves 4-6 people)

For the sour cream short crust pastry : (Recipe from Maggie Beer)

125ml sour cream

250g plain flour, extra for dusting

200g butter

For the filling : 

200g HUON Reserve Selection banquet rolls

1 leek (white part, halved lengthwise and thinly sliced)

8 mushroom cups, sliced

10g chives, finely chopped

6-8 sundried tomatoes, finely chopped

1 tbs olive oil

10g unsalted butter

salt and black pepper, to season

200ml thickened cream

150g shredded cheddar

4 eggs

Steps :

Kneading the dough into a ball

1) For the short crust pastry : Preheat the oven to 200 degrees celcius. Dice the butter then pulse it in a food processor with the plain flour till it resembles bread crumbs. Add the sour cream and pulse it further till it resembles a dough.

Rolling out and dough and blind baking

2) On a clean surface, dust a bit of plain flour and knead the dough into a ball. Wrap the dough in cling wrap and allow it to rest in the fridge for 20 minutes. Roll the pastry out to 3-5mm thickness and roll it over 24cm quiche baking tin that has been oiled. Blind bake the pastry for 10-15 minutes, or until it’s lightly golden. Allow it to cool while preparing the other ingredients.

Lining the tin with the pastry

2)  For the filling : Heat a large heavy-based pan on high and add the olive oil. Fry the leek till soft and fragrant, then add the mushrooms. Season with salt and pepper and allow the mushrooms to fry till slightly caramelised. Add the butter and fold in the mushroom mixture. Set it aside and allow it to cool before placing it in the pastry case. Sprinkle the chives and sundries tomatoes evenly around the pastry case.

Frying the leek and mushroom mixture

3) Cut each banquet rolled salmon into half and place them in a shape of a flower. ( I did 3 large flowers, and 3 small flowers. But you can do as many as you like! Bring out your artistic side! )

4) Combine the thickened cream and eggs in a bowl and mix them till well combined. Pour it slowly into the case and around the smoked salmon, careful not to get any on.

eggs and cream mixture

5) Top the quiche with shredded cheddar, once again avoiding the smoked salmon.

6) Reduce the oven to 190 degrees celcius and bake the quiche for 35-40 minutes, or until the egg mixture is set and the top is golden brown.

Smoked salmon bouquet quiche

7) Serve with a side of salad with your favourite dressing and with extra sour cream to go with the quiche! Indulgence! ENJOY!

Quiche with a side of salad

I have to say I really enjoyed making those flowers out of the smoke salmon rolls! To make it look more like flowers, I piped stalks and leaves using the sour cream and fill the leaves with chopped chives! hehe I’m no artist, but I think this is the best I could do!

Hope you enjoyed the recipe, and do give it a try! I didn’t get to eat the smoked salmon on it’s own (before cooking), but the mr and sister-in-law said it was delicious and not as salty as the others they’ve had! Which is always a plus! Have a great weekend everyone!

Remember to always cook and bake with love! Till the next post, xx

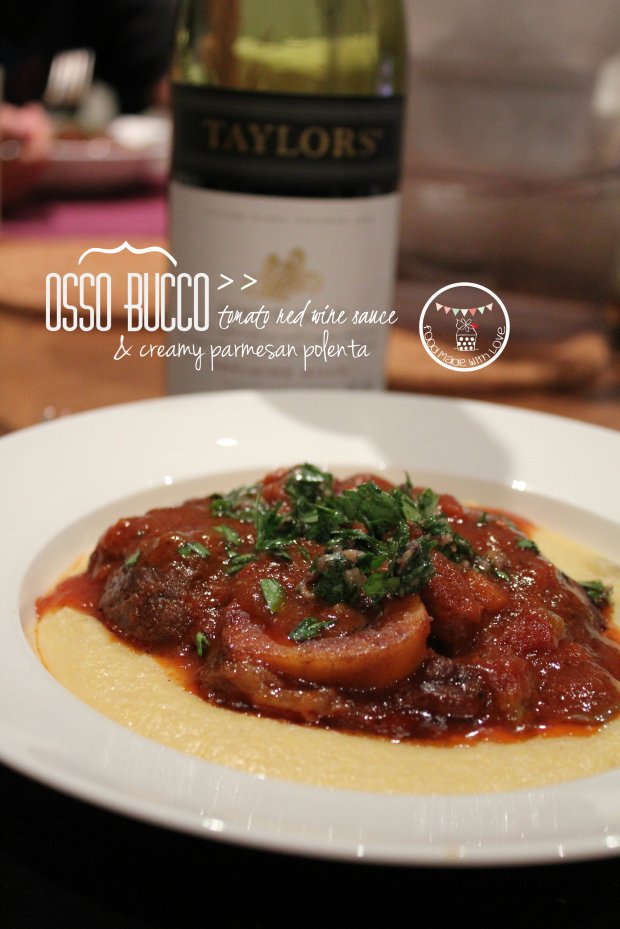
Osso Bucco in A Rich Tomato Red Wine Sauce & Creamy Parmesan Polenta

IMG_9684-1-1

Being pregnant, I cook according to what I crave these days, or some might like to say, according to what the baby wants! hehe To be honest, most of the things I cook are food I miss from home, but currently, my daily cravings are anything tomatoey and cheesy! Mmmmm (: How can that go wrong?

Taylors Estate Pinot Noir

It is the time of the month again when I’m so lucky to receive a couple of bottles of Taylors Wines! I know, I know. Please do not worry, I’m not drinking! I also make sure that I cook it long enough to get all the alcohol content out of the dish, leaving just the intense flavour of the wine. hehe So you can take a deep breath! hehe I decided to ask for Taylors Estate 2012 Adelaide Hills Pinot Noir. This medium bodied wine has flavours of ripe cherry and the freshness of berries. It’s soft on your palate and has tones of subtle spiciness. I knew immediately what it would be great for – Osso Bucco!

Tomato and red wine cooked osso bucco with creamy parmesan polenta

This was one perfect dish for satisfying my pregnancy cravings! Melt-in-the-mouth beef pieces cooked in a thick, luscious tomato and red wine sauce and served on a creamy parmesan polenta! I’m not a huge fan of marrow, but the mr is, so it was also a winner with him! hehe

So here’s the recipe, hope you will enjoy it as much as I did! (:

Osso Bucco in a Rich Tomato & Red Wine Sauce with Creamy Parmesan Polenta (serves 6-8)

For Osso Bucco :

8 pieces of osso bucco

salt & pepper, to season and to taste

hot paprika, to season

plain flour, to season

4 tbs olive oil

2 red onions, finely chopped

2 carrots, peeled and sliced into rounds

2 stalks of celery, finely sliced

3 cloves of garlic, finely chopped

2 large chilles, deseeded and thinly sliced

2 anchovy fillets

1 tin of chopped tomatoes (400g)

1 cup passata

1 cup Pinot Noir

1 cup beef stock

aromatics chopped up

For creamy parmesan polenta :

4 cups chicken stock

1 cup yellow cornmeal

1 cup finely grated Parmesan

2 tbs unsalted butter

1/4 cup thickened cream

Salt & ground black pepper, to season

For Anchovy Gremolata (optional)

4 tbs flat leaf parsley, finely chopped

9 anchovy fillets, finely chopped

Steps :

1) For the osso bucco : In a heavy based frying pan, add the olive oil and heat it on medium heat. Season the osso bucco pieces with salt, black pepper, hot paprika and flour on both sides. Fry and seal the osso bucco and place it on the plate, set it aside while preparing the sauce.

Season the osso bucco

Sealing the osso bucco

sealed osso buccos

2) Add the red onion, carrots, celery, chilli and garlic into the pan and fry till soft and fragrant.

Frying the ingredients till fragrant

3)  Add the red wine and allow that to reduce till 1/4 left.

adding the red wine

4) Once the red wine is reduced, add the tinned chopped tomatoes, passata, anchovies and beef stock. Allow the mixture to come to a boil then carefully add the osso bucco.

Slow cooking the osso bucco

5) Cover and allow it simmer on low heat for 2-31/2 hours. The meat should separate from the bone.  Give the pan a shake every 30 mins, to make sure it’s not stuck /burnt at the bottom.

6) For the polenta : In a medium sized pot, bring the chicken stock to a boil. Reduce to medium heat, and slowly add the cornmeal, whisking continuously with a whisk to prevent lumps. Switch to a wooden spoon and continue stirring until the mixture thickens (about 10 mins), season with salt and black pepper. Make sure you scrape the bottom to make sure nothing burns or stick. Take it off the heat and add the parmesan, butter and thickened cream.

7) For the anchovy gremolata : Mix the chopped parsley and anchovy until well combined.

8) To serve : Place the osso bucco on top of a bed of creamy parmesan polenta and top with more tomato and red wine sauce. Scatter the anchovy gremolata on the osso bucco and ENJOY! (:

Osso bucco served

Thank you Taylors Wines once again for the beautiful Pinot Noir, and although I can’t have a glass (or two), I’m so happy I’m still able to have them in my food! hehe Have a great mid week everyone! Remember to always cook and bake with love! Till the next post, xx

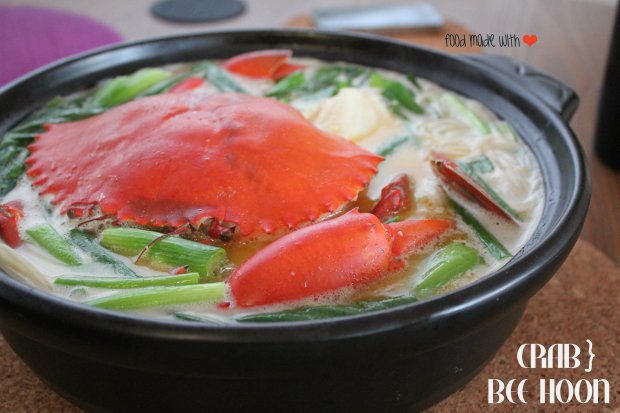
Crab Bee Hoon Soup

IMG_3295-1-1

Fridays in the Ho Clan only means one thing – Seafood day ! (: After all the poultry and red meat we have for the rest of the week, we abstain from them on Fridays and have seafood instead. Most of the time, I would make either fish or prawns (or both). But once in a while, I would do the occasional splurge and treat ourselves to something different. This time, it’s crab!

cleaning the crab

The Mr and I went to Springvale to scout for a mud crab. Thankfully, they sold live ones! But being the noob us, we didn’t really know how to pick! haha So we asked the store owner, and she kindly chose one for us. The Mr was a little disappointed that all the mud crabs were female, as he was really looking forward to having some crab roe! Maybe next time! hehe

Of course, the first thing we did when we got home was to pop the crab into the freezer so that it would fall into a deep sleep so that we could clean it out the humane manner. I didn’t dare do it, so the Mr had to help me with the killing and cleaning. hehe Thank goodness he was home! (:

crab bee hoon soup

I have been craving for some crab bee hoon (thick rice vermicelli) soup for the longest time! I remember the first time I’ve had it was at Mellben Seafood in Singapore. They, in my opinion, has the best crab bee hoon soup I’ve ever tasted! Being the instagram stalker that I am, I saw one of my friend’s post of their crab bee hoon soup and I couldn’t resist the temptation of trying it out on my own! hehe

crab bee hoon soup

The broth was so full of flavour with the subtle milkiness of the evaporated milk. Definitely satisfied my cravings! heh I have to say, it was surprisingly easy, besides the cleaning of the crabs! You could get it on the dining table within 30 minutes after everything is prepared. How good is that? As close to instant gratification as I can get! hehe

So do give this a go. Especially if you’re craving for something comforting for this cold winter nights we are having now! You’ll have warm, toasty and happy bellies for sure!

Crab Bee Hoon (Thick Rice Vermicelli) Soup (adapted from Rasa Malaysia)

1 kg mud crab, cleaned and cut into pieces

2oog dried thick vermicelli noodles

4 tbs unsalted butter

6-10 slices of peeled ginger

3 cups fish stock

1/2 cup evaporated milk

3 bunches of baby bok choy

1-2 stalks of spring onion, cut into 2-inch pieces

1 tbs shaoxing wine

1/2 tbs fish sauce, or according to taste

white pepper, for seasoning

fried shallots, garnish

crabs cleaned and cut into pieces

Steps :

1) Cook the dried thick vermicelli noodles according to the package till al dente. Drain the noodles in a colander and rinse them under cold water to remove the starch. Drain and set aside.

2) In a claypot or heavy-based pot, add the butter and allow it to melt. Add the sliced ginger and fry till fragrant.

frying the ginger in melted butter

3) Add the stock and bring it to a boil.

Bringing the broth up to a boil

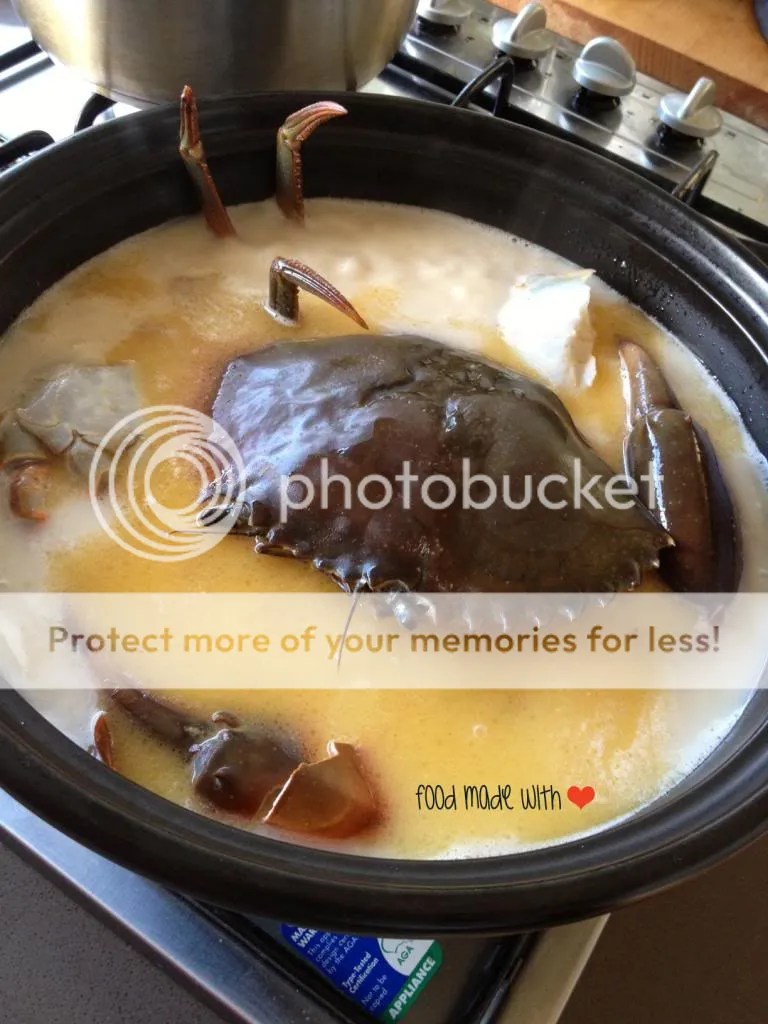
4) Then add the evaporated milk followed by the crab.

Add the crab and evaporated milk

5) Cook for a few minutes until the crab turns red and is cooked. Add the baby boy choy, shaoxing wine, spring onion and season with fish sauce and ground white pepper. Bring to a boil, and add the rice noodles. Allow it to boil for a few minutes, garnish with fried shallots and serve!

crab bee hoon soup served!

 ENJOY!

My favourite part of the crab is definitely the pincers. It’s just full of sweet flesh and after I was done with mine, I just wanted more! So dear readers, which is your favourite part of the crab? heh Would love to know and how do you like to have your crabs too! hehe

Hope you all had a lovely week and not long till the weekend! So hang in there! Remember to always cook and bake with love! xx

{SG} Kilo Kitchen

Kilo Kitchen

We were introduced to Kilo Kitchen by one of our closest friends, Jacky and Linda, located at along the Kallang River. It’s just above Loysel’s Toy and this area brought back lots of good memories for us! Just a year ago, Jacky shot our pre-wedding video here and we had so much fun during the shoot! 

We didn’t know that in that same building was a beautiful quaint little restaurant that served comfort food inspired by Japanese and Italian cuisines. It took up the whole level, and there was plenty of space between each table. I was so excited the moment I stepped out of the lift and couldn’t wait to try the food they had to offer! (:

Kilo Kitchen

Address : 66 Kampong Bugis, Level 2

Telephone : +65 6467 3987

Email : reservations@kilokitchen.com 

Opening times : Monday – Saturday 6pm – 12am (Reservations highly recommended!)

We asked Linda and Jacky to order as they knew what was good and WOW! Just WOW was all I had in my mind when I tried the food. They were scrumptious and soulful. You could tell how much love and effort they put into making their food. That’s what I really love about places like these.

slow-cooked beef shortribs with salt and pepper

First up : slow-cooked beef shortribs with just salt and pepper. These were slices of heaven! Every single bite just melts in your mouth and you just want more! We were close to ordering a second serve but was saving out tummies for the other dishes we ordered. hehe It’s amazing how just salt and pepper would make a dish so delish!

Seafood ceviche

Initially, we wanted the figs with danish blue cheese, walnut and bacon (cause everyone knows I am totally addicted to figs!) but they ran out! AHHHHH! So we had to choose something else, and we decided on the seafood ceviche. They were all seasoned with a tangy vinaigrette and also a side of avocado salsa. I think it’s just me, but I am not a huge fan of raw tuna. But the tangy sauce makes it delicious! hehe Everything on the plate was fresh and I couldn’t stop myself!

12-hour pork belly with purple mash and crackling

Just when I thought things couldn’t get any better. The mains of the night arrived. Fatty pork is a favourite of the mr, so when I saw this, I requested for it to be ordered. Linda tried it before and said YES! WHEEE! It was melt-in-your-mouth-yummy-li-cious!!!! The soft pork belly, creamy purple potato mash, sour cream and bacon with the crispy pork crackling. What more can I say? MORE PLEASE! hehe We ate it exceptionally slowly., just so we could savour it just that little bit longer. hehe

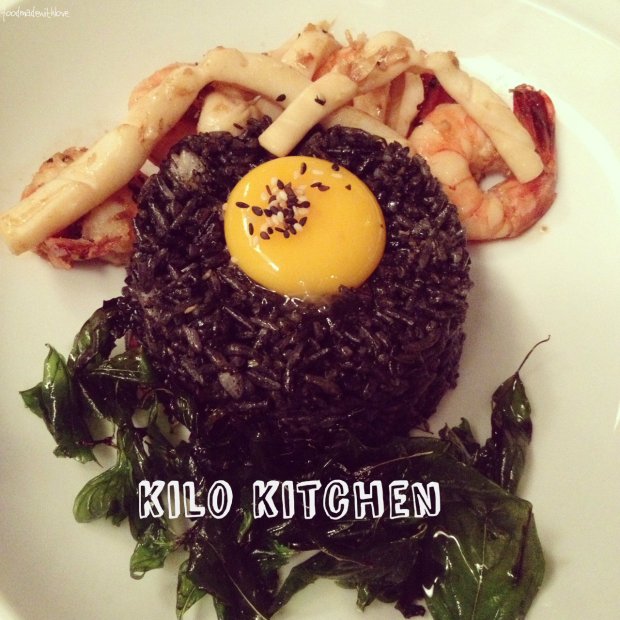
Squid ink rice with prawns and squid

This was my favourite dish of the night! So much so that each couple ordered one each! hehe Squid ink rice with an egg yolk and grilled prawns and squid! The richness of the squid ink just went so well with the egg yolk and was just MAGIC! Pure magic. You could tell from the look of our faces how much we really love this dish! I might be biased though, cause I love everything squid ink! hehe Something intriguing about the rich black ink that makes me want to dive my spoon in!

Are you drooling yet? hehe So if you’re in Singapore, do head to Kilo Kitchen and give everything a try! I can’t wait to head back when we are back in December! (: Have a great Thursday ahead dearest readers! Not too long before the weekend so hang in there!

Remember to always cook and bake with love! (:

Bring It On : Pizza Fight At The Grosvenor Hotel

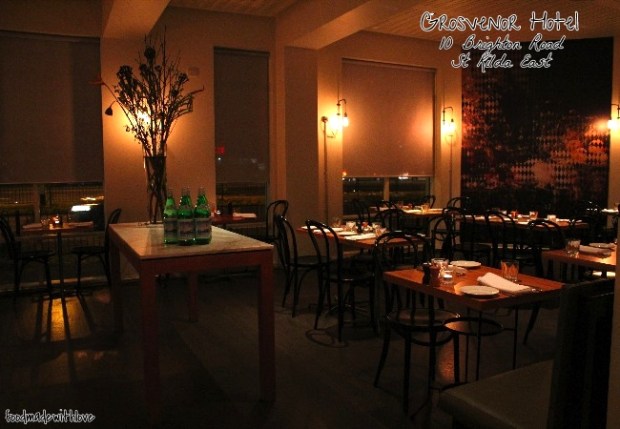
The Grosvenor Hotel

Don’t worry dear readers, this was not a physical fight! hehe It was more of a challenge. One that involves creating the best pizza and be crowned the champ! (: Thanks to the Grosvenor Hotel and Tink PR, some food bloggers and I had the chance to get flour all over our fingers and learn the art of making a good pizza dough. I was definitely looking forward to creating my very own pizza! To be honest, I didn’t realise how serious the competition was until everyone was tweeting about bringing their own secret ingredient! And when I went empty handed, only one thing was on my mind ” uh-oh, I’m in big trouble ” haha. It made me super duper nervous! In addition to that, it was my first time meeting most of the people invited for this challenge – Iron Chef Shellie, I Eat Therefore I Am, I’m So Hungree, Brunch Addict, Sweet Cherrie Pie & Ms D (Never Too Sweet For Me). But I have to say, I really didn’t need to be nervous, cause everyone was so friendly (with their game face on hehe) and we had so much fun from the start to the end! Definitely a night to remember! (:

Passionfruit, lime and basil cocktail

When everyone arrived, we were brought to our table by the gorgeous Julia (From Tink PR) and introduced Chef Emile to us! In the midst of all the introductions, the table was filled with a spread of chicken liver parfait & hot bread, antipasto and some arancini balls.

Chicken liver parfait & antipasto

The chicken liver parfait was my favourite! It was so smooth and just perfect when spread on the bread. YUMS!

Arancini balls

The arancini balls were the perfect bite size, and had bits of chicken in them! After filling out tummies, we headed towards the kitchen to learn about making the dough.

Ingredients for the pizza dough

We each had our own dough to work on, and boy was it a work out to just get the dough right! I was standing next to Thanh and we just couldn’t stop laughing as we went along! We were lucky enough to have Chef Emile and Stefano there to give us a hand and to make sure we are on the right track!

Chef Emile & Stefano giving us a hand or two!

My own pizza dough

After what felt like hours, our dough was finally ready to be cling wrapped and proofed!

Stefano distributing the dough

While our doughs were proofing, Stefano took out a whole tray of perfect looking doughs so that we could learn how to stretch them by hand! The right hand stretches while the left hand rotates the dough! Definitely easier said than done, but I had so much fun! It was like playing with playdough haha

The pizza base is formed by hand

All stretched out!

It was even an art to place them on the wooden boards before putting the ingredients on!  And at this point, everyone had their game face on and were all ready for the challenge! 

Thanh and I with our

(Photo credits : Thanh from Instagram)

I stole this photo from Thanh cause it shows exactly how prepared we were with our “ping pong” bats! From the grin on our faces, you know how much fun we’re having! hehe

All getting ready to create our pizzas in groups

We all gathered around the table and Julia starts explaining how the challenge will be carried out. We were split into three groups so that the wood oven pizza won’t be over crowded. So off went the first group of savouries!

Bakkwamon by Ashley of I'm So Hungree

The first was Bakkwamon by Ashley of I’m So Hungree and it was inspired by her dad! Her secret ingredient was homemade bak kwa! Plus her pizza base was the gluten free one! hehe It was so delicious! I could just eat the bak kwa all night long! (:

Banhmigeddon by Shellie of Iron Chef Shellie

This was one of my favourites of the savouries for the night! It was Shellie’s (Iron Chef Shellie) banhmigeddon! The lemongrass chicken was SO GOOD! I was super tempted to go for seconds but had to control myself cause I had alot more to taste through the night hehe

The Karaage Kid by Thanh of I Eat Therefore I Am

Thanh (I Eat Therefore I Am) made the karaage kid – He brought in pieces of crispy karaage (fried chicken) and drizzled yummy roasted sesame sauce! That’s pure magic and was also one that I really enjoyed for the night! (:

Second round includes :

Fiddle to the Fennel By Scott of Brunch Addict

Fiddle to the Fennel was created by Scott of Brunch Addict! How cute is the name? I’m not a but fan of fennel but this was so good and the sweetness of the caramelised onions just stood out with every bite! Noms!

Baa Baa's Delight by Sabrina of Brunch Addict

Sabrina of Brunch Addict made Baa Baa’s Delight and how pretty are the beets on the pizza? With the classic combination of lamb and minted yogurt, this was also really good! In fact everyone’s pizza were awesome creations and it was so difficult to rate them!

After all the savouries, of course up comes the sweets! Even though we were all quite full by then, there is always room for dessert yes? YES! Cause I decided to walk on the sweet side that evening, together with Miss D (of course!) and Cherrie! We were spoilt for choice for the ingredients and ended up using almost similar things with slight variations of each! So it was definitely a close fight!

Bananas about Dulce de leche and bacon by Cherrie Moore

Cherrie made hers with a dulce de leche base, mashed banans, almond flakes and her secret ingredient, bacon! The combination of sweet and savoury was just brilliant! Almost reminded me of the Elvis sandwich which I LOVE! hehe

Sweet Attack by Daisy of Never Too Sweet For Me

Our dearest queen of sweets, Daisy (Never Too Sweet For Me) of course created a dessert pizza for the night! hehe Her was called ‘Sweet Attack’ and it had dulce de leche as the base, with almond flakes, almond crumble, honeycomb and nutella! It was deliciously sweet! hehe Everyone loved it! Noms!

Banana Nut Cracker by Me!

Last but not least, it’s my creation : Banana nut cracker ! I was thinking about breakfast cereals for some reason, so I decided to do a breakfast inspired one with butterscotch sauce, bananas,  almond crumble, flaked almonds, walnuts and sprinkled with some cinnamon sugar. Of course, I’m biased and I did like mine! haha I think just cause it’s everything I love on a plate! Especially the subtle hit of cinnamon with every bite. Reminds me of cinnamon sugar churros! NOMS! hehe

Once everyone had scored their peers (including our own creations), Julia and Chef Emile went into another area to add up the scores and after 20 minutes, the winners were announced! There was a tie in the first place and it was none other than the Banhmigeddon (by Shellie) and Sweet Attack (by Daisy)! Congrats girls!! And to my surprise, I came in second! WHEEEEE! (: And our pizzas went on as their specials the following day and will be on their specials for the next week for everyone to try!

Specials menu at Grosvenor Hotel

So I need your help dear readers! Please head to the Grosvenor Hotel’s Facebook page and vote for my pizza! Every single vote counts! Plus if you are around the area, or feel like a pizza for dessert, do head down to Grosvenor Hotel to get some. You can either dine in or takeaway and for just $17 (and $12 on Tuesdays!). Every pizza you order is considered a vote too!

Vote for me please! (:

So do click on the link above or just head to https://www.facebook.com/grosvenorhotelstkilda and search for the picture of my pizza and “like” ! Your help and support is greatly appreciated! (:

Facebook page

Thank you all once again and especially those who have already voted! One more week and the winner will be announced! hehe Fingers and toes crossed! (: Thank you Grosvenor Hotel, Chef Emile and Julia for organising such an awesome event!

Disclaimer : I was invited to this pizza making event as a guest of Grovenor Hotel and Tink PR.

Cheesy Bubble & Squeak

Cheesy Bubble & Squeak

Have you ever made dinner for a party and have left over mash and vegetables that you are not too sure what to do with? Making bubble & squeak with the leftovers make a delicious meal the day after. And I assure you, you would always want to have leftovers for every party after you’ve tried making this! (: Always good to not waste food yes?

The Mr is a huge fan of bubble & squeak and the first time he had it was at Galleon Cafe at St Kilda and would order it when he sees it on a menu ever since! I’ve been meaning to make it for him for the longest time but whenever the weekend comes, I always decide to cook something else! haha

Bubble & Squeak from Mr Hive's

Recently at a good friend’s wedding lunch, I tried the yummiest bubble & squeak that made me crave for more even after a few days so I had to try to make it! This one from Mr Hive’s Kitchen & Bar was slightly different, and had cheesy bites to it, so I decided to make a cheesy bubble & squeak too! hehe and to add some protein, I fried a sunny-side up to go with (:

Cheesy bubble and squeak with sunny side up

Cheesy Bubble & Squeak (Adapted from Gino D’Acampo on Let’s Do Lunch with Gino and Mel)

4 potatoes (400g), small cubes and boiled

300g mixed vegetables (any kind you fancy or have leftover)

2 streaks of bacon, diced

1/2 onion, finely chopped

1 clove of garlic, finely chopped

50g butter

1 tbs thickened cream

1 tsp worcestershire sauce

1 tsp tabasco

1/2 tsp garlic salt

2 tbs grated parmesan

1/4 cup of mozzarella cheese, shredded

freshly ground black pepper, to season

2 eggs

Truffle oil and chopped parsley, for garnish (optional)

Steps : 

1) Drain the potatoes after their boiled, and add the butter, thickened cream and garlic salt and lightly mash them with a hand masher. I like to leave some chunkier pieces so that it gives the dish more texture, but if you prefer it smooth, then just mash the potatoes till a mash potato texture. Transfer the potatoes into a large metal bowl and set aside.

2) In a frying pan, fry the bacon till brown and crispy, then add the chopped onion and garlic till fragrant. Add the mixed vegetables and fry till tender. Pour mixture over the potatoes.

3) To the potato and vegetable mixture, add the worcestershire sauce, tabasco, parmesan cheese and black pepper. Mix it till well combined and place the mixture into 2 terracotta pots and top with mozzarella cheese. Put it under the grill till the cheese melts and turns golden brown (about 5-10 mins).

4) As the bubble & squeak is grilling, fry 2 sunny side ups and place on top of each terracotta. Garnish with some chopped parsley and drizzle some truffle oil if you have some in the pantry.

Half eaten bubble & squeak

Dig in and enjoy! (:

Remember to always cook and bake with love! 
Ricotta Pound Cake

Have you ever craved for something and you just had to get down and messy in the kitchen and make it? This was exactly what happened to me this weekend! I have been craving for some pound cake for the longest time and even though I could easily buy one from Woolies or Coles, there is nothing more satisfying than making something from scratch and indulging after! When I was a kid, mum use to get those Sara Lee pound cakes from the chilled section of the supermarket as a treat for us in the weekend! That was exactly what I was craving for last week.

Traditionally, pound cakes are made with a pound of each ingredient : eggs, flour, butter and sugar. But of late, people adjust according to their preference and come up with some really yummy (and slightly healthier) versions. One recipe which I was drawn to was one that used ricotta in replace of some of the butter content.  Perfect with a dollop of freshly whipped vanilla bean cream, some fresh fruit (mangos are perfect especially cause they are in season) and a hot cuppa for afternoon tea! (: My cravings were satisfied with my first bite! I love love love how the cake looks really dense but is actually not that heavy.
You never really know how the cake has turned out till you cut a slice out and see the inside of it. I was pleasantly surprised with how fine-textured the cake was. The crumbs were really fine and as Ju from Little Teochew calls it – microcrumbs! hehe I remember  reading one of the post from Ju (and she is AMAZING!) on her honey castella cake and was in awe! They look so perfect, fluffy and I just wanted to sink my teeth into them! She generously shared her tips of having microcrumbs in cakes – beating your eggs on low speed for a longer period of time, as compared to high speed. I tried it this time, and it worked! WOOO! (: Couldn’t be happier!

The recipe uses cake flour instead of plain flour and for some reason I couldn’t find cake flour in the local supermarkets. But Joy the Baker has a simple way of making your own cake flour! And trust me, it’s worth the extra steps! I think it makes the cake less dense as well, so do give it a shot if you can’t get any.

Steps to Making Cake Flour (from Joy the Baker, makes 2 1/2 cups)

 1. Measure out 2 1/2 cups of plain flour into a bowl.

2. Scoop out 5 tbs of the plain flour and place it back into the flour container.

3. Add 5 tbs of corn flour to the rest of the plain flour and sift the mixture 3 times.

{ The rule of the thumb is, for every cup of flour, you replace 2 tbs of flour with corn flour. }

Ricotta Pound Cake (adapted from Cakeb00k)

2 1/4 cups of cake flour (recipe above)

1 tbs + 3/4 tsp baking powder

1 1/2 tsp salt

250g unsalted butter, room temperature

500g ricotta (you could use light ricotta)

1 3/4 cup caster sugar

5 large eggs

1 tsp vanilla bean paste

Icing sugar and lemon zest (to garnish, optional)

Steps :

1) Spray a bundt cake pan with olive oil making sure it is well coated and set it aside. Preheat the oven to 180 degrees celcius.

2) In a large bowl, sift the cake flour, salt and baking powder.

3) Using a mixer, cream the butter and sugar until light and fluffy. Add the ricotta and mix on medium speed until well incorporated and the mixture is smooth.

4) Turn the speed down to low and add the eggs one at the time. Make sure to scrap the sides and bottom of the bowl a few times. Once the eggs are well combined, add the vanilla bean paste.

5) Add the dry ingredients 1/4 cup at a time and mix until the mixture is just combined. Make sure this is done on a low speed as well.

6) Place the mixture into the bundt pan and smoothen the top out using a spatula. Tap it gently on the work surface to release any air bubbles.

7) Bake the cake for 15 minutes, before turning the oven down to 160 degrees celcius and continue cooking for a further 40 minutes. It is done with the sides are starting to come away from the pan; the cake springs back when pressed and the skewer inserted comes out clean. Cool in the pan for 10 minutes before transferring it onto a cooling rack.

8) Sprinkle some icing sugar and grate some lemon zest over it for additional flavour! To serve, make sure the cake has completely cooled, then top with freshly whipped vanilla bean cream and fresh fruits!

Remember to always cook and bake with love ! 

Oven-fried Chicken

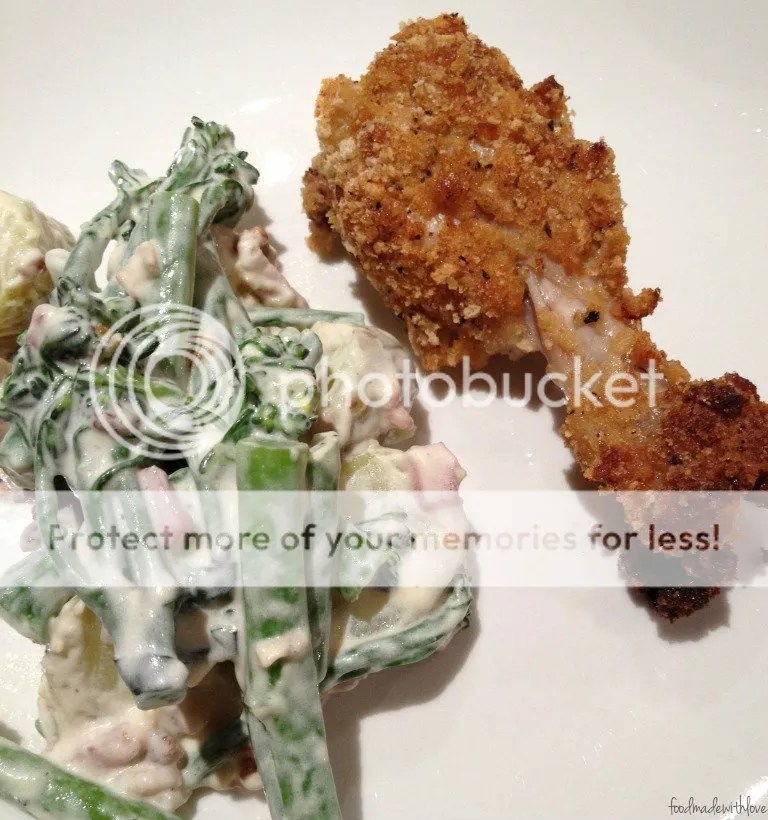
Fried chicken. How could you not like fried chicken? I would happily chow down two without much thought! haha But what could be better than fried chicken? Oven-fried chicken of course! Anything to make it feel a little less sinful than the oil-fried version. Just so you could enjoy it guilt-free. Definitely a win-win, if you ask me! (:

I chanced upon this recipe on Everyday Maven, and was coincidentally craving for something fried. It’s really quick and easy as well! Even though it’s baked, the chicken is so crunchy with every bite! The mr and I are addicted to it! We had it twice in a week. Definitely gonna make this for my family at the end of the year.

The chicken pieces were coated with crushed melba toast. I have to admit, I’ve heard of melba toast a number of times, but never really tried it or used it to cook. These were mini toasts that were baked and they were really amazing! Unlike normal bread crumbs, these ensures that the coating remains crunchy and not get soggy even after being baked. Would definitely not hesitate to use melba toast in the future! hehe

And what goes well with fried chicken? A side of kipfler and broccolini salad of course! Of course if you want to keep to the healthy-theme, you could always have it with a side of salad. Your tummies will still be satisfied. (: So I urge you to give this a try, you will never need to feel bad about have fried chicken ever again! hehe

Oven-fried Chicken (adapted from Everyday Maven)

800g chicken pieces (skin removed)

1 box of Melba toast (5-ounce/142g), crushed

1/2 tsp garlic salt

3/4 tsp ground black pepper

1/2 tsp cayenne pepper

3/4 tsp hot paprika

1/2 tsp dried oregano

1/4 cup kewpie mayonnaise

1 tbs Dijon mustard

Steps :

1) Place the melba toasts in a zip lock bag. Using a rolling pin, crush them till they are relatively fine, leaving some little pebbles for texture and maximum crunchiness. You could also place them in a food processor, but be careful not too completely pulverize them.

2) Add the garlic salt, black pepper, cayenne pepper, paprika and dried oregano into the zip lock bag and give it a good shake. Pour the seasoned crumbs into a plate.

3) In a separate bowl, mix the kewpie with the dijon mustard and mix till well combined.

4) Preheat the oven to 200 degrees celcius. Coat each piece of chicken with the mayo mixture (just enough to lightly coat) and roll it in the melba toast crumbs. Make sure the chicken pieces are covered well and evenly.

5) Place the chicken pieces on a cooking rack and place in the oven to bake for 40 minutes.

Enjoy it with a side of your choice! (: Don’t worry, I didn’t only have one piece. hehe I couldn’t resist another (or two)! Have a great weekend everyone!

Remember to always cook and bake with love!